
This morning my daughter had the call she was dreading. The anorexia has such a hold that her doctor now believes her health is “medically compromised”. She has been admitted into hospital where they can give her 24/7 professional care.
Although admission was always on the cards if her condition did not improve, it still came as quite a shock to us all when she was given two hours to pack and present herself at the hospital. Whilst we all know this is for the best, it makes the transition no less difficult both for her and us, especially at Christmas.
I wish you a speedy recovery my love.
Front brake pipes

 Now the side panels are in place, I could finally complete the routing of the from brake pipes. I took the precaution of covering the exposed areas with clear plastic tubing.
Alternator assembly
 I thought this would be a five minute job – not quite because there are no drawings or instructions, just a number of brackets, bolts and washers.
I pinched this photo from Dave Smeaton’s blog because I forgot to take a “before” photo (Thanks Dave – hope you don’t mind). I have labelled the components so you can see where I think they all should end up. As with most of this build, I doubt there is a right and a wrong, but if it seems logical then it’s probably OK.
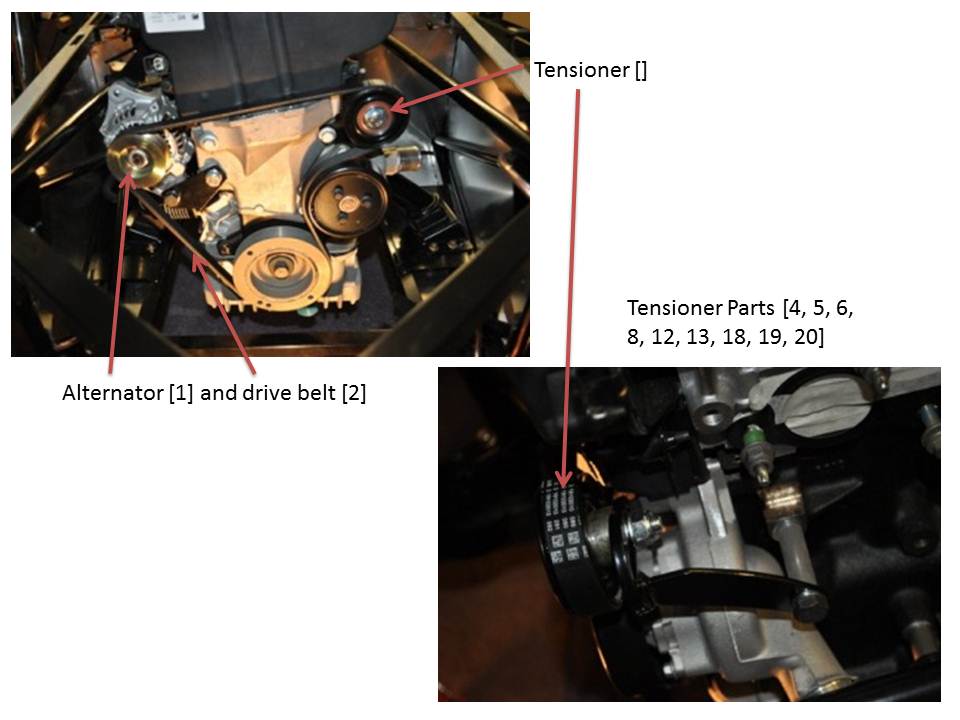
Here is a photo with everything fitted so you can see the layout.
I fitted the tensioner first as this seemed the most straightforward and reduced the number of components left to choose from for the top and bottom bracket assemblies.
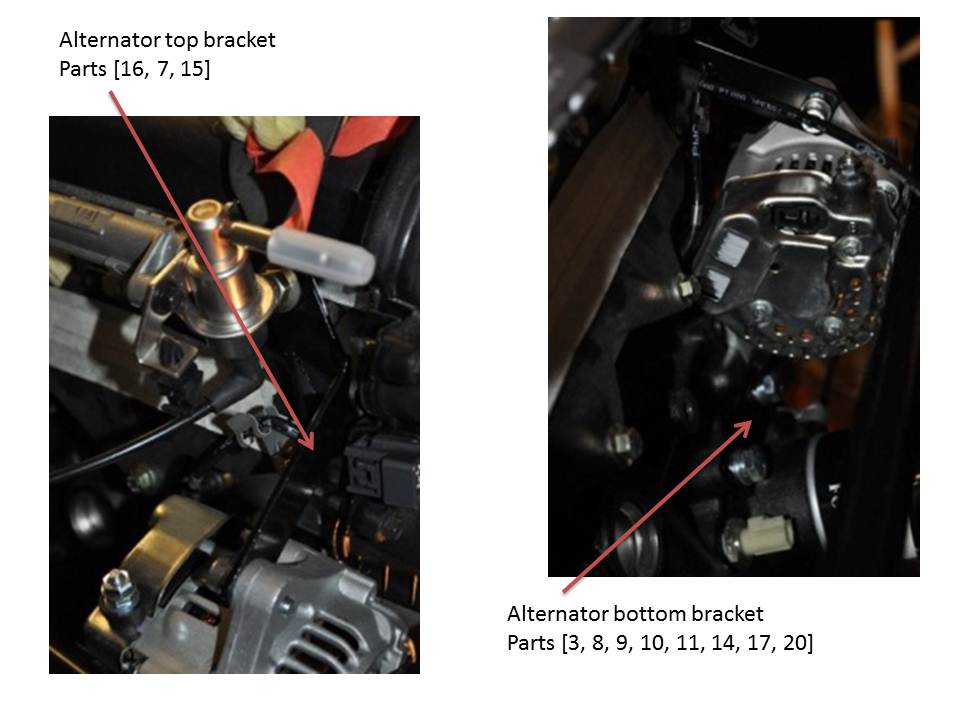
In order to fit the top bracket the inlet manifold had to come off first. On my Zetec the mounting hole was also being used for one of the engine winch eyes. As I am still using these winch points to move the front of car around the garage, I left the winch eye in situ.
The lower bracket uses the spacer [17] between it and the engine block. The alternator itself is held into the bracket with washers used as spacers.
Near-side Panel and Suspension
Nothing much to say about the near-side that hasn’t already been said for the off-side. The side panel went on fine – with a bit of fettling where it meets the back panel as I decided to build the back before the front. The suspension went back together without issue including IVA covers.
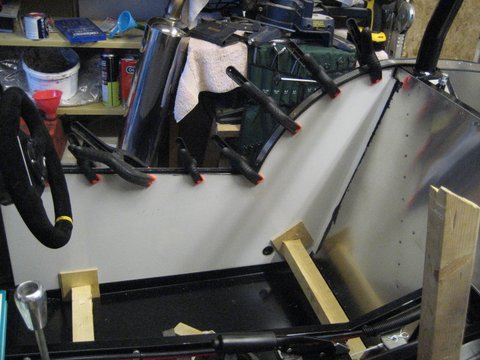 Whilst I had an open (and warm) tube of “black-glue” I thought I would bond the inner side panels. I decided not to rivet – these panels are not for strength or rigidity.
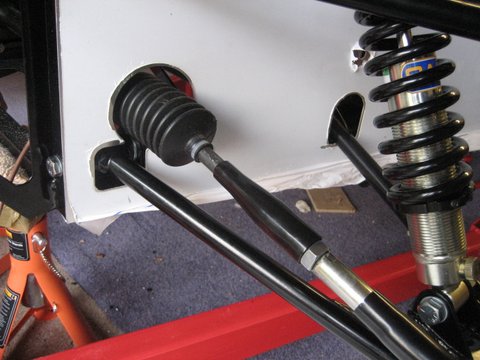
Front Suspension
Its been a few weeks since I worked on the zero. One weekend was spent in Derbyshire in a superb chalet with great spa facilities for my daughters 18th birthday. I great family weekend. But unfortunately my daughter is not well at the moment. She has been diagnosed with Anorexia – a truly awful condition. You can’t really comprehend the depth and scale of the physical and mental suffering this condition causes until you witness it at first hand. It is currently taking a huge toll, especially on my daughter, but also the rest of the family. No amount of support seems to be able to combat the torment that this disease delivers.
My Zero build is not a race and I am under no pressure to complete the car quickly, however it has now developed a further function, as a cathartic release for a few hours when I can.  Last Sunday I did find some time where I could concentrate on the Zero and lose myself in the build for a few hours. The off-side panel was bonded and riveted a few weeks back, so I thought I would re-assemble the front suspension and fit the IVA covers.
 The torque settings I had difficulty with. Having used the Haynes manual as a primary source, I then used the web to supplement this and common sense for the rest. When I asked GBS for the settings at the rear I surprisingly didn’t get a straight forward list. Perhaps for fear of liability, I don’t know. But I haven’t bothered to ask GBS for the settings for the front. The settings I have used are in the Torque Settings page. These are for my reference only. I don’t recommend these settings. As I have said before, it is not me that will be cornering hard in your car. You must decide the setting you use.
 I also fitted the brake pads into the callipers and the braided hoses to the side panel. I did have a little issue with the retaining spring on the brake pads. I couldn’t find any information on how to assemble it, but eventually found a position that seemed logical, although it did keep shooting off.