Pedal Box and Accelerator pedal

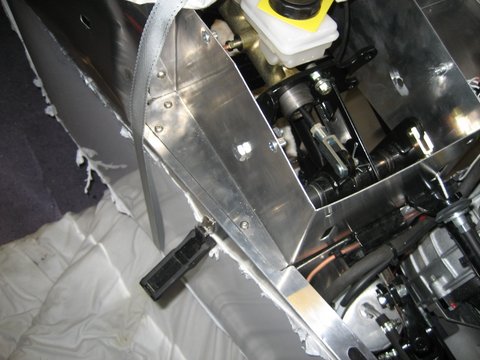
For the scuttle, pedal box and battery plate, I have used rivnuts and M6 cap heads to hold it all together. I prefer the psychological comfort of being able to easily take it all apart again if needs be, rather than using rivets and “black glue”.
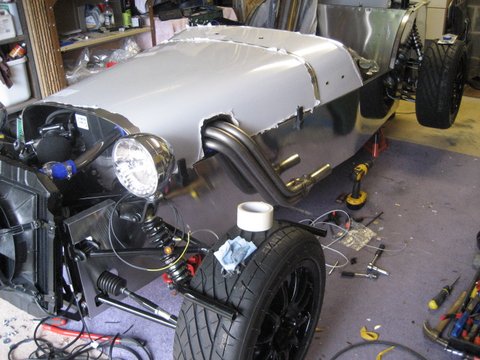
By positioning the bolts carefully I have aimed for low visual impact but a strong and robust construction.

Add caption

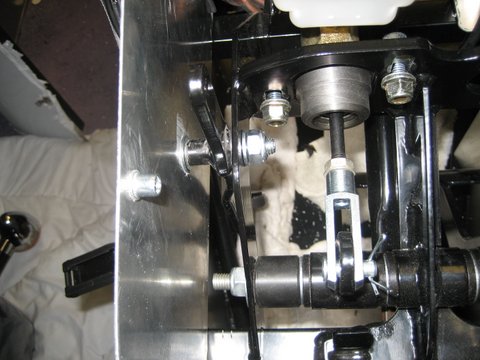
With the peddle box now in place, I could think about the pedals again. I connected the clutch cable – straightforward. (I still need to adjust the cable from the lower clutch arm connectors). Then the accelerator. After talking to Richard@GBS the last time I was at the factory, he recommended grinding down on side of the pivot tube almost down to the weld. This will bring the pedal across slightly and make it easier to drive. You don’t need to use the pre-drilled hole in the pedal box, but I have chosen to as it would need filling if I didn’t. I is not quite lined up which means the pedal is not swinging absolutely freely. Once I have connected the accelerator cable I will check if this is a problem and adjust if I must.

Scuttle and wiper mechanism

As with the rest of the brushed aluminium, I spent some time this morning polishing the scuttle before fitting. I also added the IVA plastic trim to the front and the back edges.
With the scuttle is in place, I then installed the wiper motor and gearing. I first positioned the bracket in such a way that it minimised the bend for the drive thread. Then cut the drive thread tube to fit with the wiper blade mounts. As my blades rest on the passenger side the wiper motor needs adjustment too. There is a very clear instruction sheet on the GBS kitspares website that explains how this is done. After discussing IVA rules with Richard@GBS I have decided to build the car to as complete a state as I am able. GBS will then make any necessary mods to get the cat through IVA. This includes the indicators, wipers and windscreen.

Electrics

Before I put the car back together for hopefully the last time, I wanted to make sure that all fluids and electrics were working as far as I could tell.
Engine oil, Diff Oil, Gearbox Oil, petrol, water and antifreeze – all in and no leaks as far as I can tell.
Now the electrics. Placed the battery on top of the chassis and connected it all up. 
Turned the ignition on: 

  • Side lights and headlights working 🙂
  • Dials moved to max and back and illuminated with sidelights on 🙂
  • Petrol pumps active and still no leaks 🙂
  • Starter motor turns 🙂
  • Volts gauge reading 12v 🙂
  • Fuel gauge showing 1/8th tank 🙂

I’ve seen enough to be reasonably confident that the major components are OK. So it’s time to clear up this mess and start the final build.

Aluminium Polishing

Some time ago in my post Odd and Sods I looked into polishing the brushed aluminium rather than leaving as-is. I found the best finish could be obtained by using several applications of grinding paste with a mechanical polisher. The problem I found was that the finish was almost a stainless steel finish but not quite and was very difficult to get consistent across larger areas. So I decided on a less labour intensive approach that took the dullness off the metal surface, and left it looking like shiny aluminium. I found the best polish is Autoglym Metal Polish.

Before adding all the trim to the main body panels I am polishing them with Autoglym. I have done the near side panel and the back panel and I think the results look good. Ruth@GBS has agreed to source some decals to my spec for the sides and bonnet, which I think with compliment the shiny aluminium well.


Bleeding Brakes

With the advent of Spring all of a sudden, there were a number of jobs that needed doing around the house and garden. The dog has developed the habit of visiting neighbours via various gaps in the privet hedge. You would think that butter would melt in there, but he has just cost me another £600 in fencing and two days effort erecting it.

Anyway, lawns done, fence up, garden furniture out, it’s time to get back in the garage.
The fluids I put in the car a couple of weeks ago have stayed in the car – no leaks from the gearbox, engine or water system. So next it’s brake fluid. I took a tip from Richard’s Lincoln’s blog (which I follow) and invested in a Gunsone Easybleed kit. If you are on your own it makes great sense.


First you need to remove the callipers from the rear and turn them upside down since the bleed nipple is at at the bottom rather than the top of the calliper. I simply flipped it upside down and placed it back on the brake disc so the piston and pads stay in place. Having flipped over the rear callipers, I filled the reservoir and connected the bleed kit to one of the tyres with roughly 20psi in it. 20psi is enough to push the fluid through the system quite easily. Then a couple of pumps on the peddle – which still felt rather soft. The reason for the softness: the brake light sensor was not sealing correctly. I removed it and added ptfe tape before tightening up again. I am always a little weary about over-tightening brass fittings, but this one needs to be really tight or it weeps.
I then bled the system again and put everything back together, including the threadlock on the calliper bolts. The pedal is much firmer now, and the handbrake adjusted.