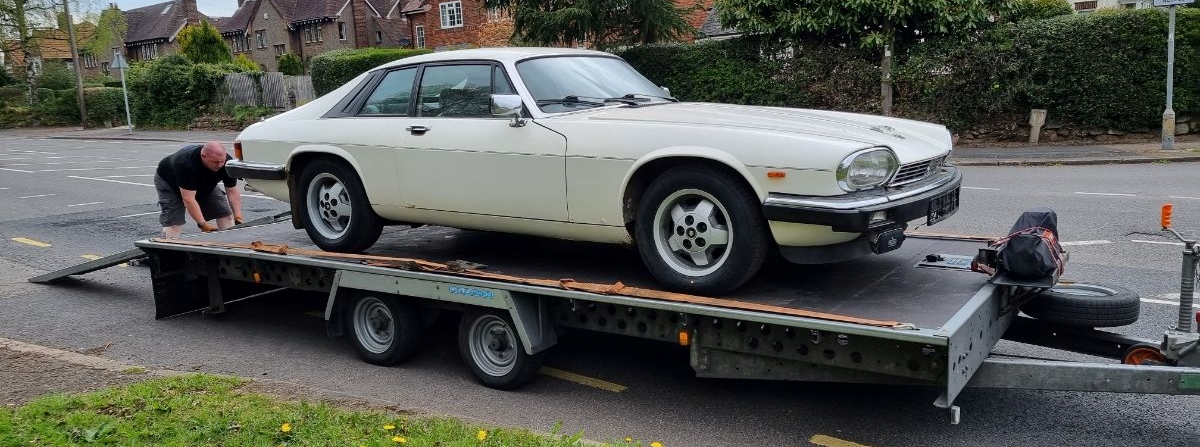
One of the last affordable V12 powered saloons, I think this 5.3L HE is worth saving.

Automotive Projects Blog
One of the last affordable V12 powered saloons, I think this 5.3L HE is worth saving.
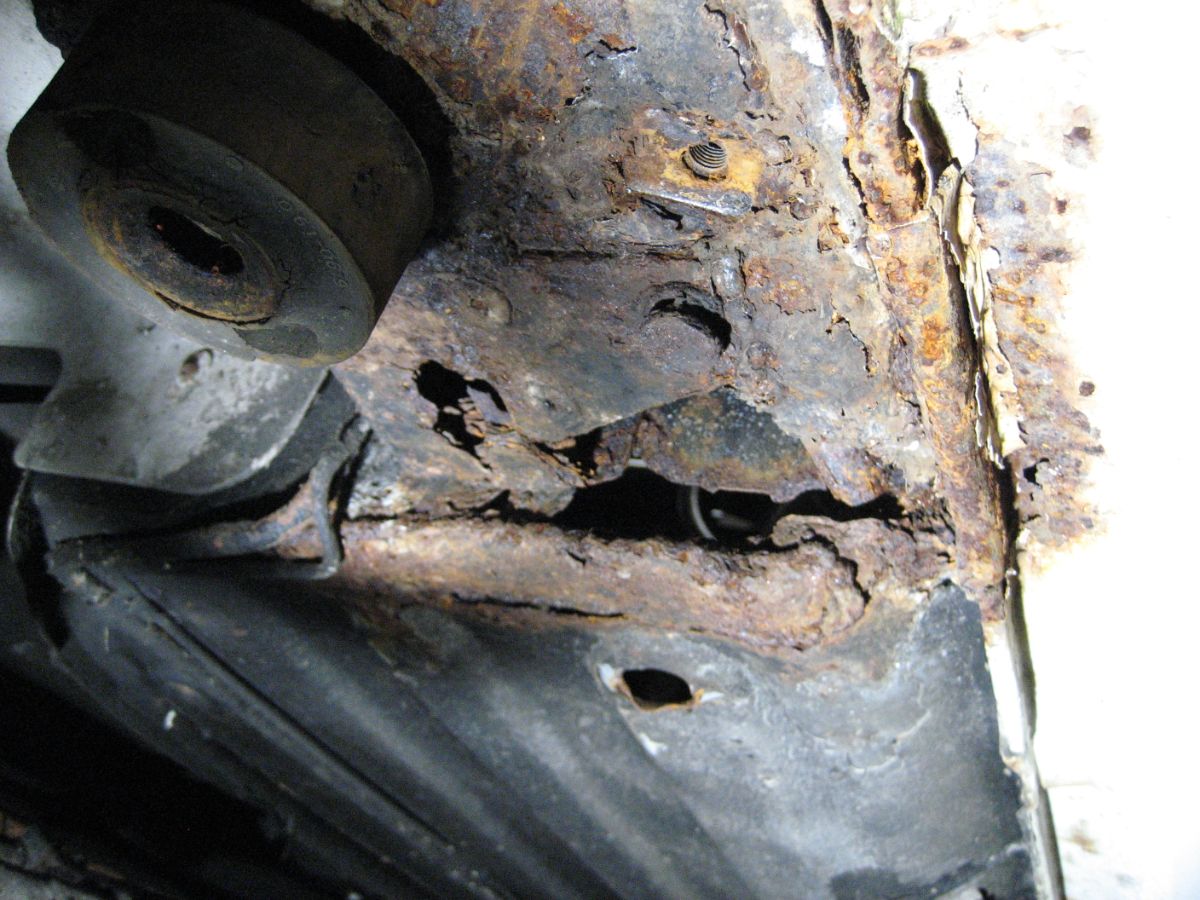
With the rear sub-frame removed I could finally take a look at the body panels at the rear. Oh dear. The drivers side rear jacking point area is totally rotten out. So is the mounting point for the radius arm.
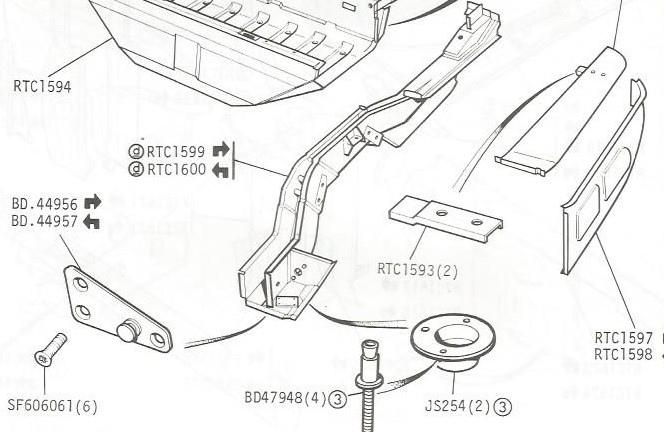
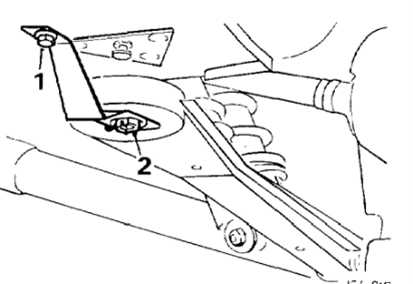
According to the parts catalogue it should look like this, with the jacking point and the radius arm attachment points on the underside of the rear side member. Fabricating a new rear member is not going to be easy. It is a load bearing structural component first of all, but secondly the radius arm needs to be positioned in exactly the right place so the rear suspension tracks properly. Whilst I am sure I could do it, I think I would prefer to buy a rear side member and graft the lower portion in place where there is good metal to weld to.
So it looks like I need to source the following:
In order to get access to the rotten bits around the back wheels, and as a prerequisite to refurbishment, I will drop the rear suspension and subframe. After some research this process “is quire straight forward”. I’ve heard that before.
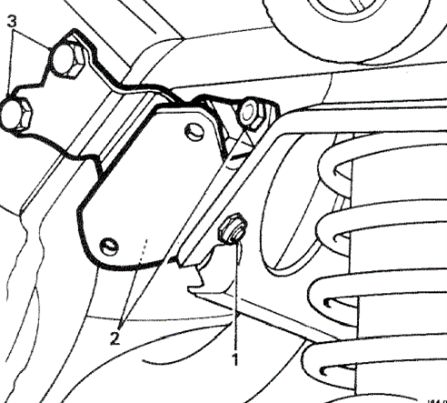
The subframe upon which the diff, drive shafts, brakes and struts are mounted is connected to the car body by 4 rear suspension mounting brackets. Removing the bolts that hold the mounting brackets is all that is needed. But as always it’s never that simple. First all of the components that link to or around the subframe need to be disconnected.
The rear sections of each exhaust pipe need to be removed from just behind the mid silencer box – really tricky because the pipes curve through the sub-assembly and over the drive shafts. I took the real silencers off and left the pipe in-situ within the sub-frame. I will worry about that when I refurbish the sub-frame and it’s components later on.
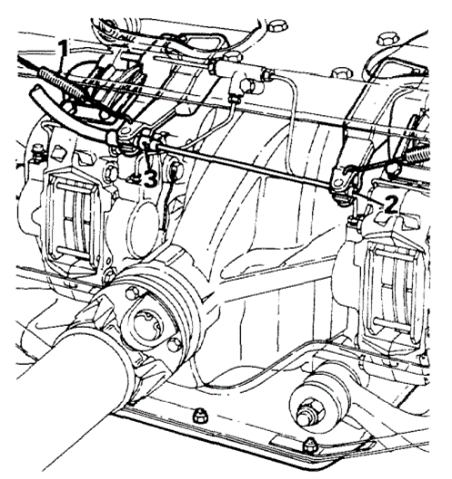
The hand brake cable needs disconnecting, by slacking off at the lever and unhooking the cable from the calliper levers.
The hydraulic brake pipe needs disconnecting. This was a real problem. Access is very tight and the flexible pipe connectors were really rusted. In the end I simply sniped the flexible hose – I am going to replace it anyway.
Then there is the radius arms. Each has a safety strap that needs disconnecting first, before the bush can be prised out. I have heard removing the radius arms can be a major issue, but mine were so knackered they fell apart.
Finally there is the propshaft that needs un-bolting from the diff.
Once all that is done, the suspension mounting brackets can be unfastened and the whole sub-frame will be free from the car. It is really heavy and cumbersome to move. To make my life easier I constructed a small trolly on wheels that my jack would slide under. I raised this platform under the tie plate to take the weight, removed the final bolts and lowered the sub-frame onto the trolly. I could then drag the sub-frame out from under the vehicle and move it easily around the garage.