
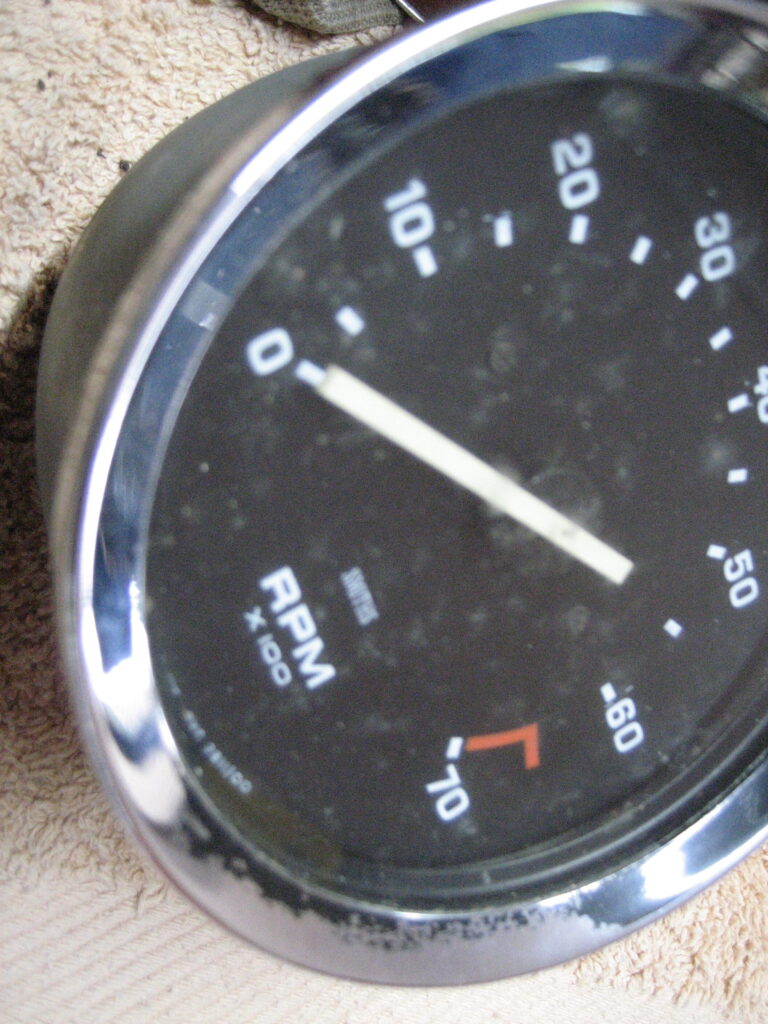
After almost 50 years, most of this time spent in musty damp garages, the dials and gauges are looking their age. On the inside of the glass there is dirt and perhaps even mould.
I researched if it was possible to clean these without sending them to a profession refurbishing company. I decided that a simple cosmetic refresh was well within my abilities.
The chrome bessels are attached via folded metal tabs on the rear of the bezel and a layer of sealant that runs the circumference of the unit. Carefully bending back the tabs and then easing the bezel away from the casing is all that is required to detach the bezel and glass from the front of the unit.
The original sealant around the circumference had long since hardened / crystalised which is why the inner glass has probably end up the way it has.
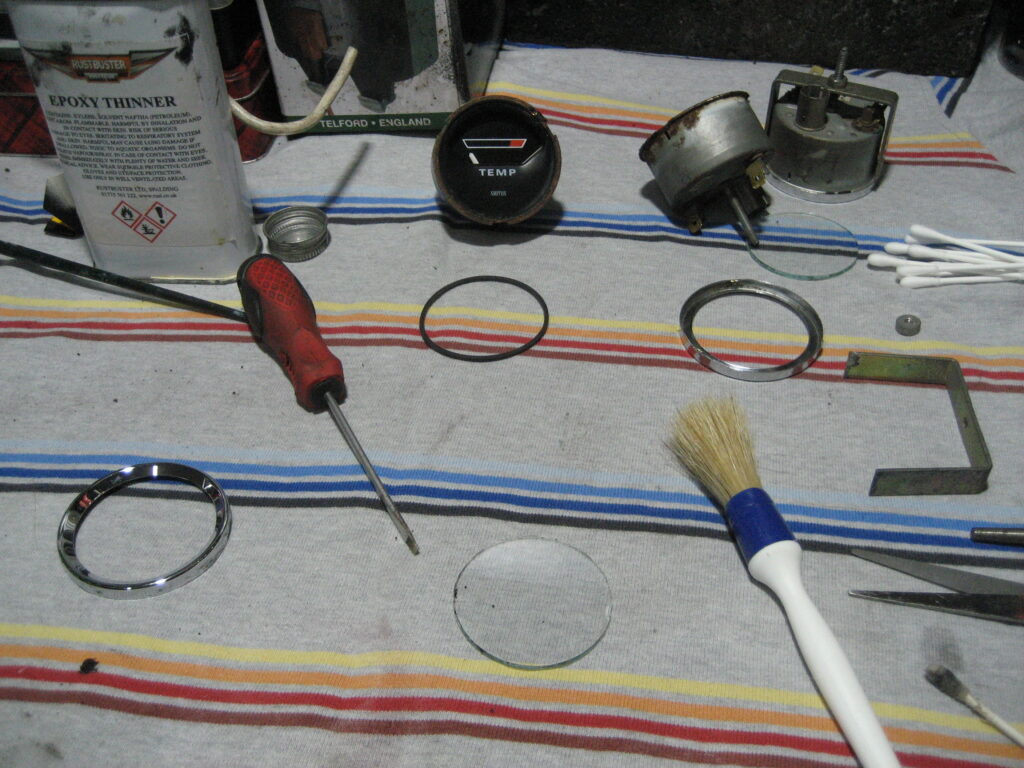
With the bezel and glass seperated from the unit, I cleaned the glass thoroughly with good old windolene. I then decided that the matt black coating on the inner surface of the chrome bezels was too scratched and chipped to look as I wanted. Some strong solvent and a cotton bud dissolved this without harming the chrome underneath.
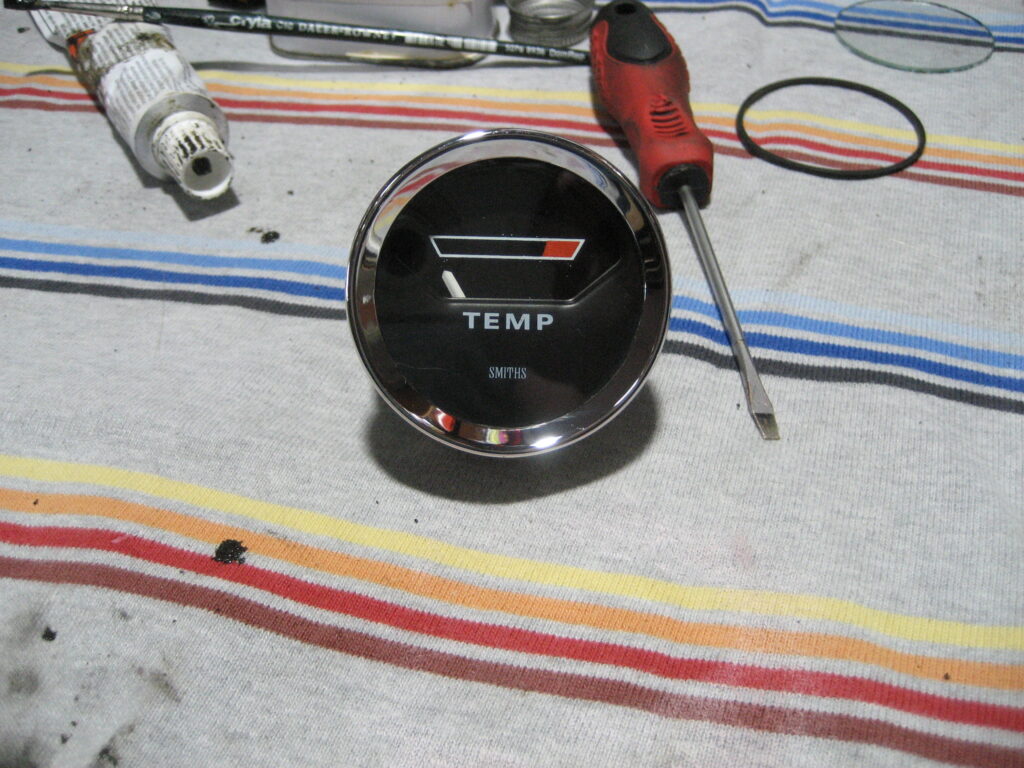
Once I was happy with the bezel and glass, I reassembled using some gasket sealent to re-seal the circumference of the gauge. I started with the Temp gauge (as I had a spare), but as the process went well I moved on to the Rev counter and was rewarded with a similar positive result.
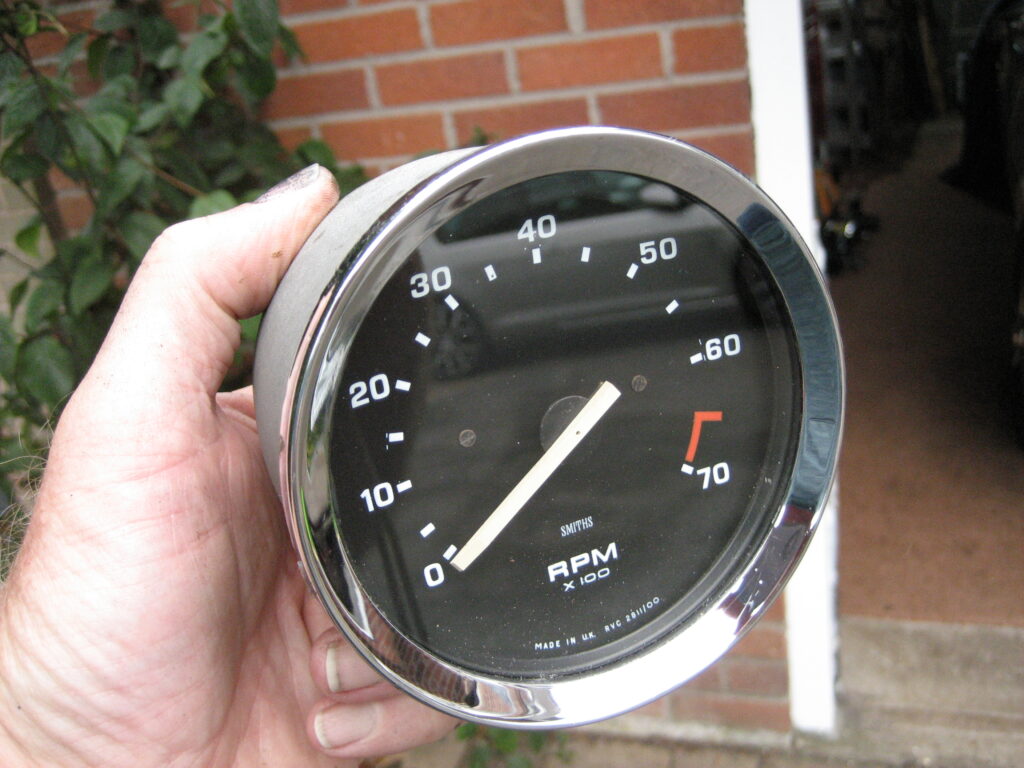
It takes some time, and is a little fiddly, but the results speak for themselves. Here’s a picture of the dash now that all the dials have been cleaned
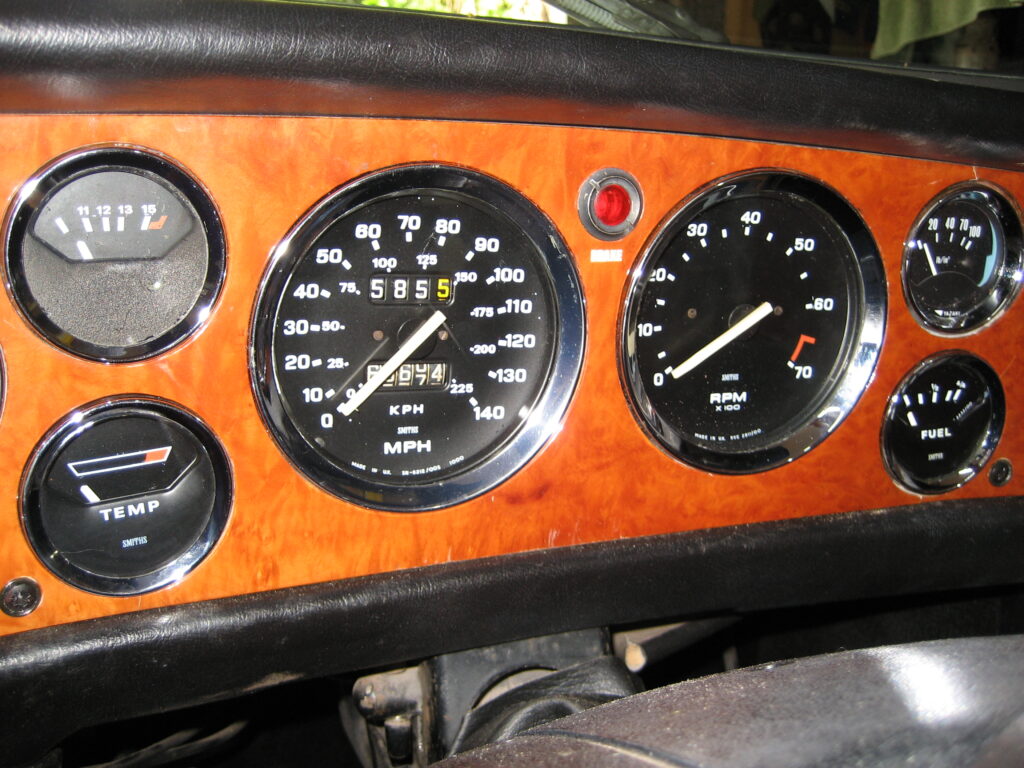
OOPS…….
The next day after cleaning the dials I took the Stag out for a drive as the sun was out (any excuse). The fuel gauge was reading higher than I remembered and the Temp gauge just kept on climbing. The fuel gauge over reading I simple put down to connecting it back incorrectly. But the Temp gauge started off as it should – in the cold area. As I drove it moved to the half way point as it normally does, but then it kept climbing. I managed to get back home as it approached the red.
Opening the bonnet, I checked the water flow. The top of the radiator was hot as expected. So was the expansion tank. No leaks. Plenty of coolant. Bottom of the radiator cooler than the top. Nothing seemed amiss.
Then my slow brain put the two items together. The Temp gauge and Fuel gauge both use a 10v feed from the voltage regulator which mounted behind the speedo. This regulator is a 1960’s regulator. It operates using resistance wire, a bi-metallic strip and heat. I think that I may have distrurbed it whilst cleaning the guages and the thermal fatigue of almost 50 years use as cuased it’s demise.
Since the Stag was designed, there are now solid state equivalents of the 10v voltage regulator that are more stable, accurate and cheaper than the original.

You can’t tell from the photo, but this replacement is actually smaller than the original and is an straight forward replacement. The guages now read as expected – not an over-heating problem afterall – phew – I was worried as I drove home with the needle climbing.