The Big Day

Now the local garage is open again, it was time to test the quality of my work over the last 2 years on this project – MOT day.

She passed with no advisories – I am really satisfied with the result so far. So far, because there are a lot of cosmetics to finish. But she is now drivable for the summer.

Headlamp Alignment

The current DVLA rules on headlight alignment are covered in the 3 pictures below. In practice you need to park up 3m from a flat vertical surface:

  • Main beam needs to be directed straight and level
  • Dip beam need to drop to 2″-4″ below level and slightly left to avoid dazzle
  • If your headlights have a kick-up then that need adjusting too (mine didn’t)

When using standard Stag headlight adjusters, it’s the adjuster at 1 O’clock for height and the adjuster at 7 O’clock for direction. Here the finished lights and grill

Almost ready for MOT

Once I have adjusted the headlights and replaced the front grill, it will be time for MOT. As it’s older than 40 years, it doesn’t necessarily need one, but I have done some extensive restoration work and want to make sure all is well. With the Covid lock-down still in place, my local garage is closed, and I can’t go out driving anyway, so I guess i’ll have to wait.

Here are a few pictures of the car as it now looks.

Bumpers

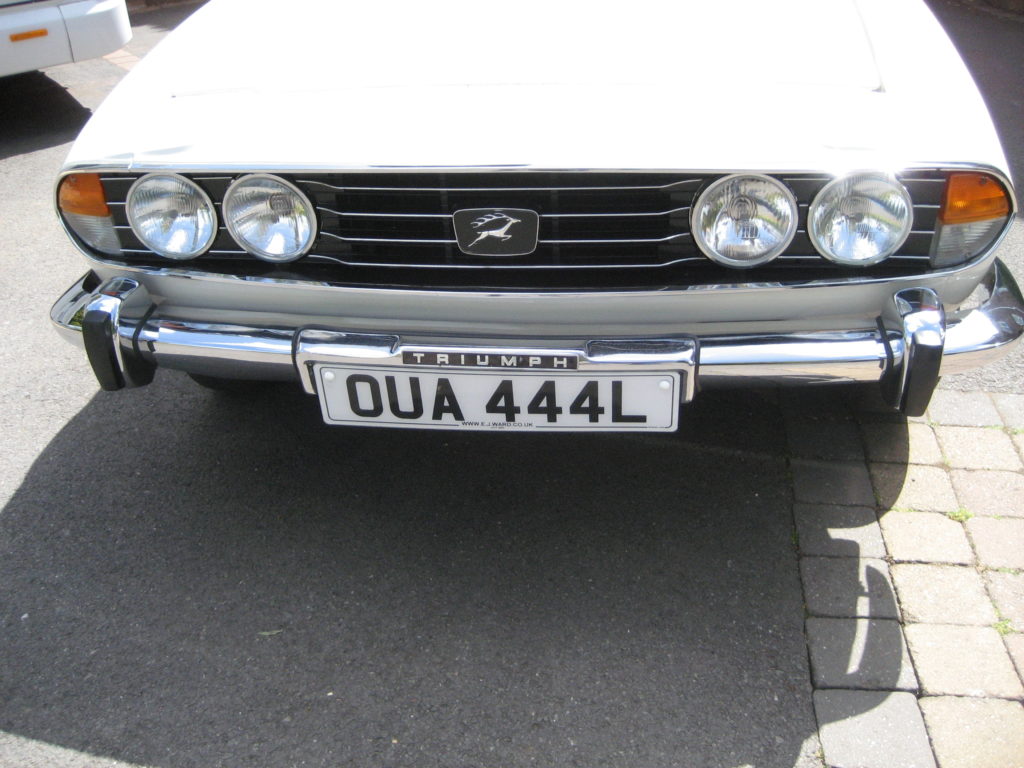
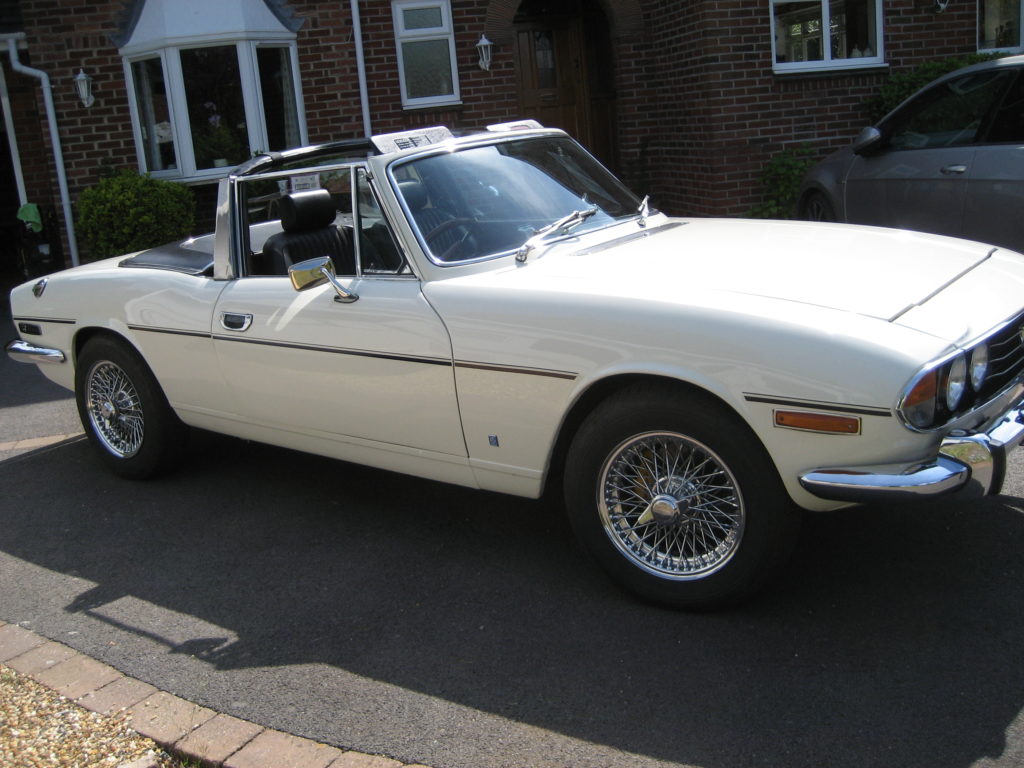
This is an almost 50 year old vehicle, so I am not expecting perfect chrome, especially since this car has been used during it’s long life, unlike some which seem to have spent their days in a dry garage.

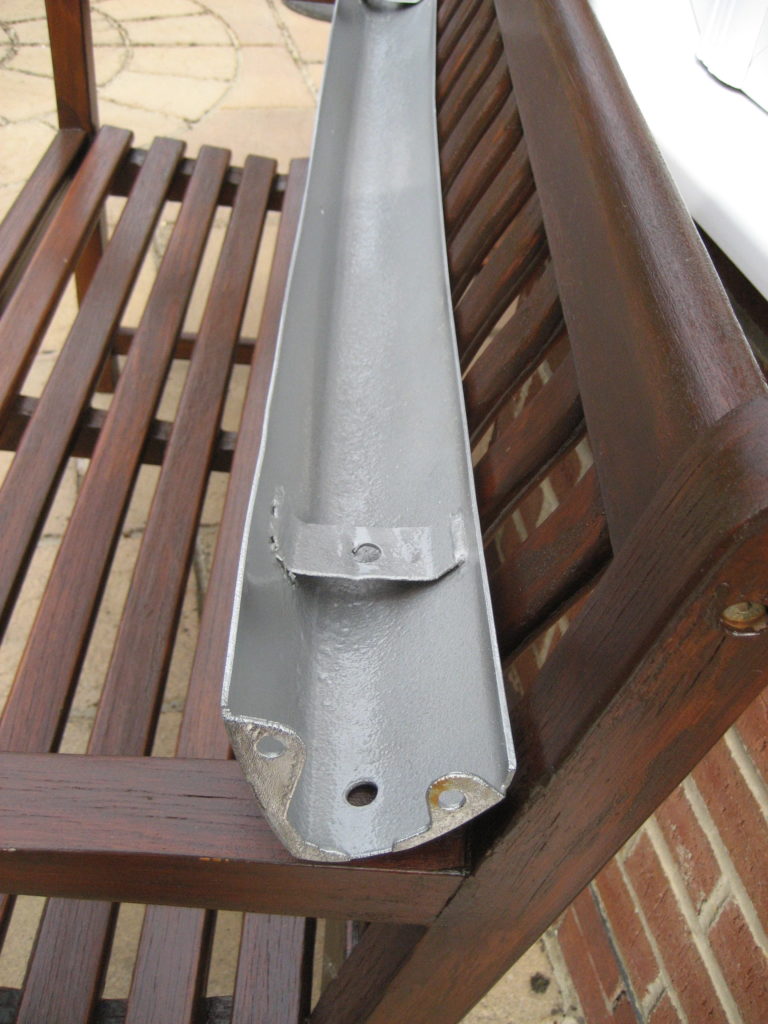
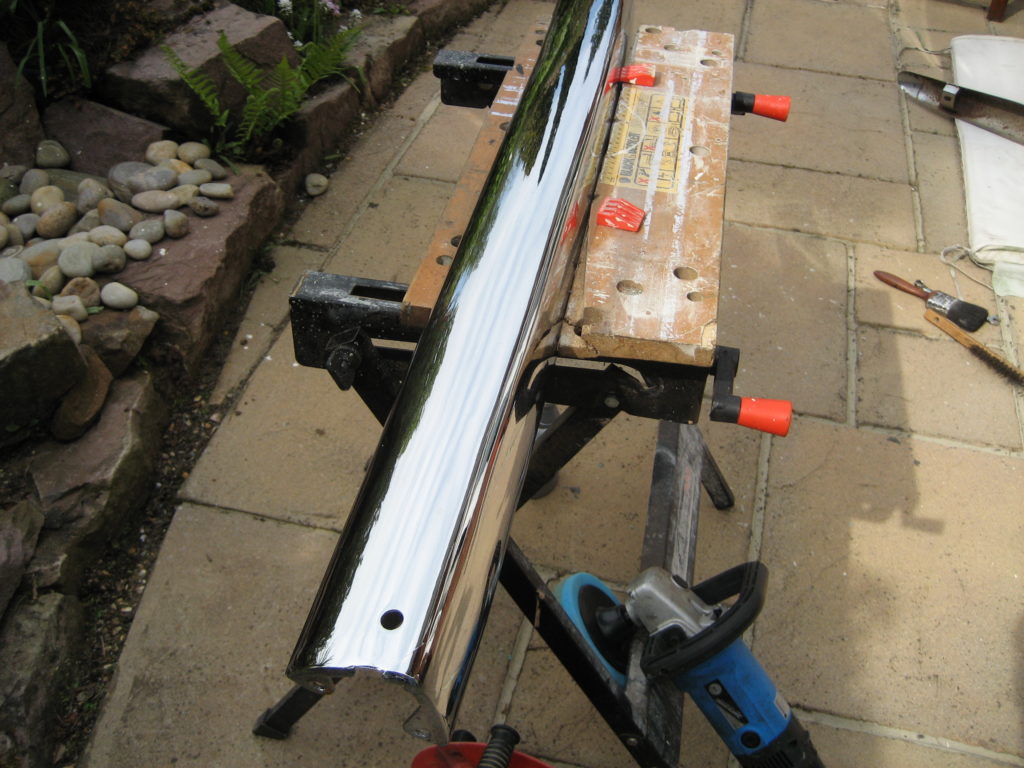
After removing the front and back bumpers, over-riders and mounting brackets, I took them outside into the sunshine along with my polisher. The bumper brackets were not in bad shape, having been galvanised. Just a quick wire brush and a coat of hammerite. The front bumper has fairly widespread micro blistering across the whole of the bumper and rust building up on the inner side. So a wire brush and silver hammerite were applied to the inner surface, and large amounts of metal polish and the elctrical polisher to the outer.

The results were pretty good – although not perfect. The chrome responded very well to the polish, coming up really bright, but the micro blistering is still noticeable if you look closely. As a new chrome front bumper is over a grand from Rimmer’s, I can live with some minor imperfections. This is not and never will be a concourse car.

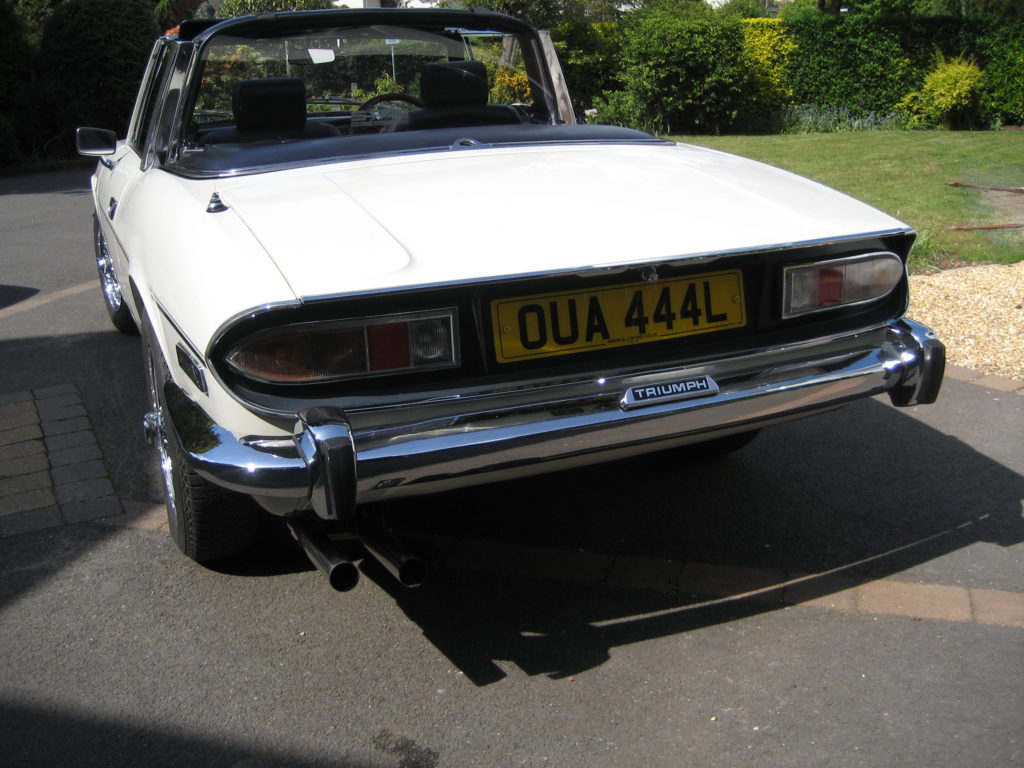
The centre peice of the rear bumper was in very similar condition to the front, but the corner sections were a little worst. The chrome had blistered through in a couple of places. As with the other bumper sections, I can live with the imperfections at the current time, but will keep an eye out for second hand corner sections in better condition.

Headlights – Part 2

The new headlights from MK1 arrived – very nice – and they fitted within the steel bowls, so I started the process of putting them in place. Firstly I replaced the plastic raw plugs with the proper “nylon nuts”, and wired in H4 lamp connectors. I’ve used H4 for all 4 lamps, wiring the outers to dip and the inners to main beam. Many use H1 as the inners, but I perfer to use the same bulb type throughout – less spares to worry about.

You can see from this picture (courtesy of Rimmer Bros) how the lamps fit together. I would have saved a lot of time, had I looked at this first.

The light units are sandwiched between the outer chrome ring and the inner steel ring, with adjustment being provided by moving the inner steel ring via the aduster screws. I made the mistake of assuming that the light units fitted between the inner ring and the steel bowl. I wondered why the light units didn’t quite fit, and thought that it was just because the new lamps were pattern parts. The inner rings clamped the light units tightly enough but they wouldn’t fit flush with the front of the ring so adjustment was really difficult and not accurate enough for an MOT.

As I wasn’t happy with the fit, I took them off again and checked the manual. Fitting them the second time, and in the correct way led to much better results. Just as I had hoped. I’ll adjust them again on one dark night this week. Then I can put the grill back on.