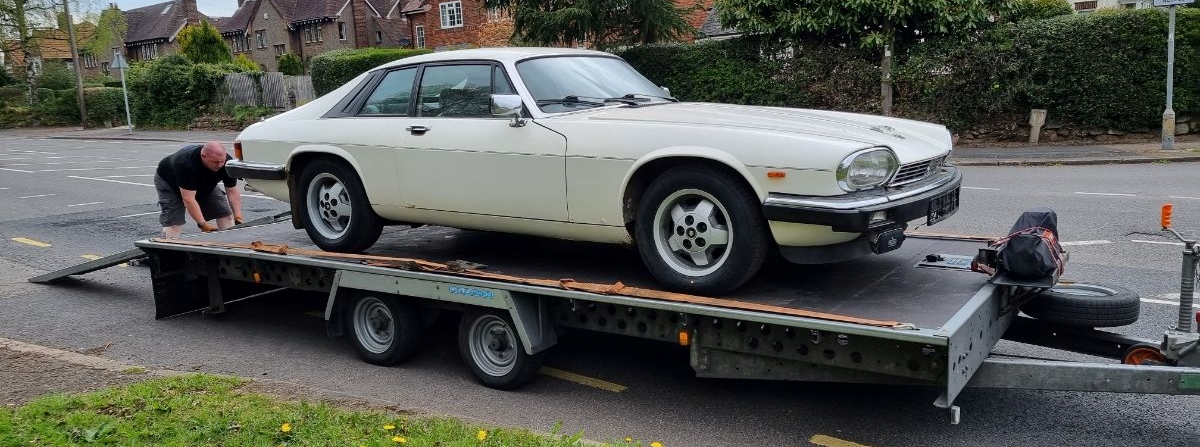
One of the last affordable V12 powered saloons, I think this 5.3L HE is worth saving.

Automotive Projects Blog
One of the last affordable V12 powered saloons, I think this 5.3L HE is worth saving.
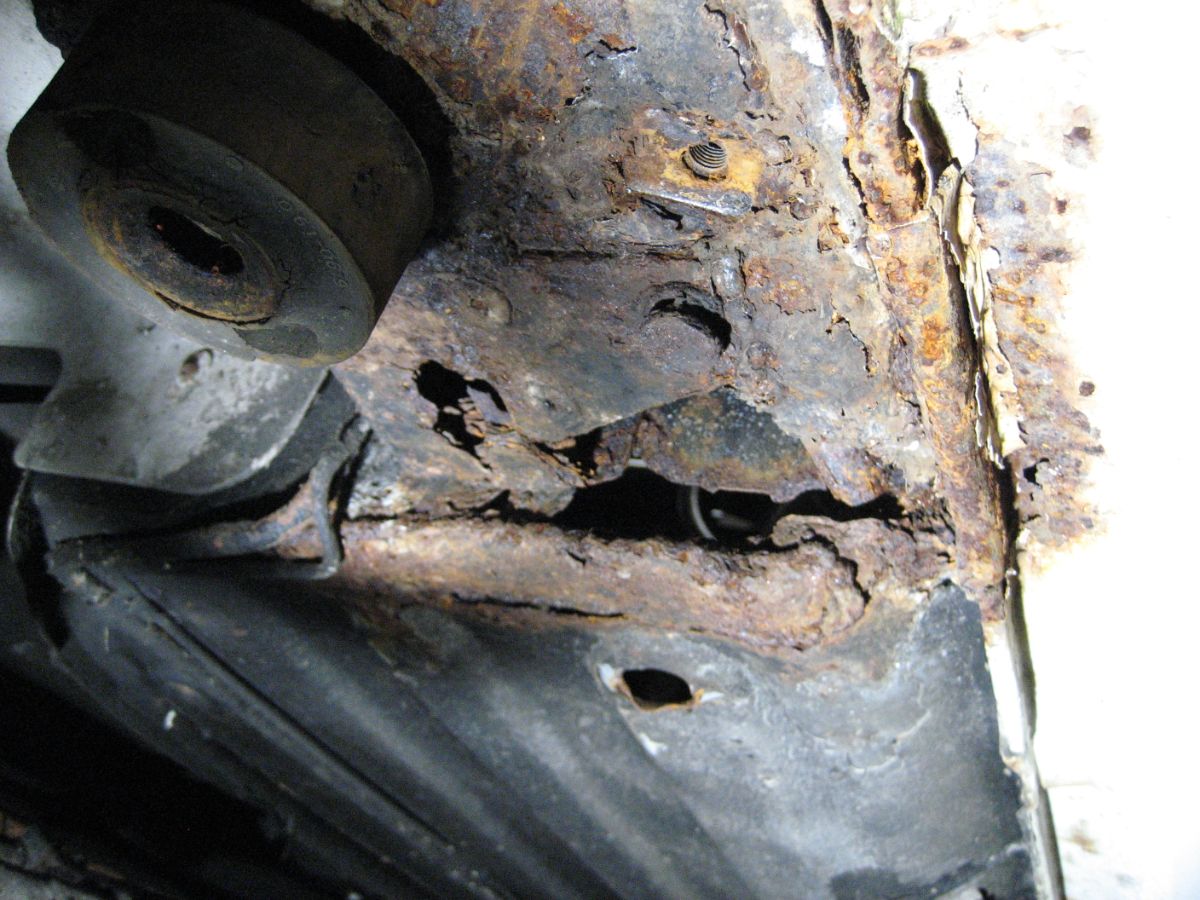
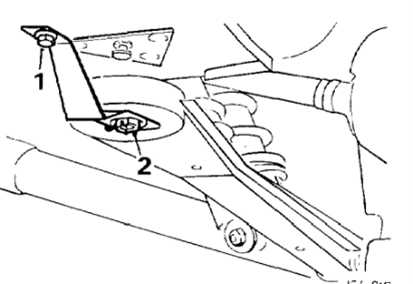
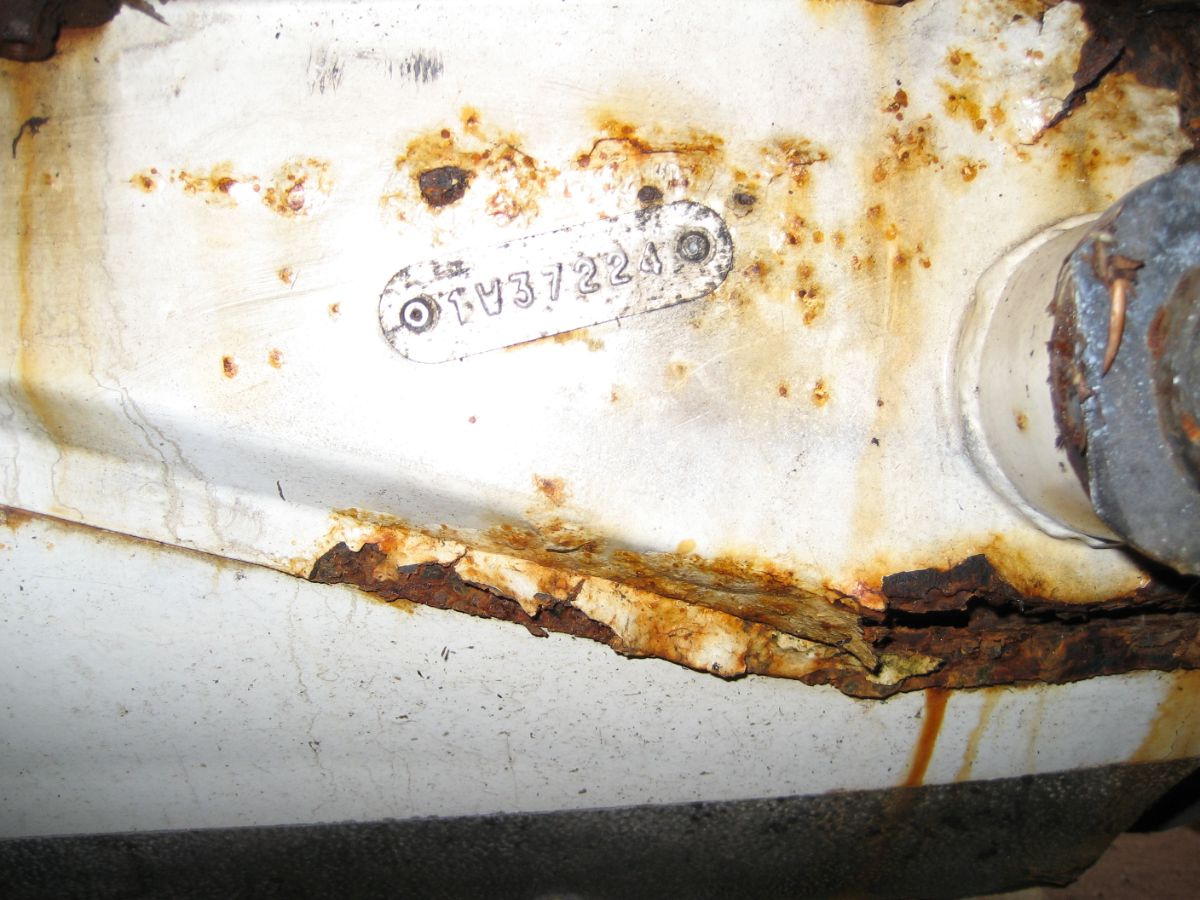
With the rear sub-frame removed I could finally take a look at the body panels at the rear. Oh dear. The drivers side rear jacking point area is totally rotten out. So is the mounting point for the radius arm.
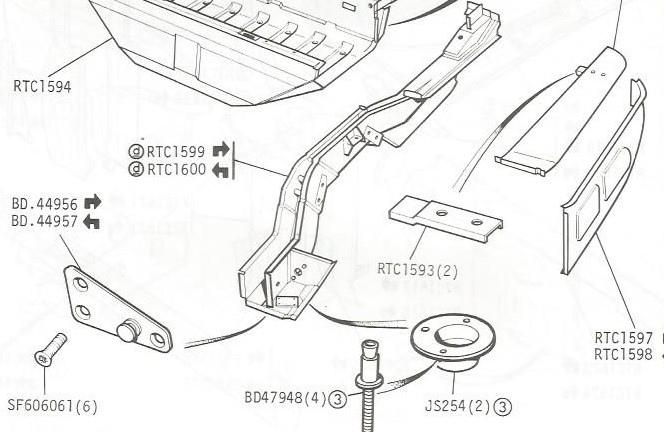
According to the parts catalogue it should look like this, with the jacking point and the radius arm attachment points on the underside of the rear side member. Fabricating a new rear member is not going to be easy. It is a load bearing structural component first of all, but secondly the radius arm needs to be positioned in exactly the right place so the rear suspension tracks properly. Whilst I am sure I could do it, I think I would prefer to buy a rear side member and graft the lower portion in place where there is good metal to weld to.
So it looks like I need to source the following:
In order to get access to the rotten bits around the back wheels, and as a prerequisite to refurbishment, I will drop the rear suspension and subframe. After some research this process “is quire straight forward”. I’ve heard that before.
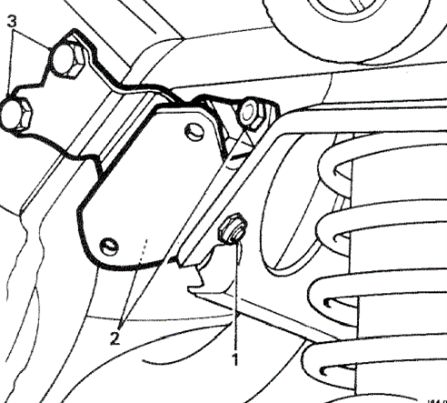
The subframe upon which the diff, drive shafts, brakes and struts are mounted is connected to the car body by 4 rear suspension mounting brackets. Removing the bolts that hold the mounting brackets is all that is needed. But as always it’s never that simple. First all of the components that link to or around the subframe need to be disconnected.
The rear sections of each exhaust pipe need to be removed from just behind the mid silencer box – really tricky because the pipes curve through the sub-assembly and over the drive shafts. I took the real silencers off and left the pipe in-situ within the sub-frame. I will worry about that when I refurbish the sub-frame and it’s components later on.
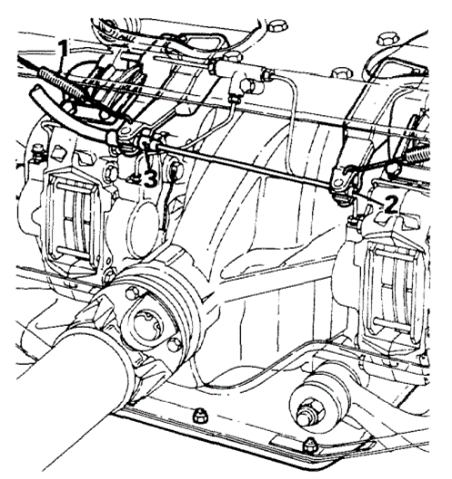
The hand brake cable needs disconnecting, by slacking off at the lever and unhooking the cable from the calliper levers.
The hydraulic brake pipe needs disconnecting. This was a real problem. Access is very tight and the flexible pipe connectors were really rusted. In the end I simply sniped the flexible hose – I am going to replace it anyway.
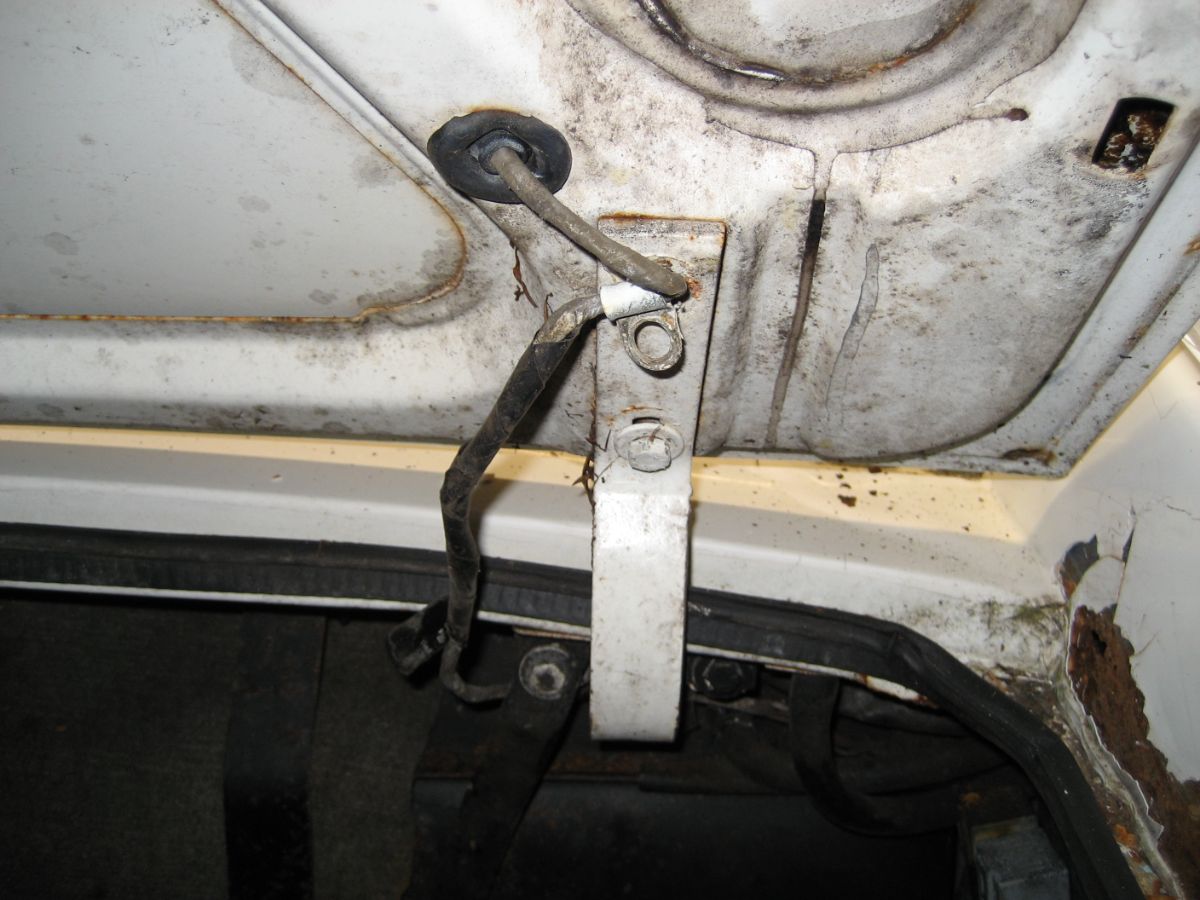
Then there is the radius arms. Each has a safety strap that needs disconnecting first, before the bush can be prised out. I have heard removing the radius arms can be a major issue, but mine were so knackered they fell apart.
Finally there is the propshaft that needs un-bolting from the diff.
Once all that is done, the suspension mounting brackets can be unfastened and the whole sub-frame will be free from the car. It is really heavy and cumbersome to move. To make my life easier I constructed a small trolly on wheels that my jack would slide under. I raised this platform under the tie plate to take the weight, removed the final bolts and lowered the sub-frame onto the trolly. I could then drag the sub-frame out from under the vehicle and move it easily around the garage.
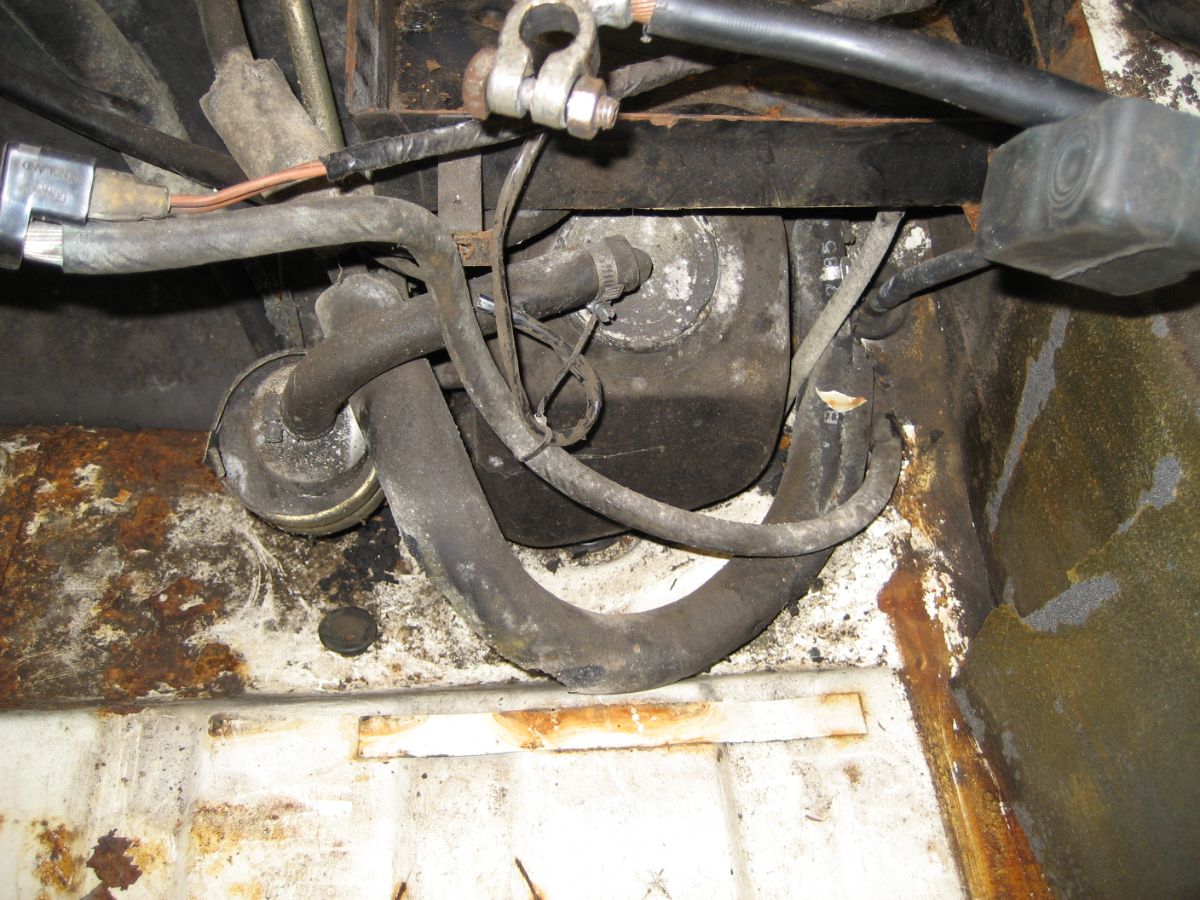
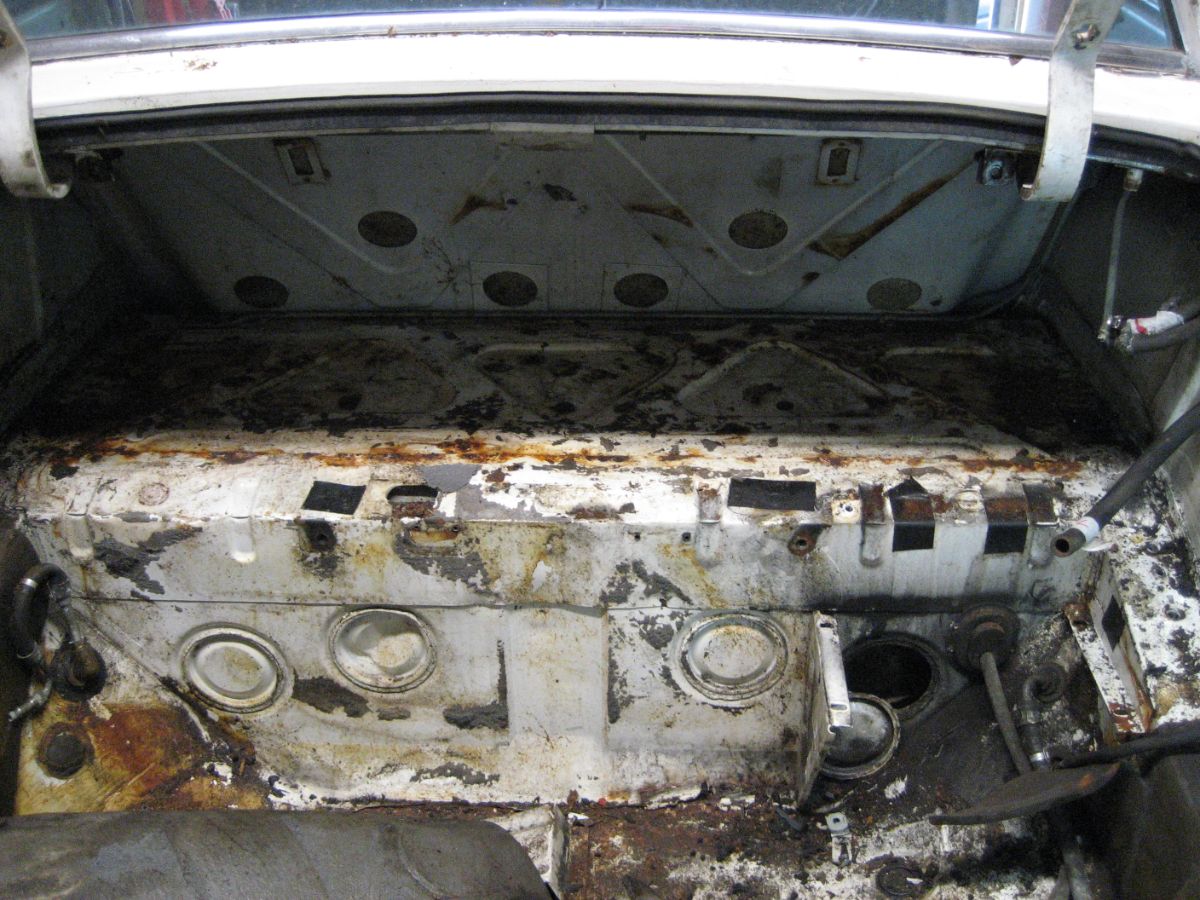
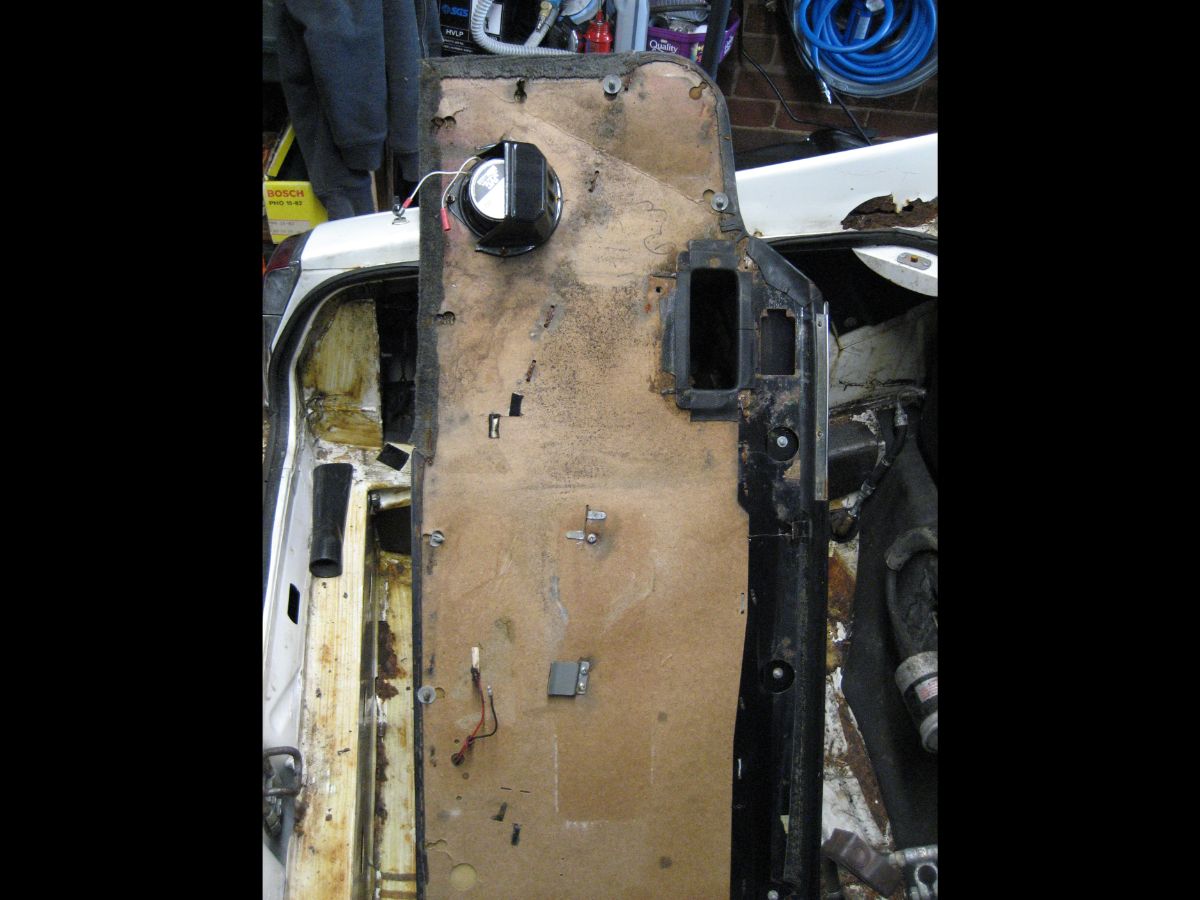
Ever wondered what lurked under the battery tray? Well I think it’s a swirl pot – the small reservoir that ensures a steady flow of fuel into the high pressure side of the fuel system. As this sits below the petrol tank, then this was where I started the disassembly to make sure the tank was drained.
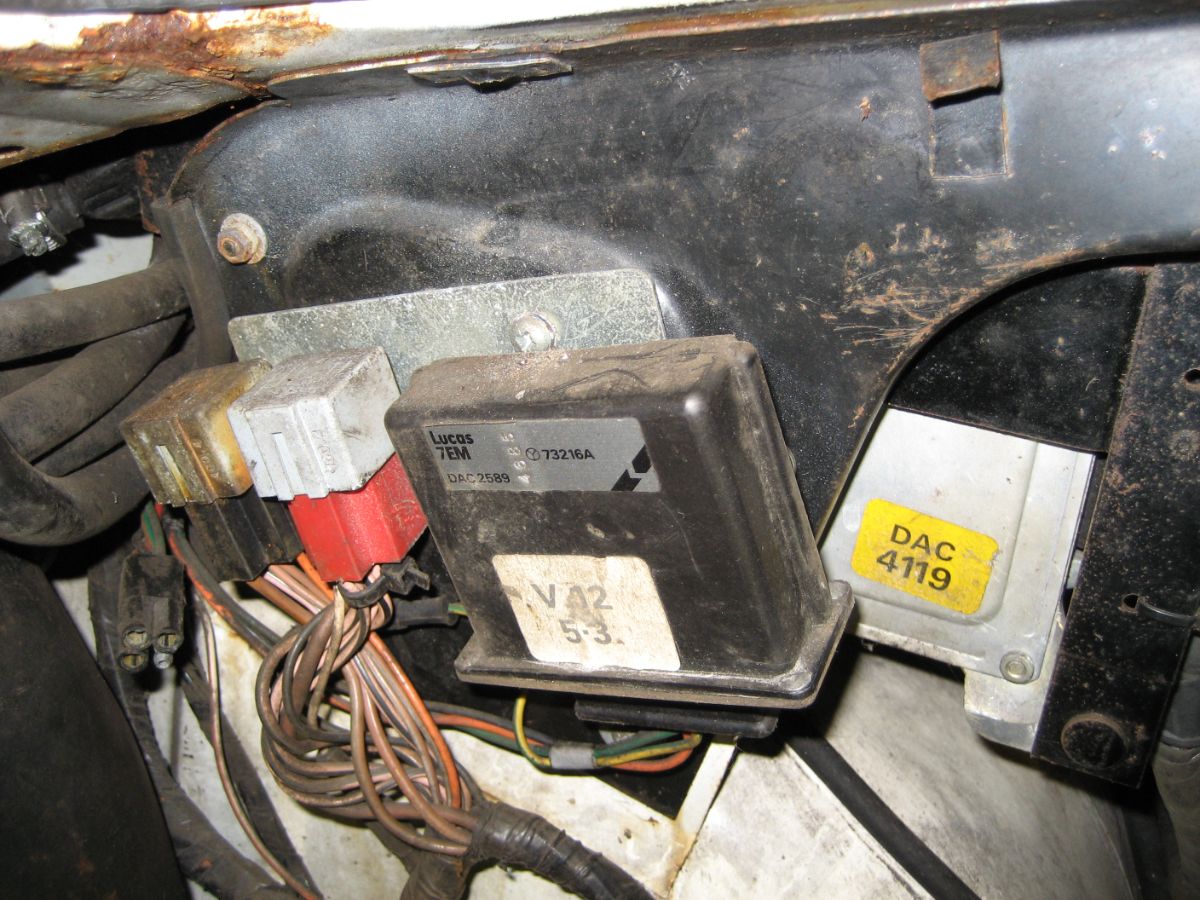
Removing the petrol tank itself, requires other stuff to be removed first. Obviously, the feeding and return pipes all need disconnecting, including the filler neck, but you also need to remove the steel strips either side of the boot opening, the right hand of which is the mounting point for the relays and fuel injection electronics.
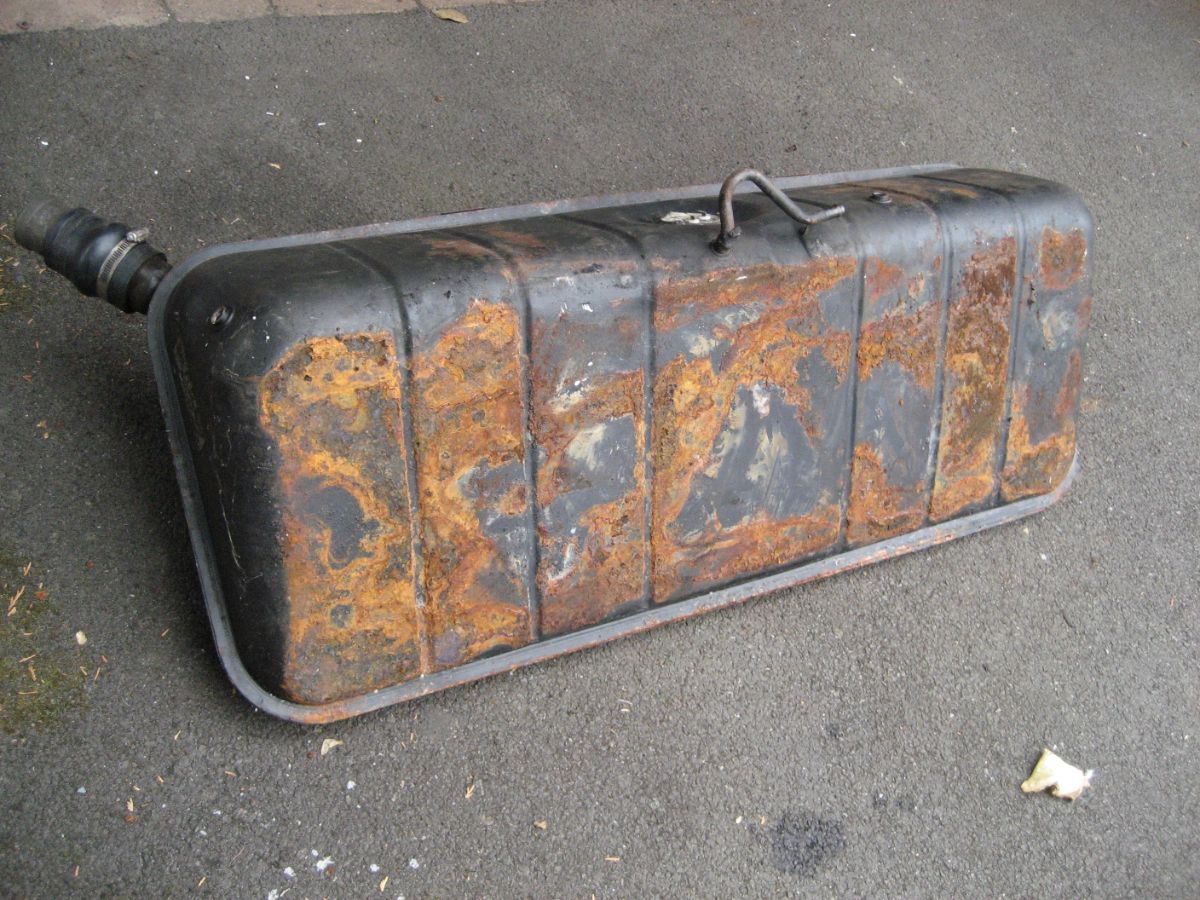
Once all of that is out of the way the petrol tank slides out. The underside of the petrol tank is susceptible to rust if the rear window has leaked water onto it for long enough. The sound insulation it sits on absorbs the water and keeps the base of the petrol tank moist – nice. In my case, there is some surface rust but nothing more.
As you may have guessed, the rear window has been leaking and needs to be removed so that I can repair the window channels and get access to the corners of the buttresses to repair them too. Removal was not as worrying a job as I had thought. A sharp knife following the line of the chrome trim releases the seal and the rear window comes free. Sounds simple, but there’s a lot of careful cutting, and scraping involved to make sure it comes out in one piece.

So apart from the wiring loom, that’s the boot emptied and ready for the real work to begin.
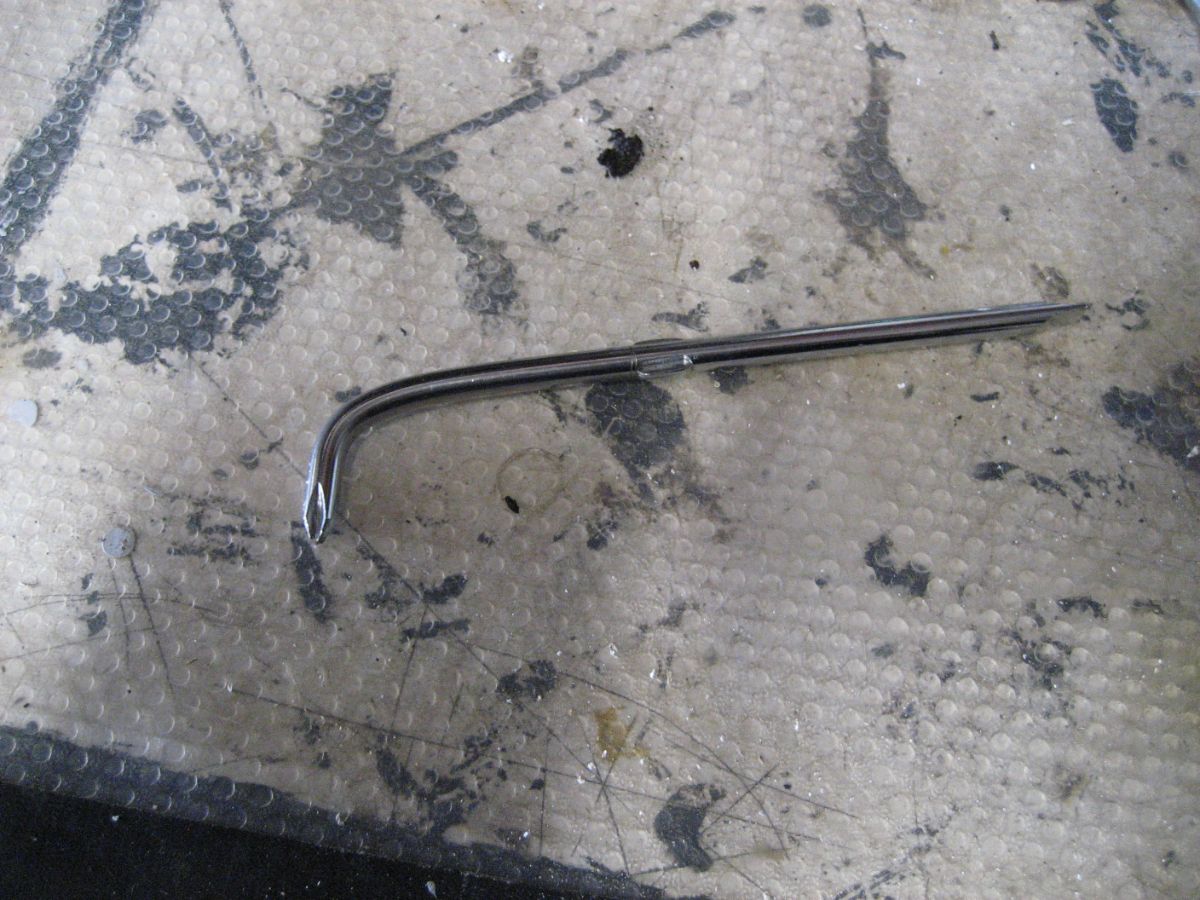
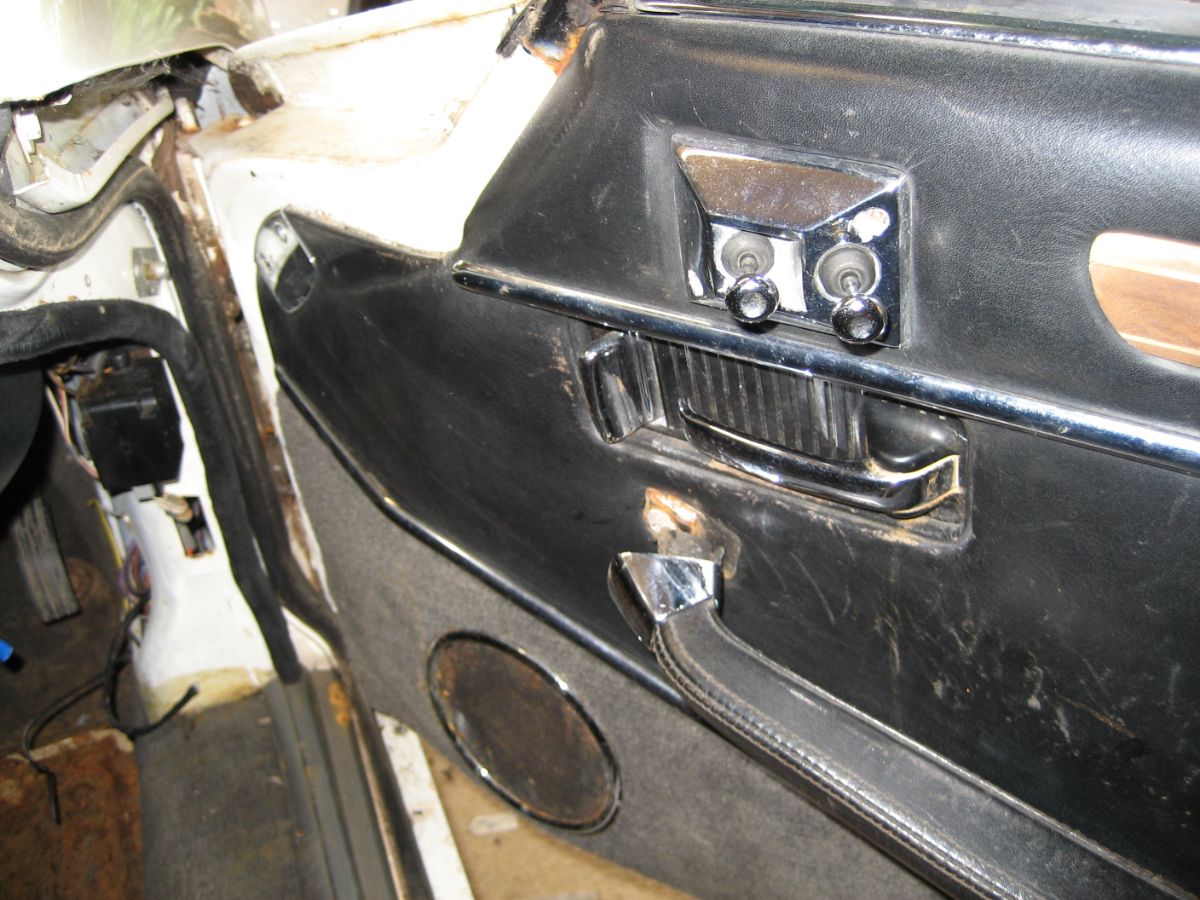
Having already removed the drivers door I assumed that the same procedure would be required – I was almost right. My small garage ddidn’t allow the passenger door to open completely so the simply practice of removing the screws holding the door car crome plate was impossible with any of my standard screwdrivers. So I had to adapt and create my own tool.
Other than that it came off without too much effort. I am a little concerned as to how it’s going to go back on. The wiring for the remote locking is in such a tricky place behid the window.
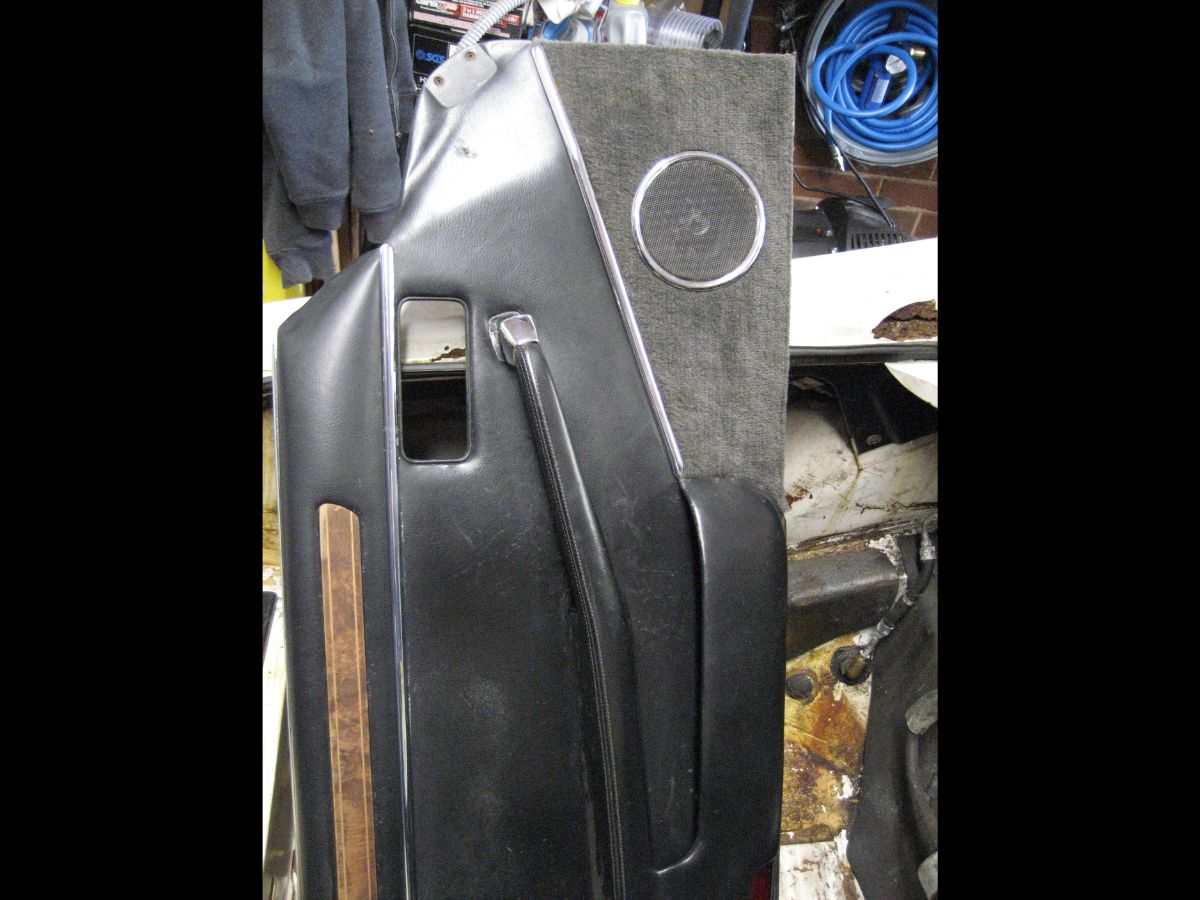
The dorr card is is fairly good condition when compared to the drivers side. Don’t think I will need to replace the card itself on this side.
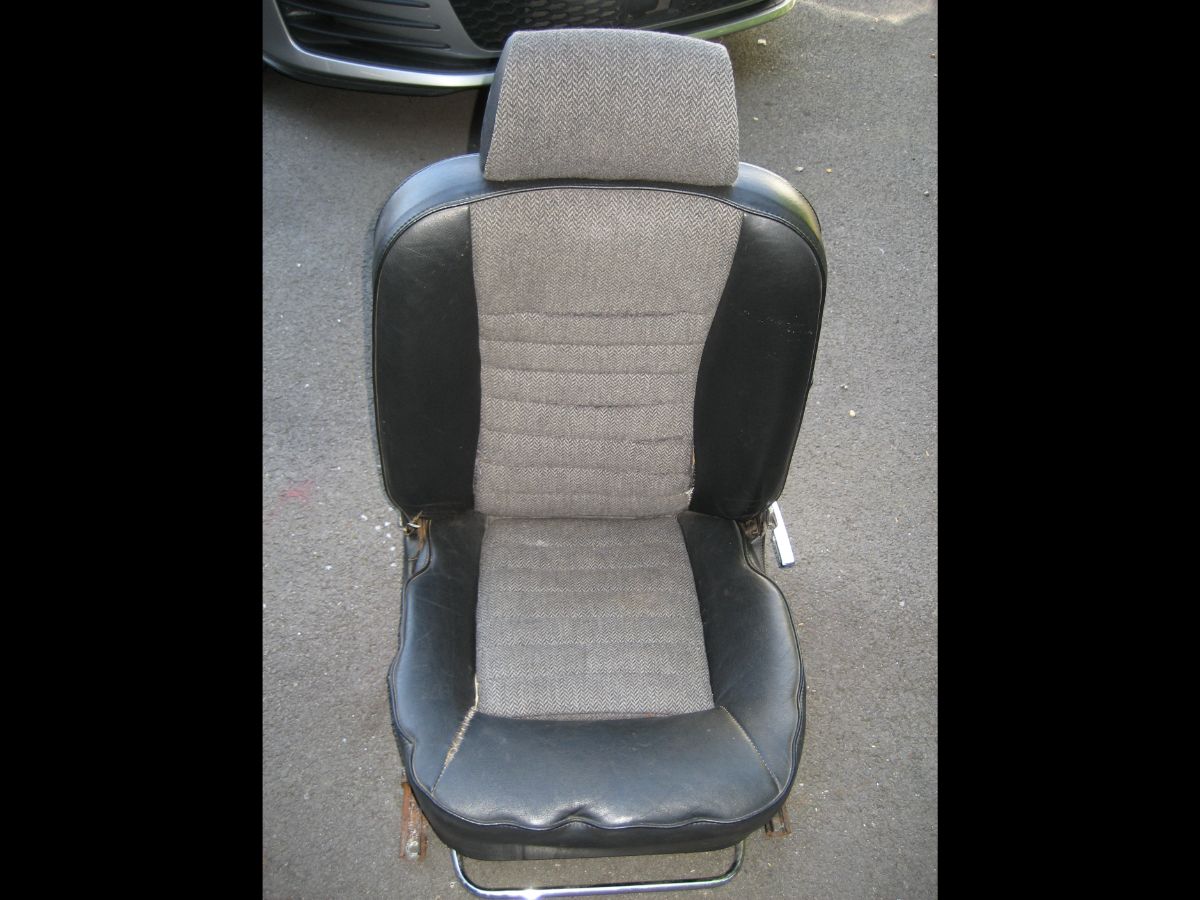
Passengers Seat
No problems here. The screws holding the seat rails came straight out. The seat however has seen better days.
I’ve rapidly run out of storage space in the garage. I’ve tried dangling the boot lid from cables attached to the roof but the risk of it dropping onto the roof of the car and effectively righting off the car before I really start the restoration is too great. I’ve looked around the local area for self-storage. All the smaller sized spaces are full, and the larger sizes start at circa £60 per month – too much for me. So now that all the garden potting is complete for this year, I’ve agreed with my wife that I can use the potting shed for storage.
The first job today was creating space in the garage by moving all the disassembled parts into the potting shed. The potting shed is at the bottom of the garden and my garage at the front of the house. As the temp today was an astounding 32 degrees C, the wheelbarrow came out the help with the heavy bits. Lying under an old Jag in a dark corner of a north facing garage was absolute heaven today, as cooler place as you will find without aircon or fans.
First out were the old carpets. They look to be original and all there but in a very poor condition. I’ve kept them to act as templates. I’ll purchase some suitable carpet material and make some new. Next was the spare wheel clamp and battery lower surround.
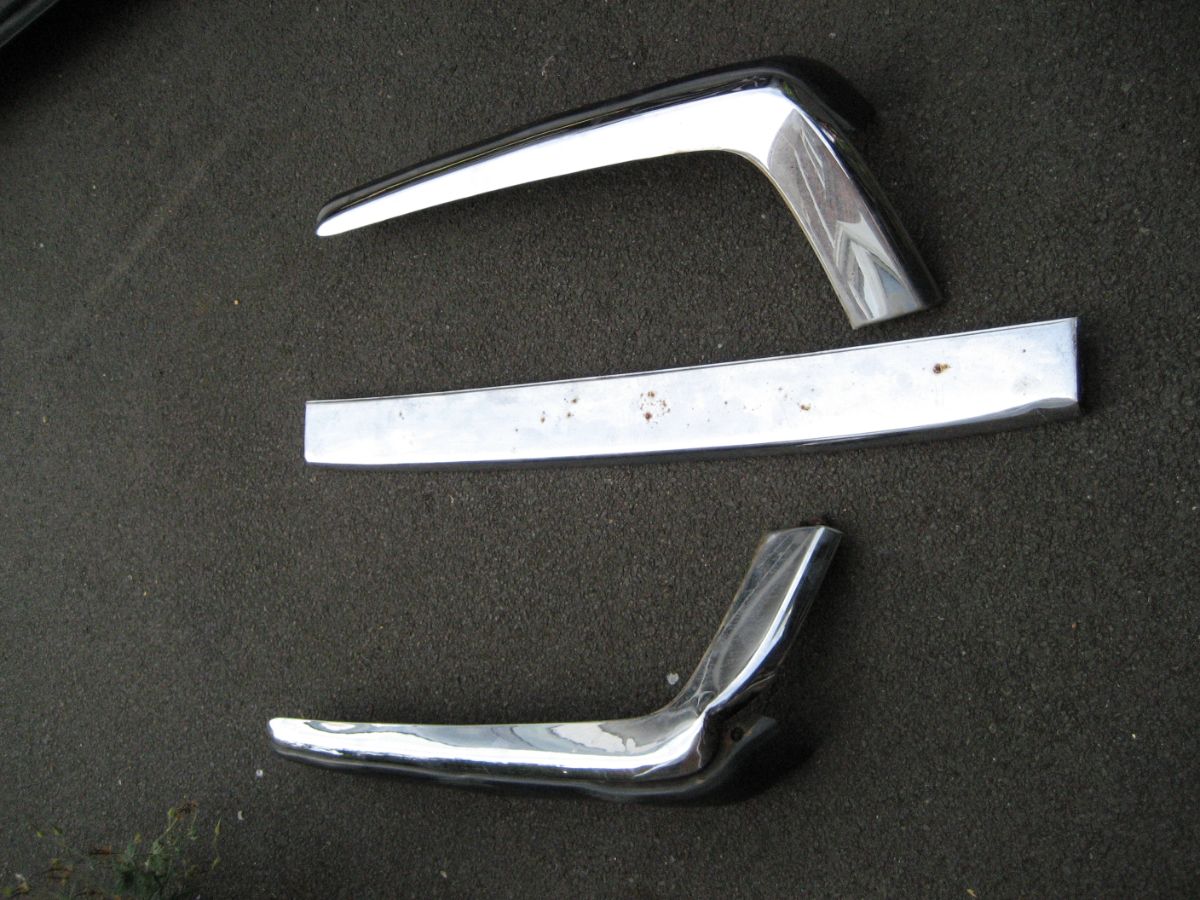
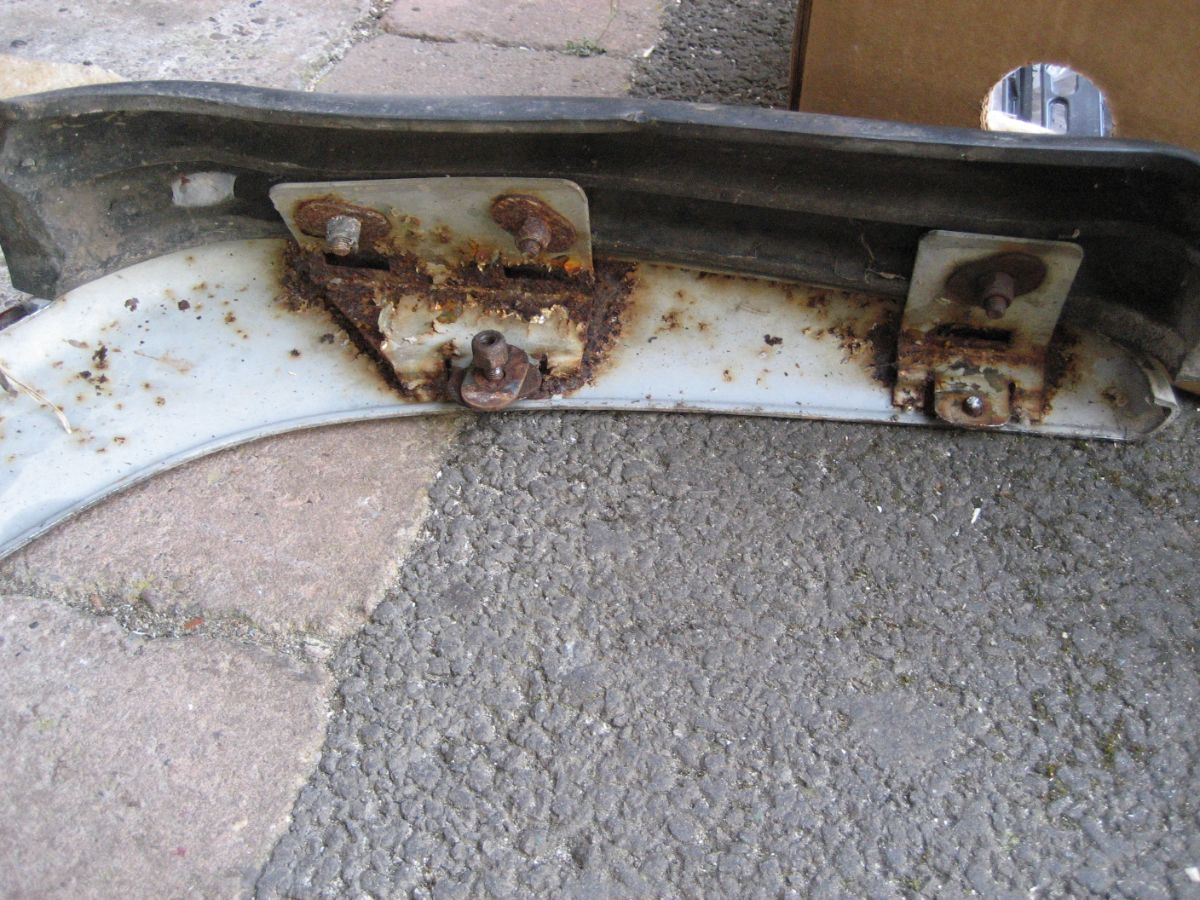
The left and right rear corners are secured via bolts from inside the boot. These bolts screw into brackets with welded nuts on the rear of the bumpers. Both sides were heavily rusted and even after soaking with penetrating oil, I managed to shear 2 out of the 6. The right-hand side corner looks fine for it’s age and should clean up well.
The left-hand side corner is not so good. At some point there has been a serious impact causing the chrome to be severely out of shape. Not only that but the damage has let the water in and the rear of the chrome section maybe scrap.

The chrome upper section of the long straight rear bumper has a few minor marks but will clean up to look like new. The same applies (with a little extra effort) to the rear lower bumper steel box section and over-rubber. Both rear bumper fog lights are fine also.
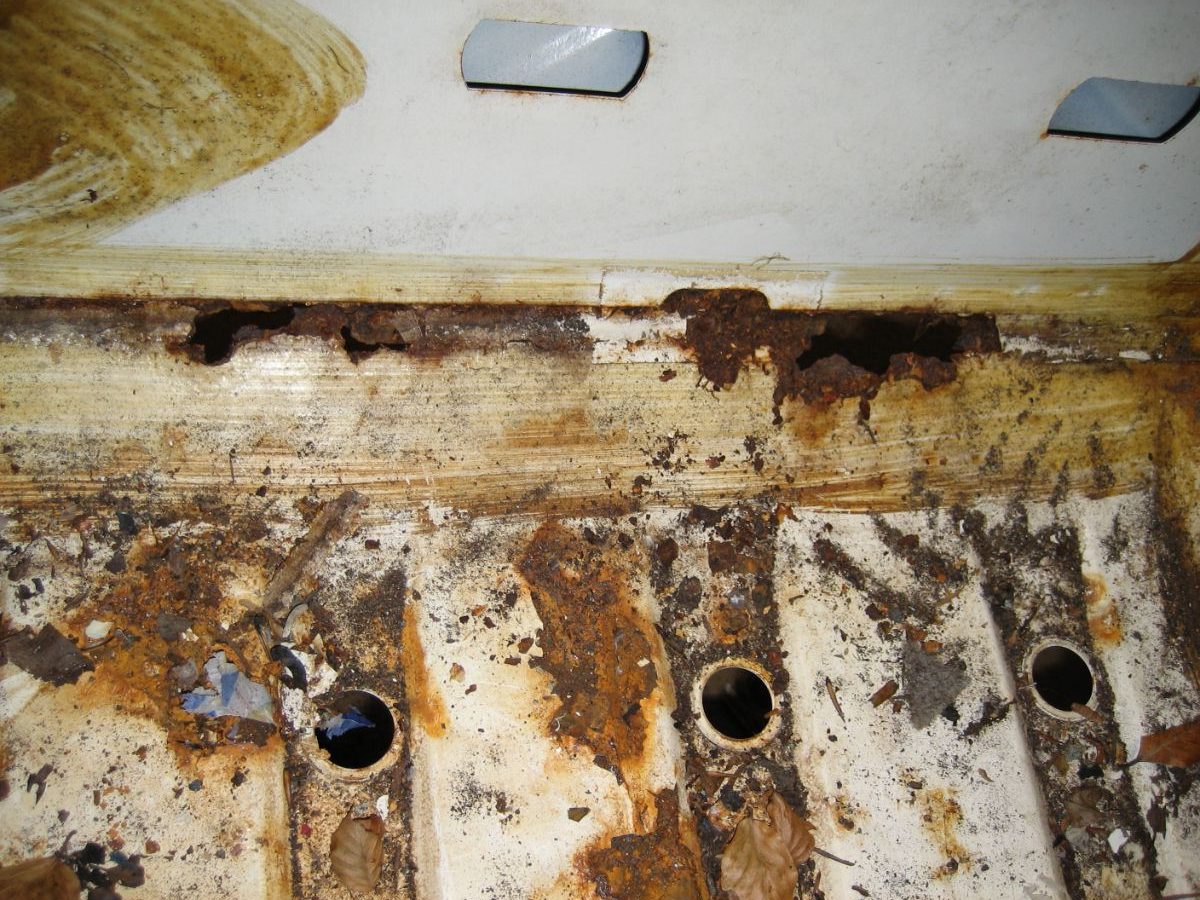
The rusty bits I found today are the boot floor where it meets the lower rear panel and the lower rear panel itself especially below the rear bumper mounting plates. Also, the nut on the bumper end of the long bolt that holds the bumper irons is seized and in trying to release it, I’ve removed the threads from the end.
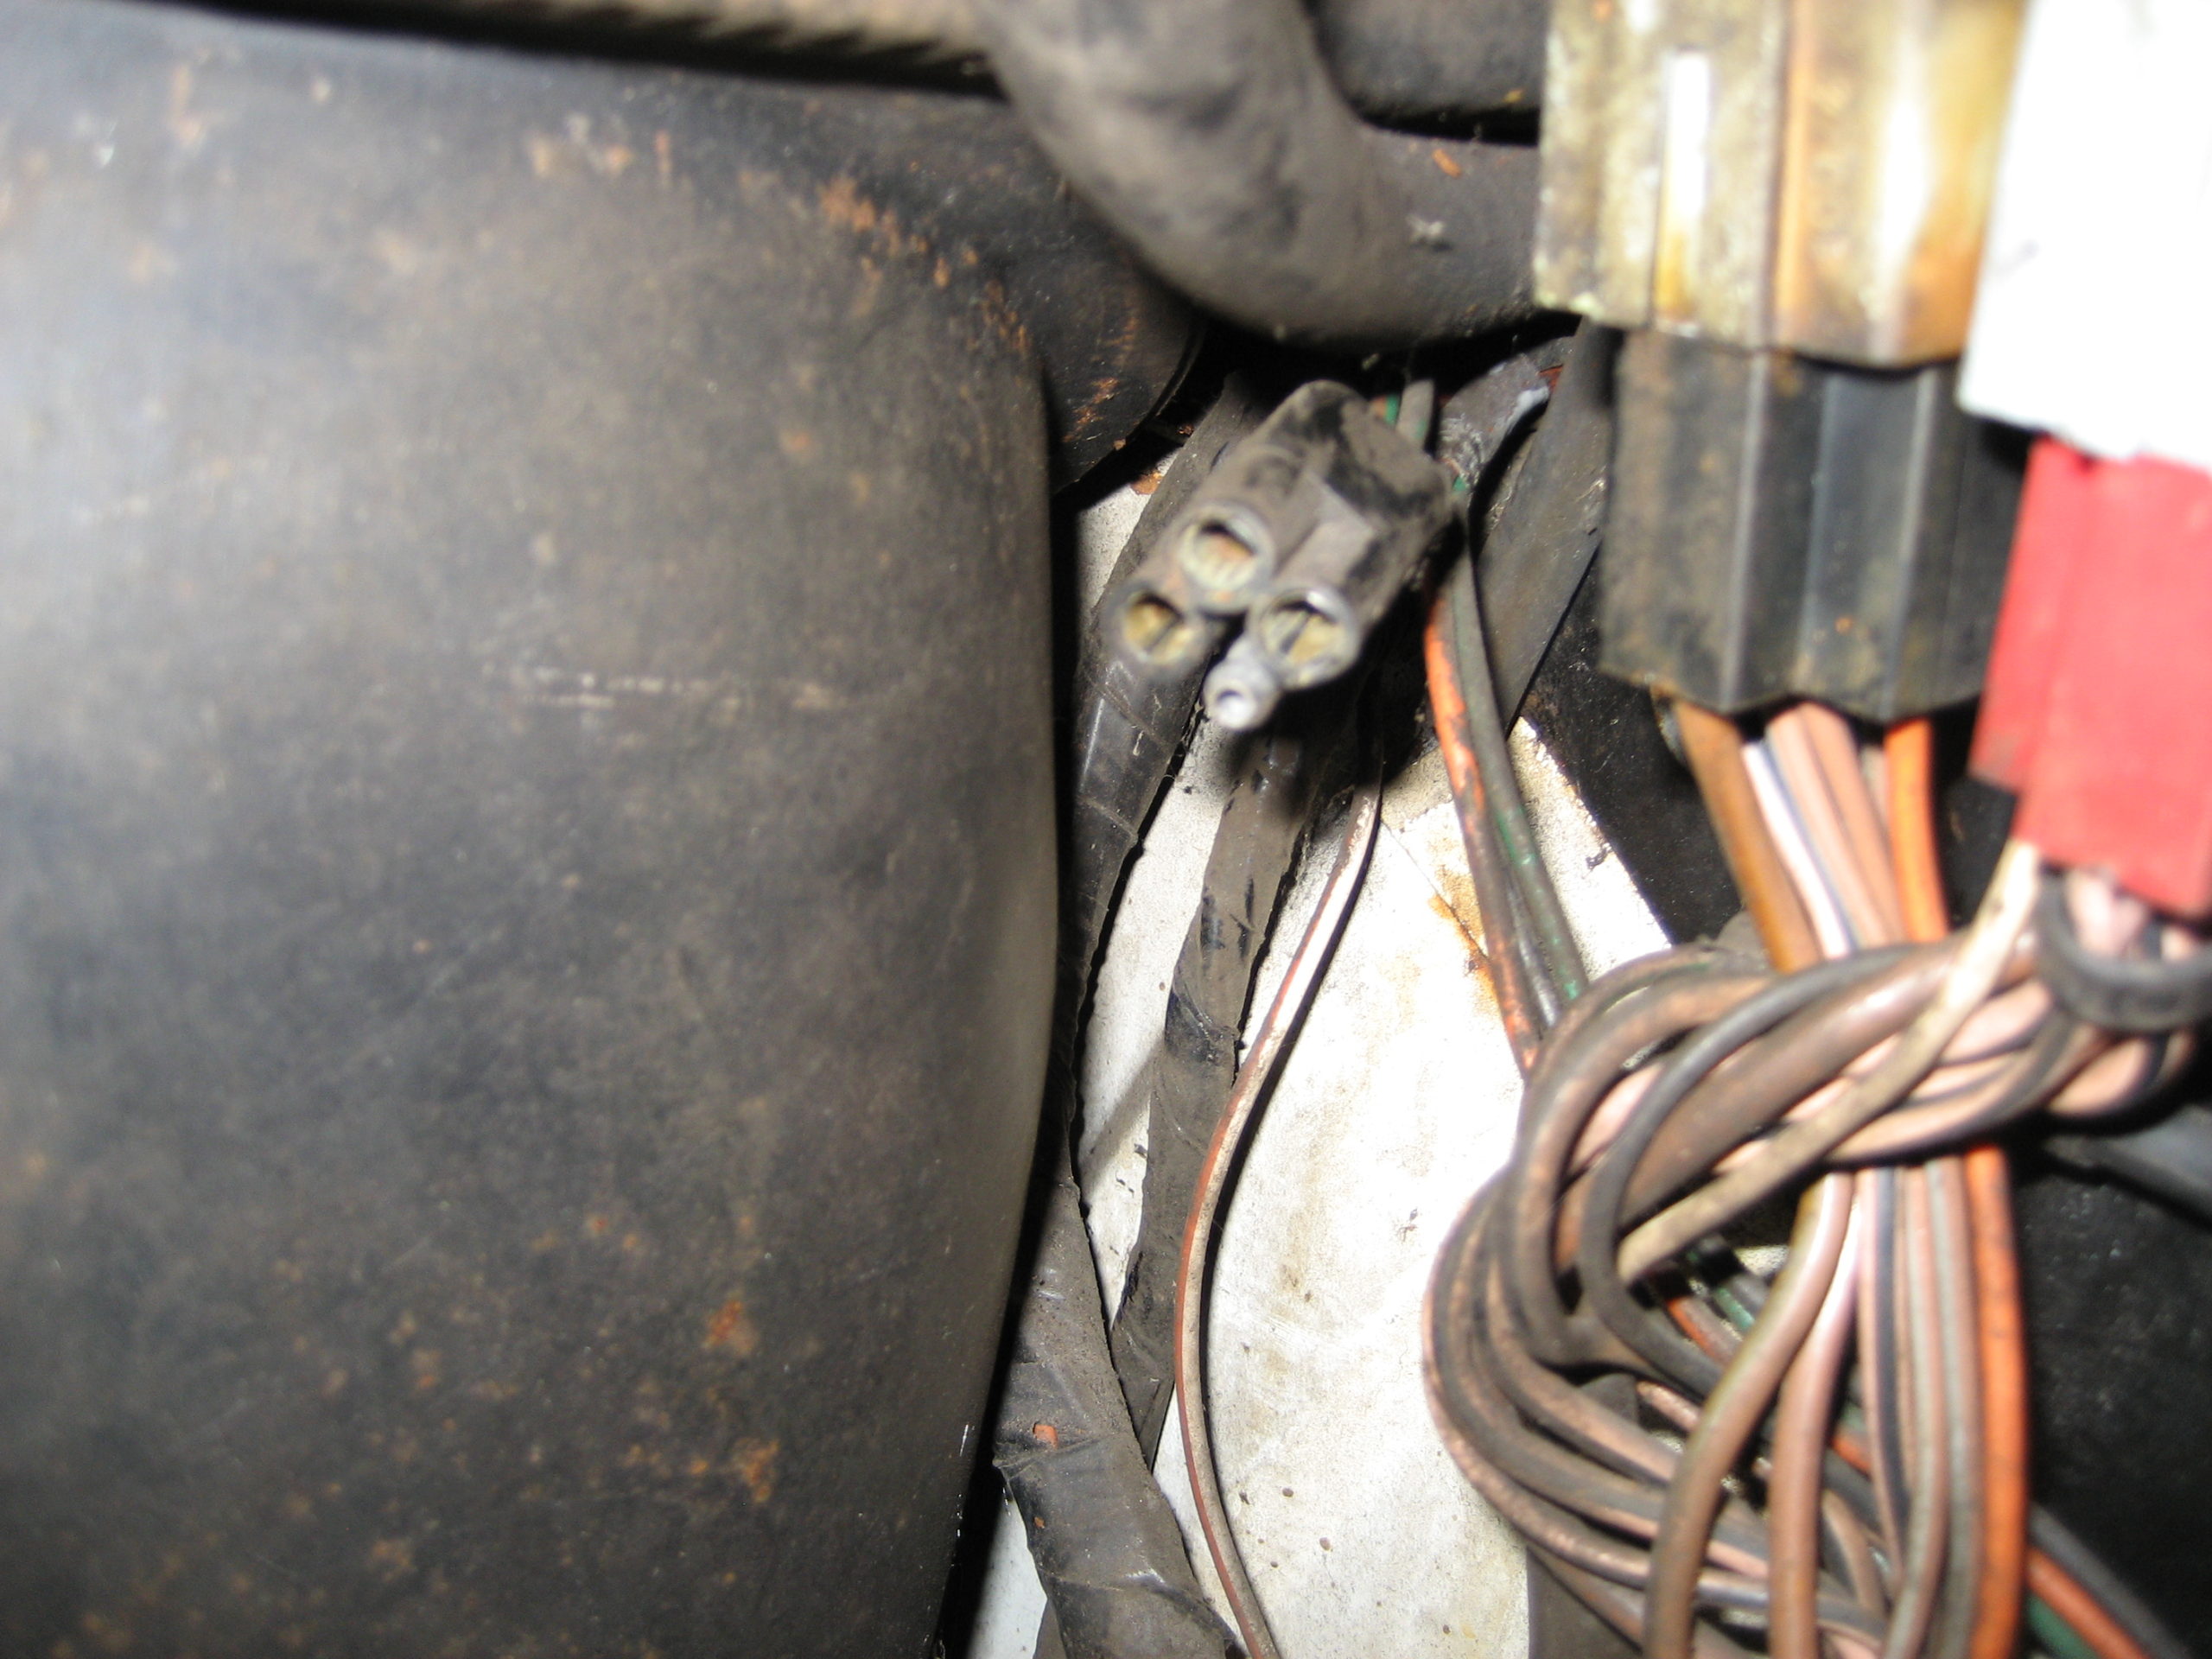
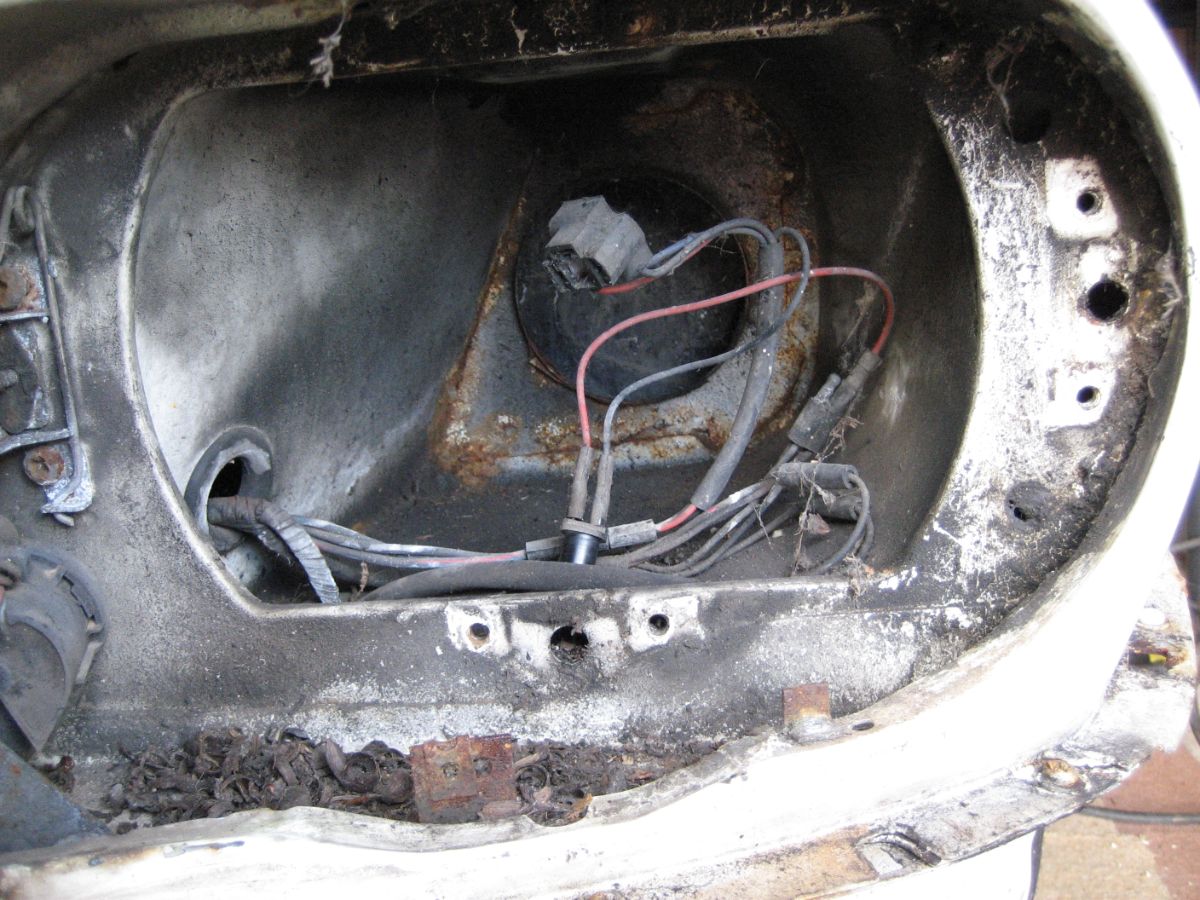
Next to come off was the boot lid. The only thing to note here is the position of the connector for the reversing lights which is tucked up in the inner rear wing above the petrol tank.
In my small single garage I am rapidly running out of space. The car itself occupies virtually all the available room, but I take things off it, I simply don’t have anywhere to store them. The boot lid is now handing from ropes on the ceiling.
Now the drivers door. To remove the door card there is a chrome plate at the front of the door, the mirror adjustment console and a large screw hidden behind the front trim piece of the inner door handle. Once they are all removed, the card can be unclipped and lifted from the door.
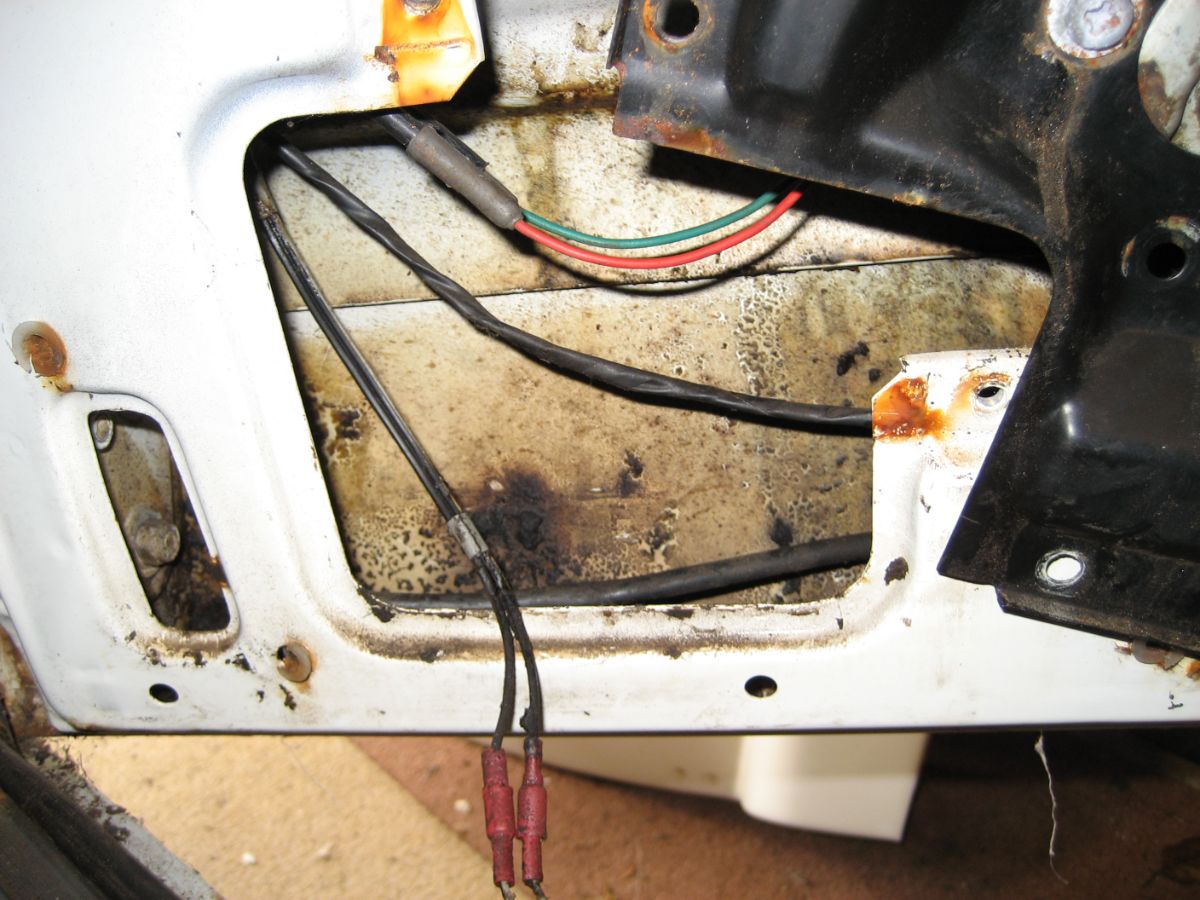
The door itself is connected via the hinge plates, but that isn’t the tricky bit in removing it. The tricky bit is the cabling. Electric locking, electric windows, speakers, mirror adjusters – there are a lot of of wires that need to be disconnected before the hinge bolts are loosened. The majority are straight forward (takings lots of photos to make sure where they all go) but the connectors for the wires to the locking solenoid are behind the window winding mechanism – so that had to come out too.
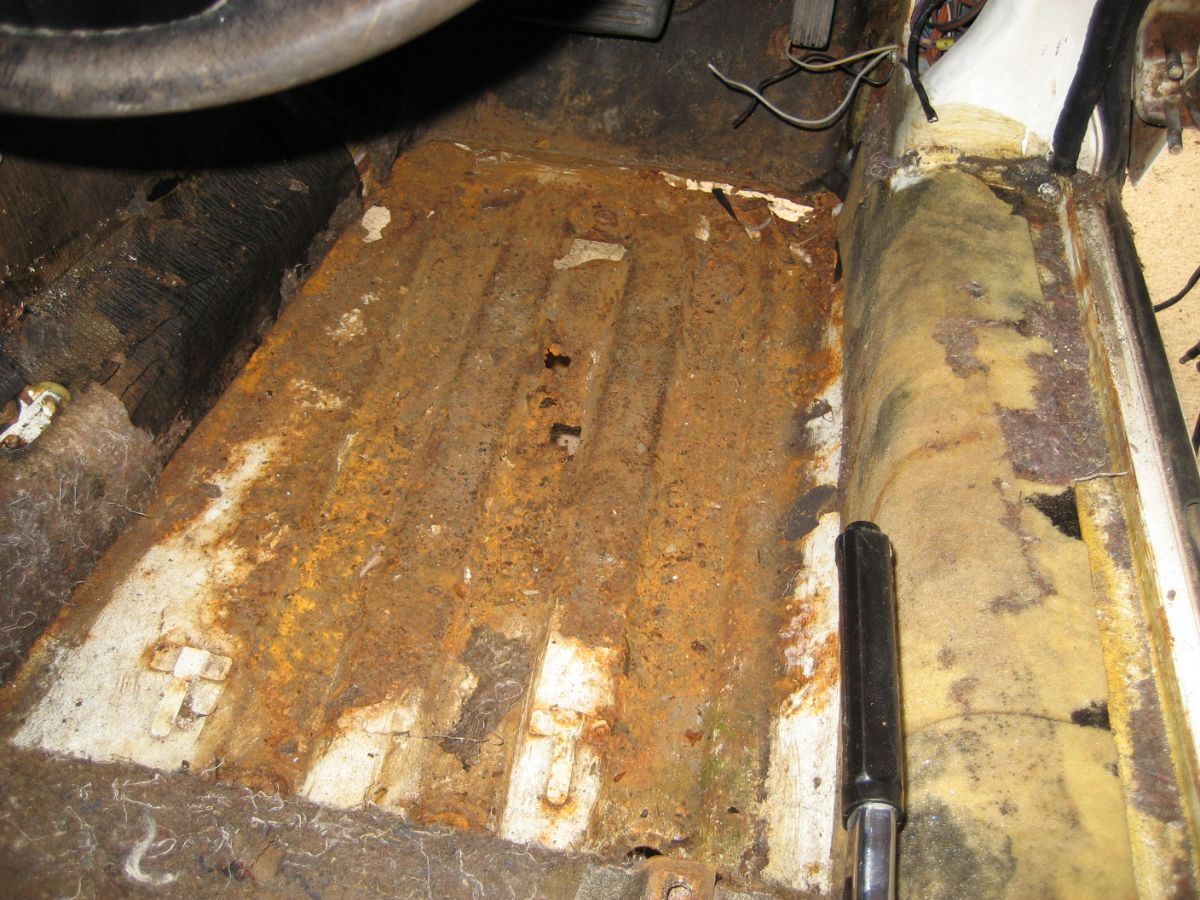
With the door removed, I can now get access to the cabin. If I had a bigger garage I could probably get reasonable access with the door wide open. But I don’t have that luxury. The seats and seat belt mountings simply unscrew/bolt along with the outer casing for the hand brake. Now the carpet can come up and I can see what I need to do to the floor pan. Oh dear! What’s left looks to be original but it needs completely replacing. I can’t quite see the state of the base of the A post. I will need to remove the stone guard from behind the front wheel to check.
New drive belts were delivered this week, but as always with classics, I’ve found another problem. The fan cowls have been fitted but not secured properly. So much so, there is no way I can get the drive belts around the fan blades. So, I’ve decided to continue dismantling the front end and to worry about the belts as I put the front back together again.
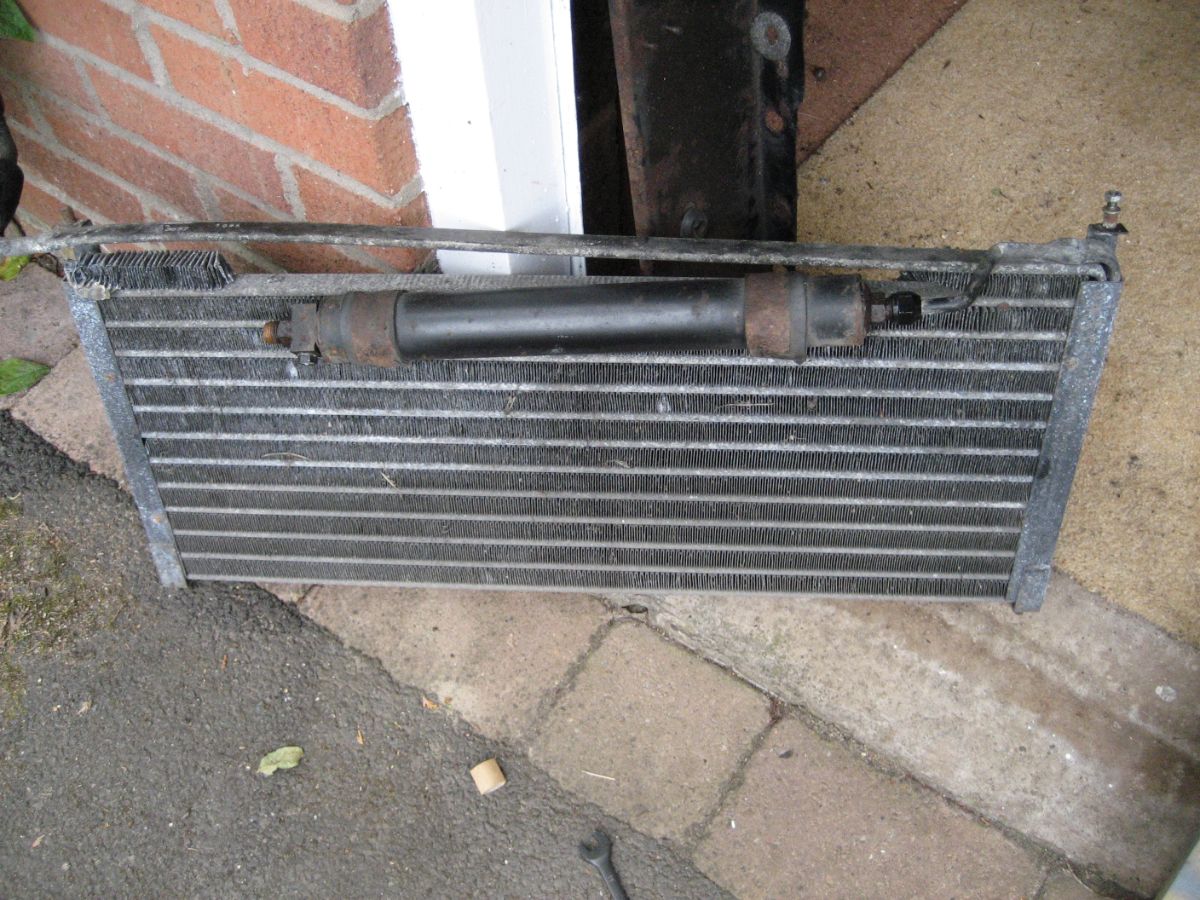
First to be removed was the condenser and receiver/dryer for the aircon. It looks like the top cooling strip has come detached from the frame. Another job for the future.
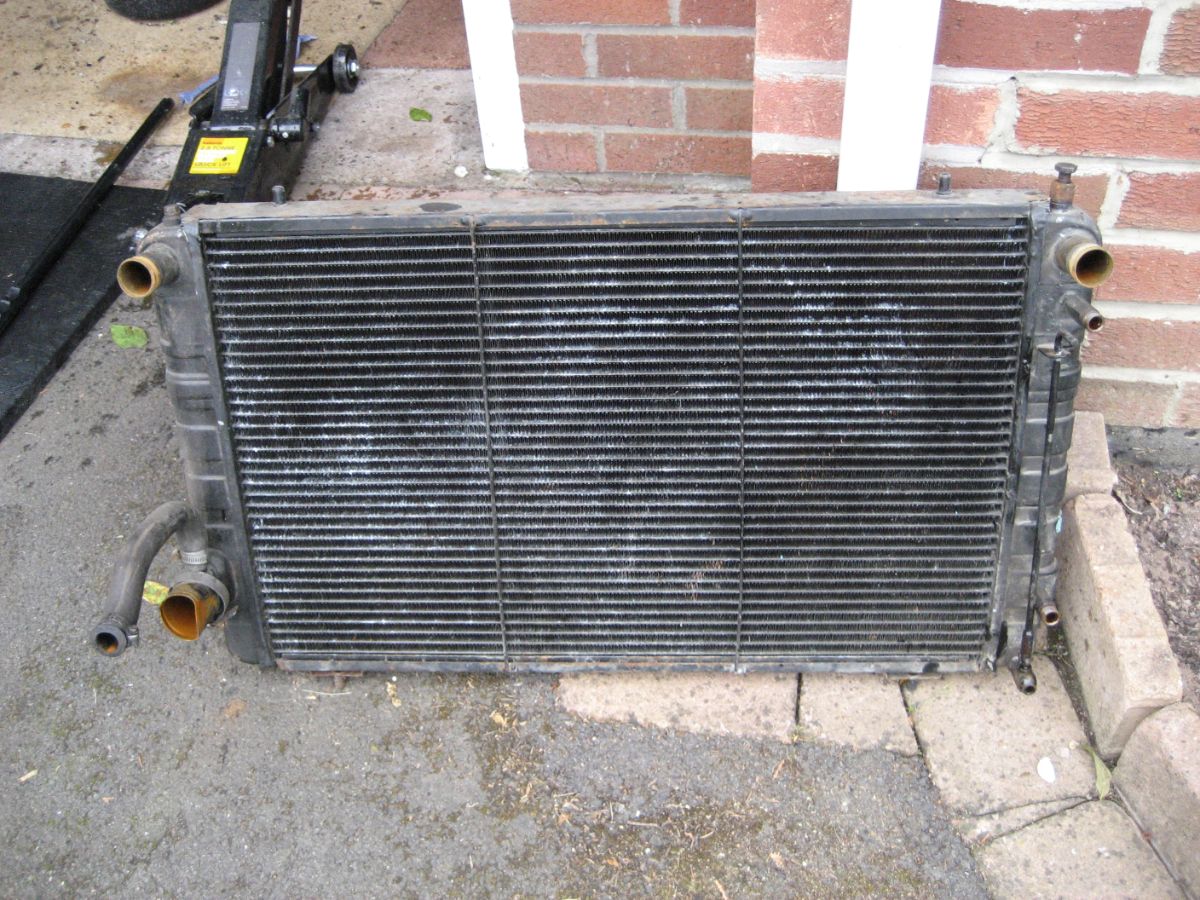
Then the radiator came out after draining the system from the lower hose. The radiator is definitely serviceable. It will need flushing and painting but that’s all.
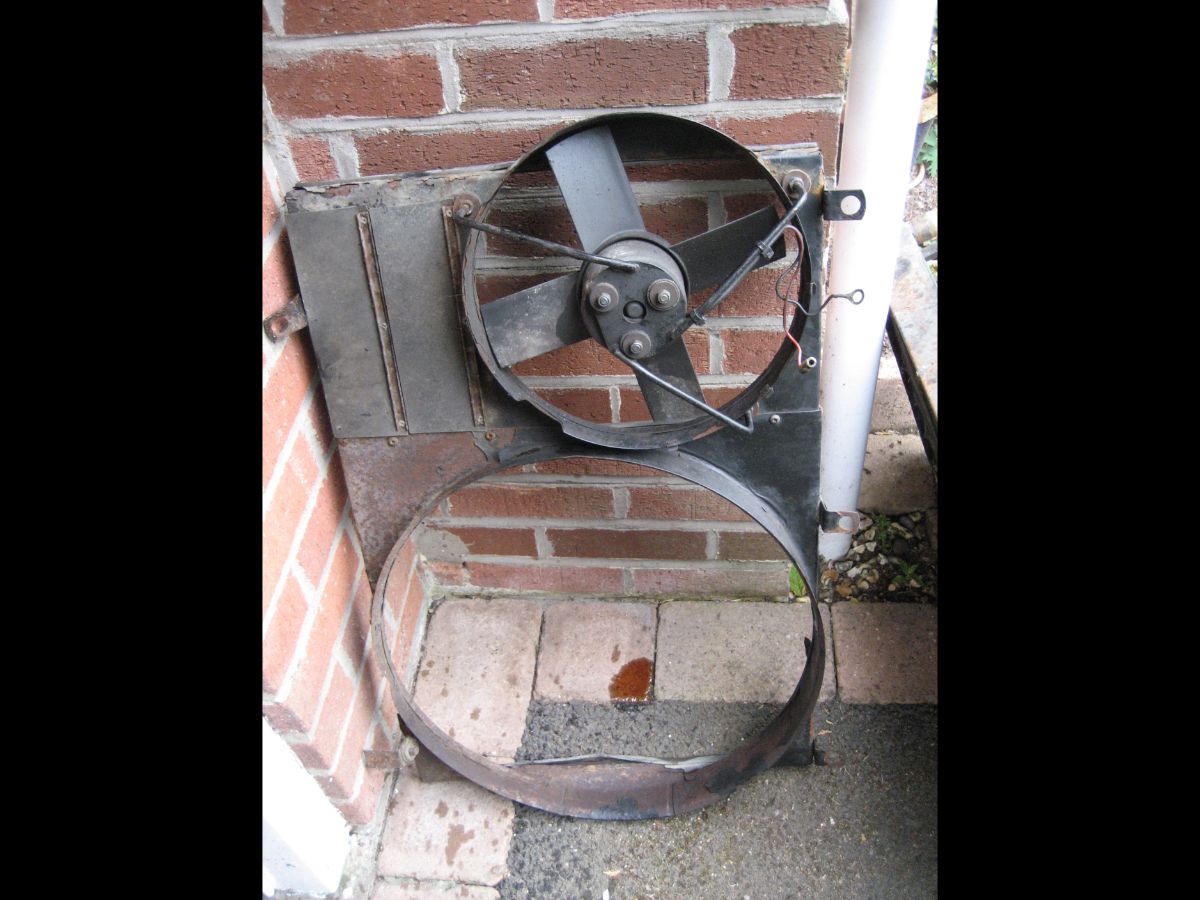
The fan cowls are also in need of de-rusting and painting, but they can be re-used as well.
The assembly is missing the packing blocks / radiator seals on the side and bottom, and also the cross member undershield which I can see in the parts catalogue but isn’t on the car.
Also at the front I removed the damaged chin spoiler and lower front panel. Both need replacement. The lower front panel has rusted through.

My first intention is to find the things that are either missing or broken. I can then source replacements whilst I work on the other aspects of the car.
The car came with an alternator belt on the front seat. A quick check revealed that there was no alternator belt fitted around the alternator pulley and the aircon belt was missing too. So first job is to order a new set of belts and replace them all. I can then run the car up to temp and see what else needs attention.
In order to replace the alternator belt, all of the other belts (4 in all) need to be removed. This is awkward enough in an XJ-S engine bay but harder still with the bonnet in place. So I decided to start disassembling the front end. Firstly because I wanted to see the state of the panels behind the lights and secondly so I can get better access when I replace the belts.
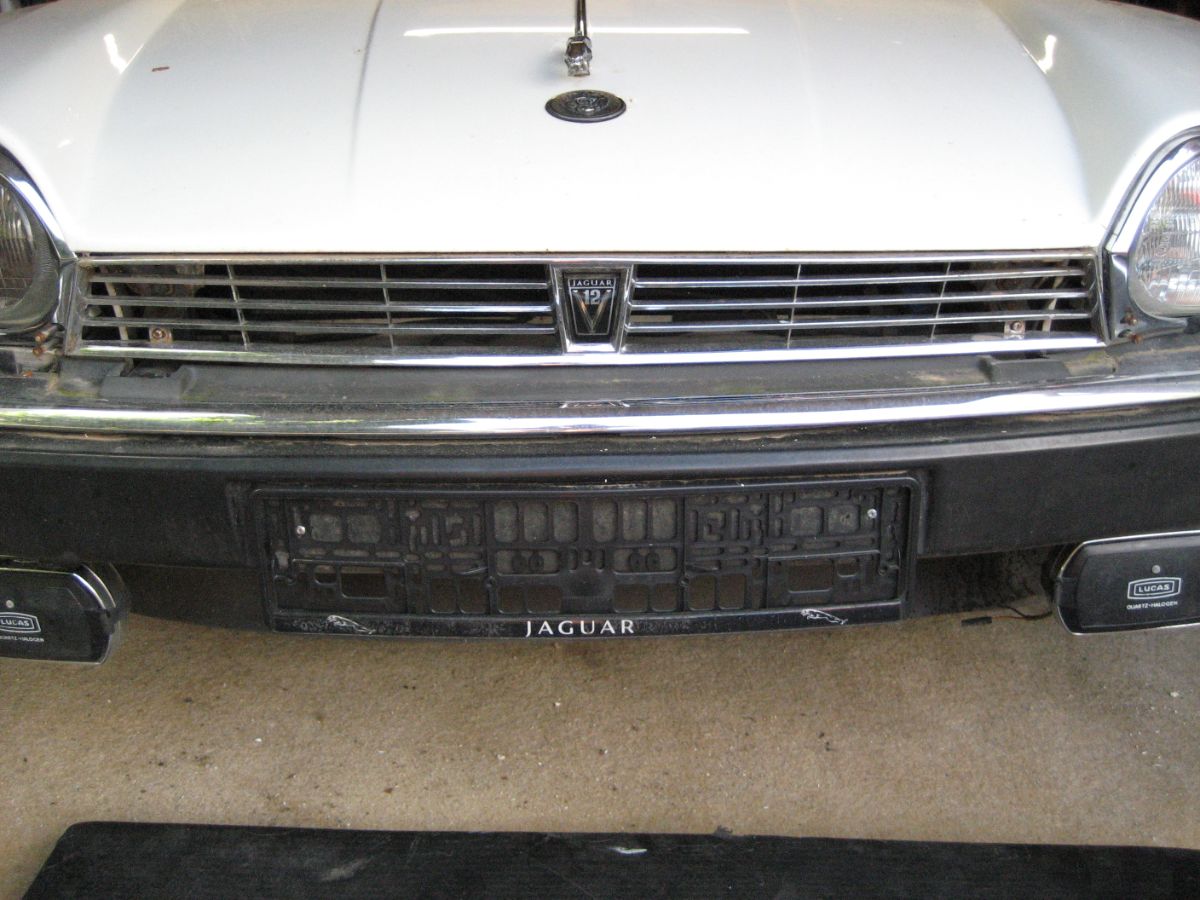
The grill was the first – held on by 2 self tappers. Then the rubber coated bumper, which is secured from the 2 front bumper irons. There was some surface rust on the inside of the steel bumper, but nothing terminal. It will clean up nicely. The drivers side indicator lens was missing so I will need to source a replacement.
Next the chrome blades that sit above the bumper and the plastic plinth in the centre. This was a bit more tricky. The bolts clamping the plinth between the 2 oval washers were rusted heavily and a few sheared. Also the headlamp wiper motors needed removing to get access to one of the bolts.
The headlamps themselves, being the UK variant, simply un clipped from their 3 brackets, however the brackets themselves were held with phillips headed bolts which were partly mangled by a previous owner and heavily rusted in place. I had to drill out 4 of these to release the brackets.
Finally I removed the lower grill (in front of the oil cooler) before unbolting the bonnet hinges and removing the bonnet.
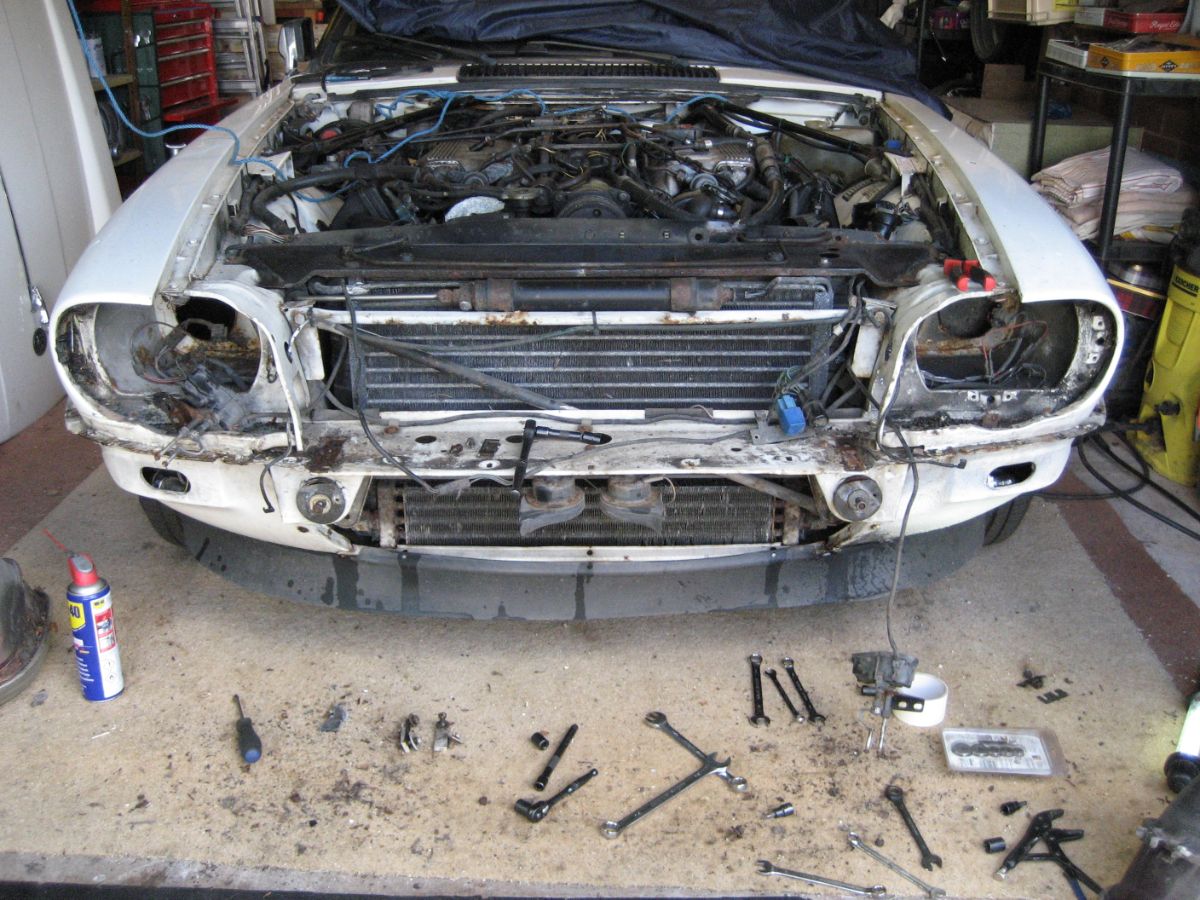
Looking inside the front wings I was pleasantly surprised. The panels enclosing the headlights were almost rust free.
Passenger Side
Drivers Side
Rear End
Front