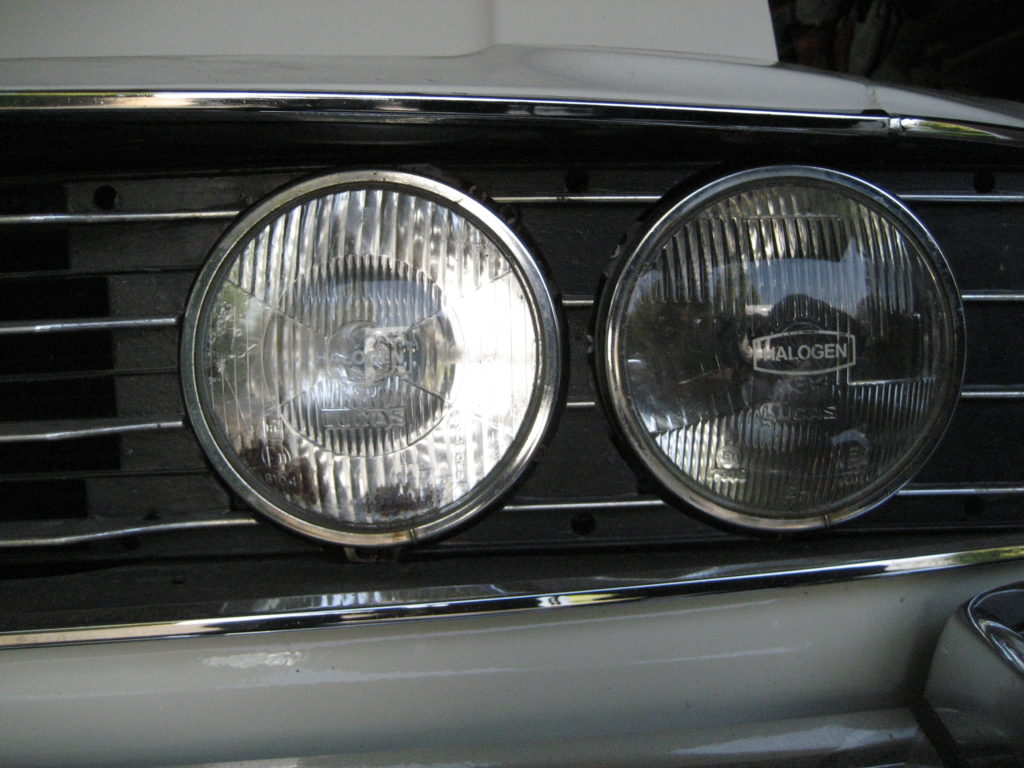
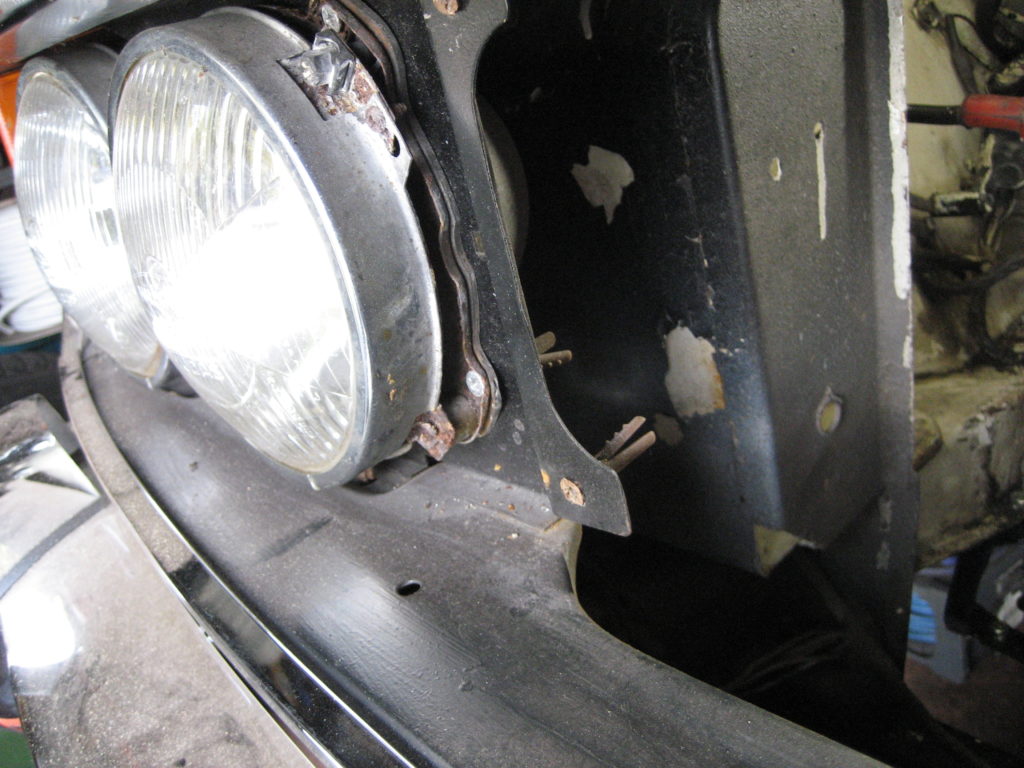
I am amazed sometimes by what some restorers do to old cars. I could see the reflectors were rusted so I removed the grill segments to get at the headlamps. What I found was that the headlights and grill were held in by wood screws and rawplugs. Ok – 10 points for inginuity, but I couldn’t live with it. So out it all came.
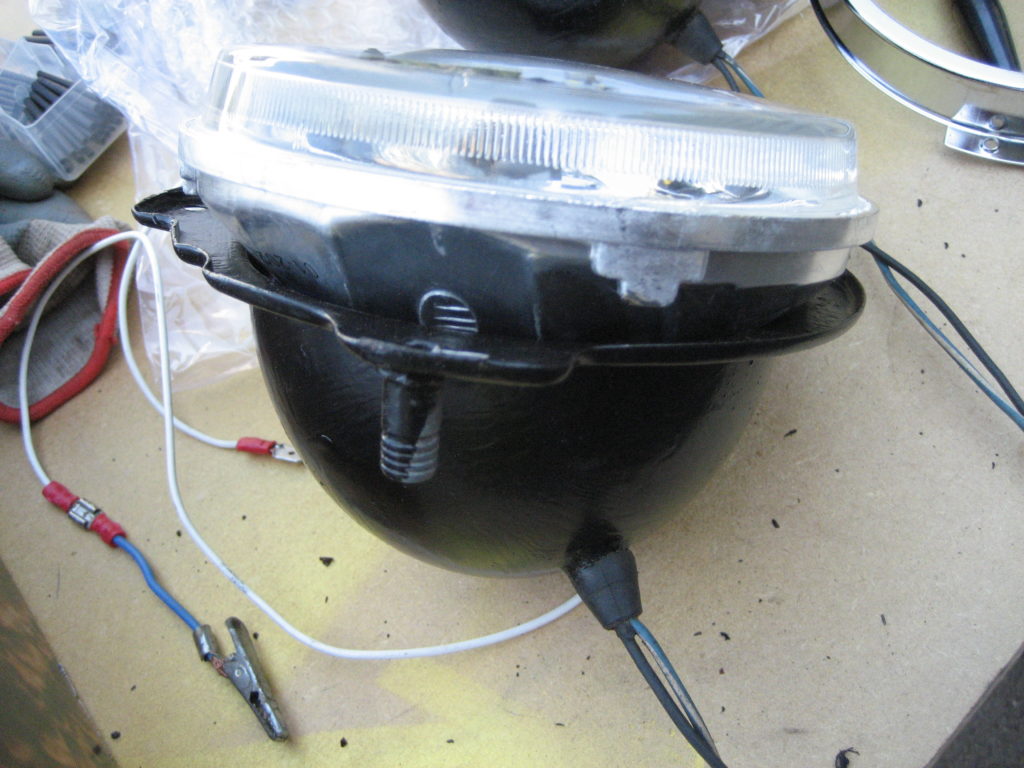
The reflectors on all 4 headlights were shot, so I found some “like for like” replacements on E-Bay (Crystal Halogen). Whilst I waited for delivery, I cleaned up the original steel headlight bowls and gave them and their surrounds a new coat of paint. Unfortunately when the new lamps arrived they didn’t fit into the refurbished bowls, so they went back and I ordered some more (MK1).
Worse still I found the wiring for the headlights consisted of stripped and twisted copper with no insulation, where someone had patched in replacement sidelights. This was a vehicle fire-ball waiting to happen. The wiring junctions have all now been replaced with insulated terminals.
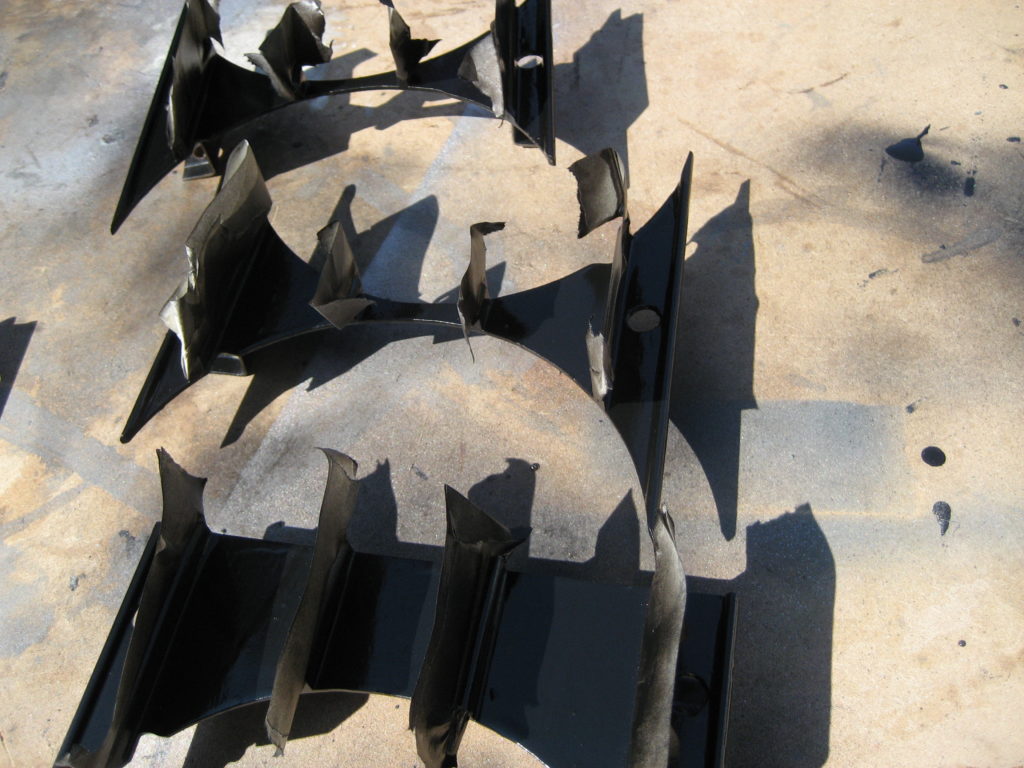
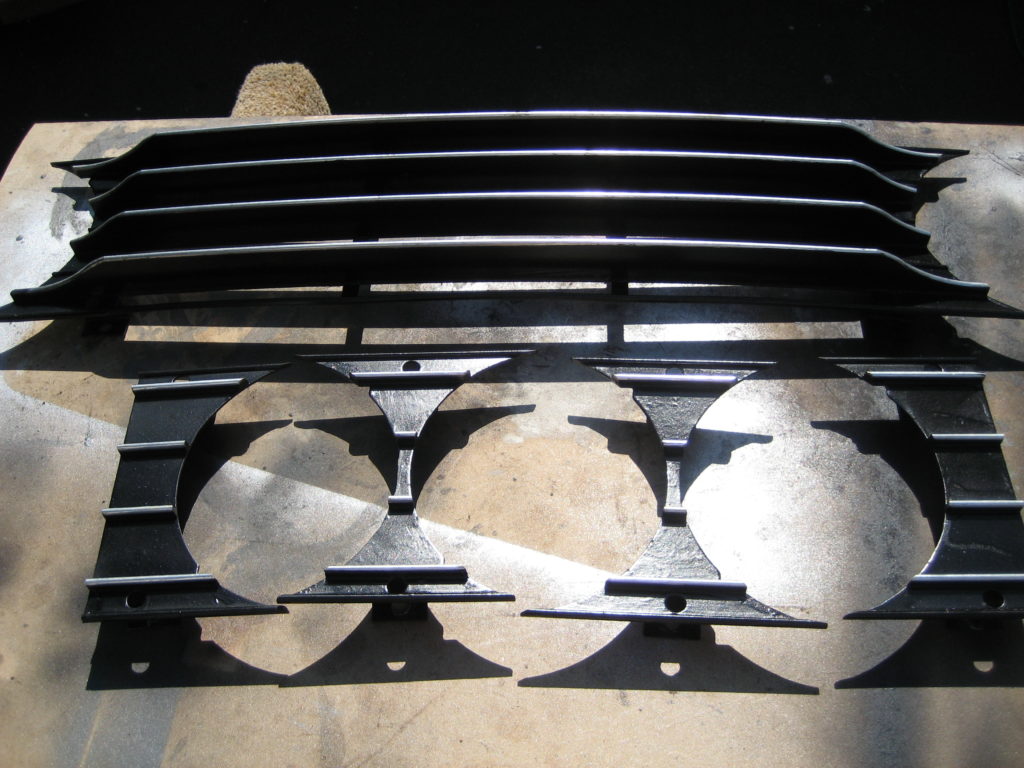
So while I wait again for the next set of lights to be delivered, I thought I would re-paint the grill segments. After cleaning they were tricky to mask, but the end result looks pretty good.
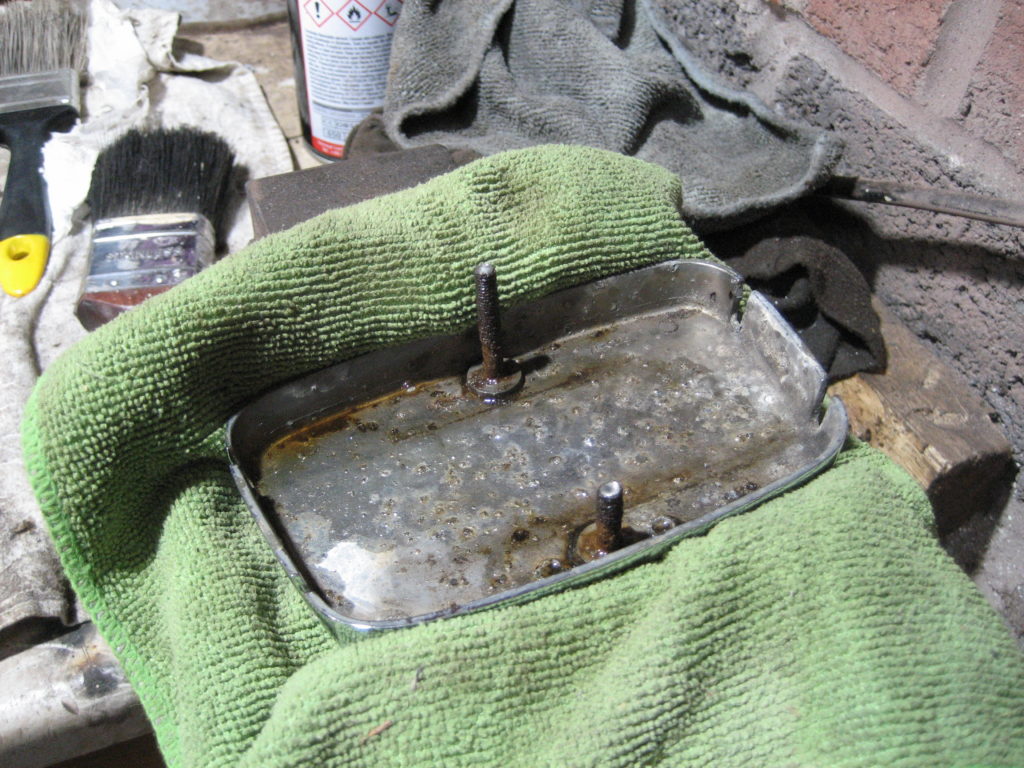
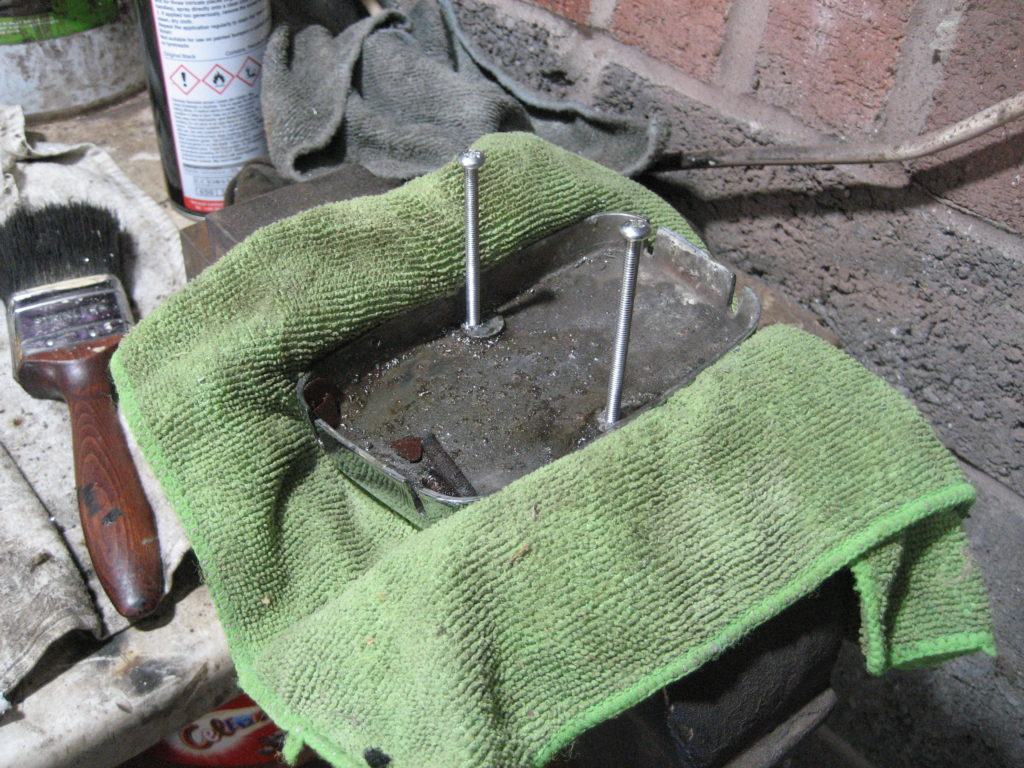
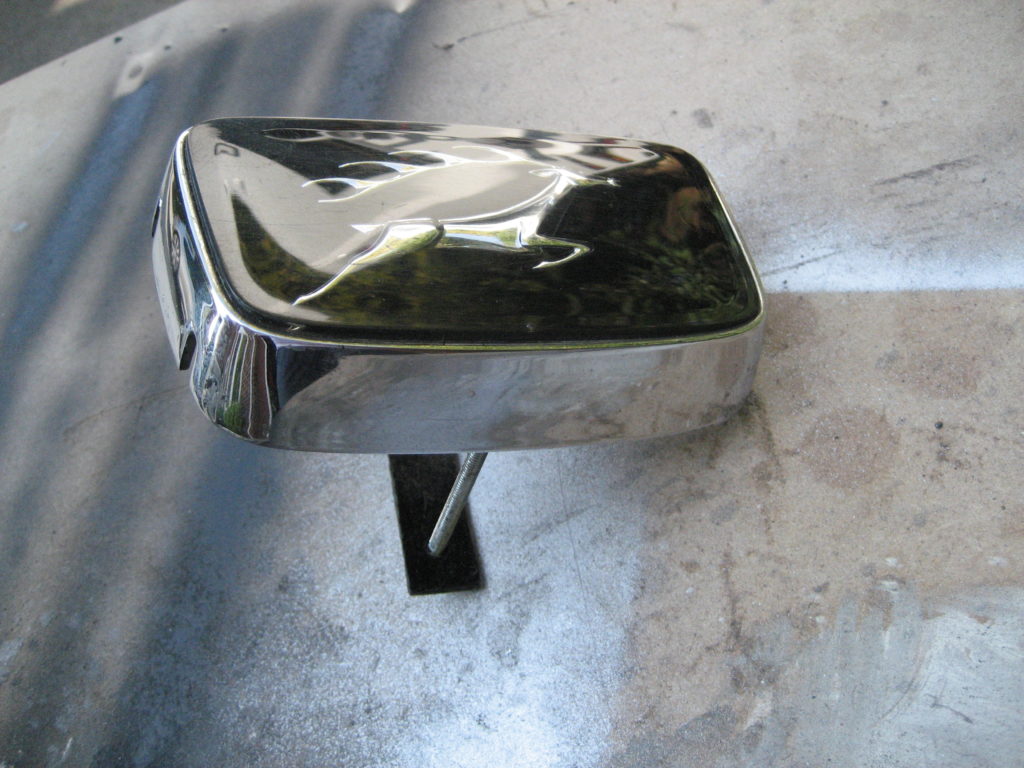
There is always a snag when doing almost any job on a Stag. The snag here was the grill badge. Both retaining bolts sheered when I removed it. I happened to find a couple of M4 replacements in my spare bolt box, so I drilled and tapped two replacement threads – good as new.
With the cooling system now upgraded and all the fluids back in place and topped up, I ran the engine to temp to check everything was working. 3 problems:
The top hose poped off once the engine was warm;
There was a fuel leak at the joint of the steel fuel pipe and the rubber hose at the rear;
There was a puddle of fresh oil.
The first 2 were easy fixes – done in a few minutes. I did some research on the third.
There are some usual suspects when it comes to oil leaks on a Stag. The cam covers can leak through the cork gasket, the half-moon rubbers or the cam cover screws. Underneath the oil pump has two internal seals that can leak along with a 3rd between the pump and the block. Then there is the oil transfer housing that also has 2 seals that perish and/or harden over time and cause leaks. The final source of dripping oil after a run, is the rear crankshaft oil seal.
The rear crankshaft oil seal is the most onerous to change as it requires the gearbox to come out first. Not something to contemplate until all the others have been sorted first.
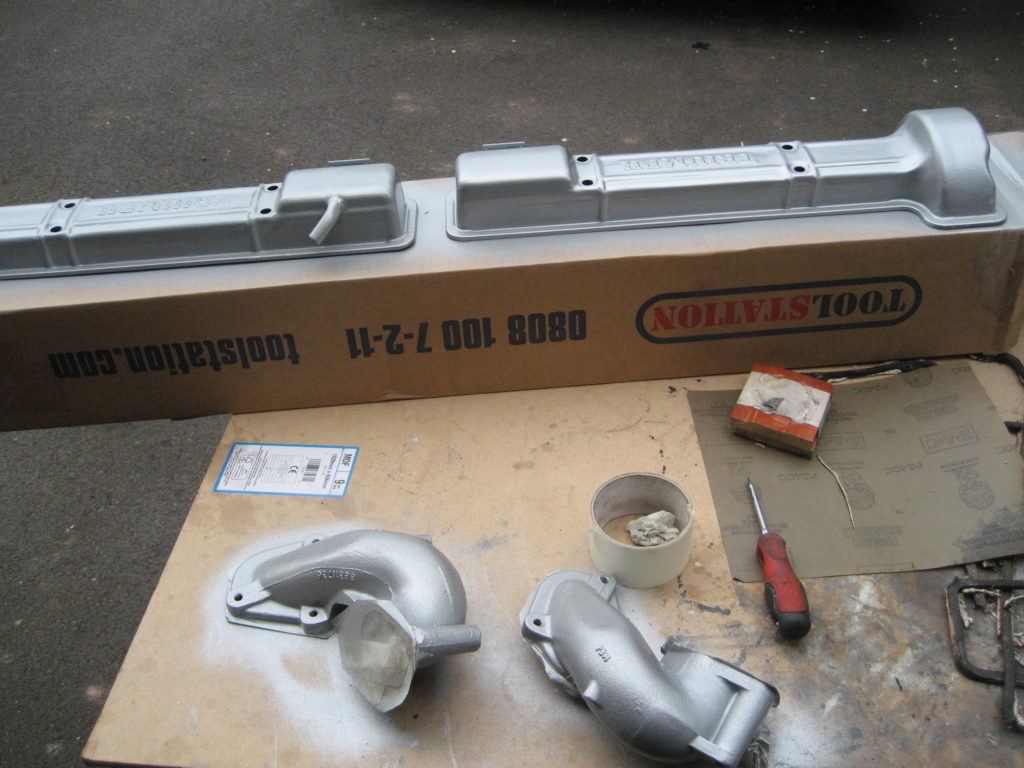
I started with the cam covers. They came off easily although thet need some cleaning internally as the gaskets had been held in place with silicon sealant. Having removed all of the sealant I decided to give them a new coat of paint along with the air intake elbows.
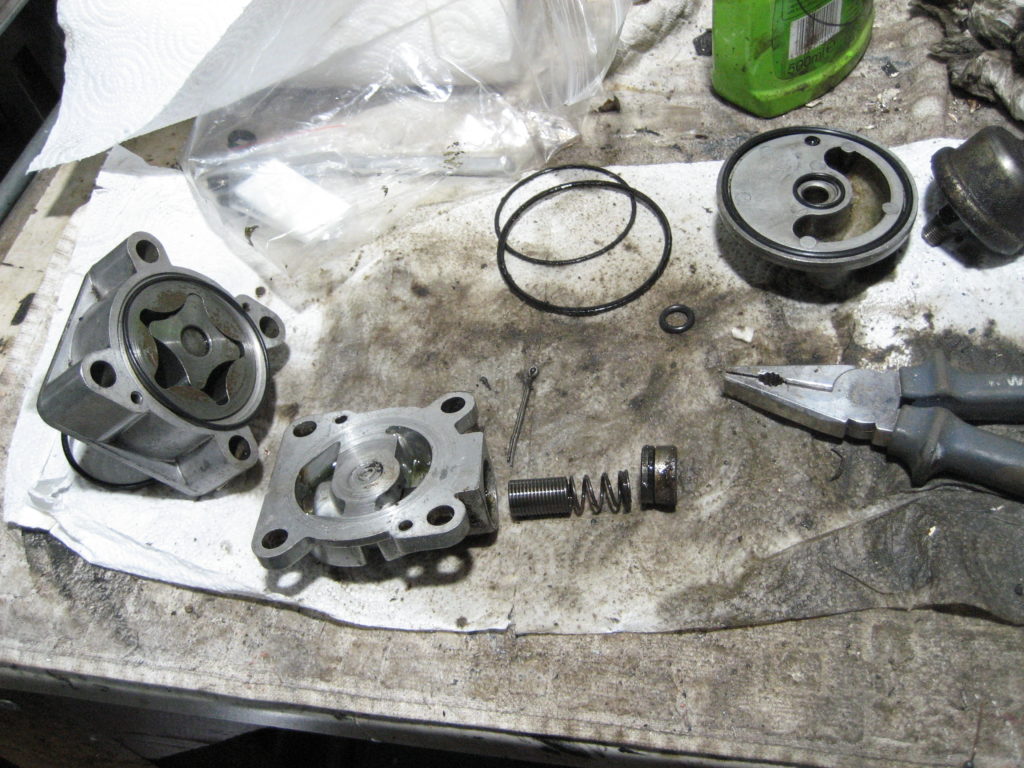
As these were drying I tackled the oil pump and oil transfer housing. Neither can be done from above – you have to get underneath and also remove the right hand exhaust at the manifold. You need to remove the oil filter first and then you can remove the oil pump and the transfer housing.
Replacing the seals is straight forward once the pump and transfer housing were cleaned. I did have a little trouble trying to figure outwhich new seal was which as they came all in one back together. In the end I stripped the pump and housing and laid out all of the old seals next to the new.
While I was had the pump in bits I also replaced the drive shaft. The old one had very little wear but I didn’t know that until it was stripped. As they are so cheap, I bought a new one just in case, and replaced it anyway.
The trickiest part of this particular job was replacing the transfer housing on the block. My stag is an auto with the BW35 box. The clearence between the Bw35 breather pipe and the oil sensor which is screwed into the top of the oil transfer housing is very tight. After half an hour of profanities, I managed to get it installed by
Sticking the sealing ring into the recess in the housing using a little flexible gasket sealant – as it kept dropping out of position;
Starting the thread of the oil sensor into the housing before refitting the housing – I couldn’t start the thread with the transfer housing in place, there just wasn’t room;
Disconnecting the sensor wire and re-connecting only after everything was tight.
I’ll re-asseble the cam covers tomorrow and turn the engine over to see if i’ve cured it.
Cam covers back on, but I haven’t turned her over. The reason – I used a very thin smear of gasket sealant between the head and the cork gaskets. Mainly because the half moon seals stood a little proud of the block, and I wanted something to fill a potential gap if they didn’t compress when I tightened the cam covers up.
I will leave it all to settle and seal and start it next weekend.
Update – 26th April 2020
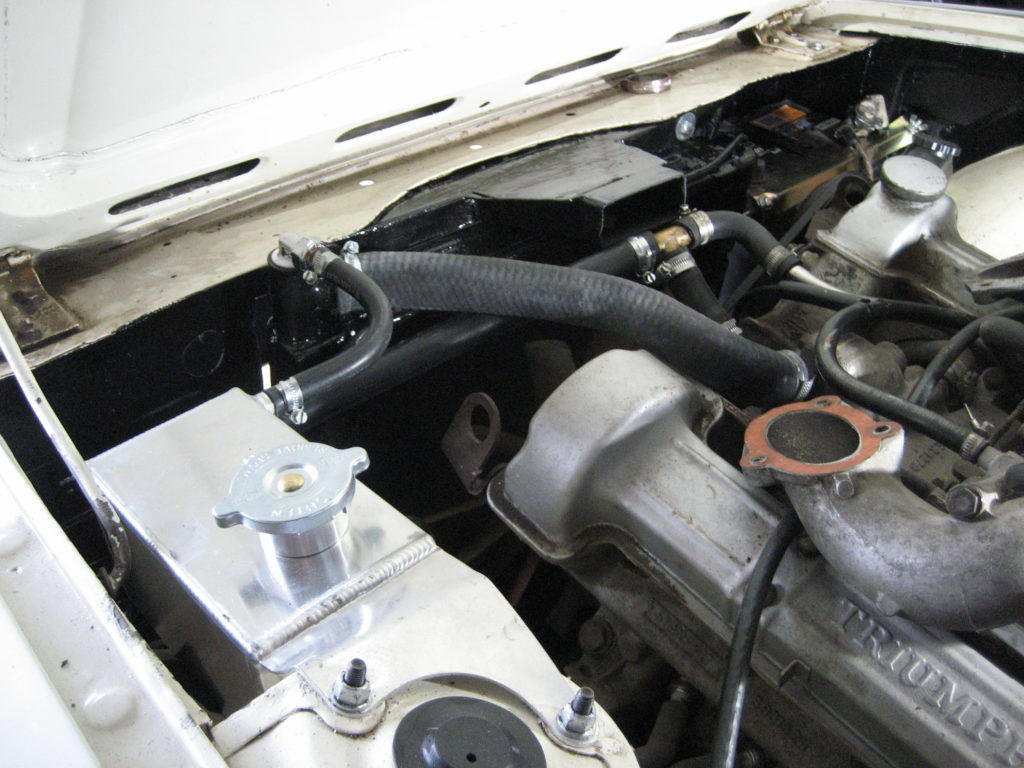
After the remedial work last week, I turned the key again. The re-connection of the radiator hose to the pump, had re-positioned the lower segment of the pipe so it interferred with the alternator again. This time I drained the coolant, removed the lower rubber segment and shortened it by a centimeter. When refitted this moved the pipe assembly out of the way of the alternator fan.
I ran it up to temperature once more – all well and NO OIL PUDDLE – success!!.
The automotive trade press has been dicussing this topic for many, many years. Namely, the problems with the Stag cooling system that caused the engine to overhead and the heads to warp. From the many articles I have read and the many knowledable folks I have spoken to, this was not an inherent design flaw, but more a symptom of poor build quality, followed by even worse ongoing maintenance.
The root cause, in many cases, was that casting sand was not fully flushed from the block during production. As the engine was in use, the casting sand migrated into the radiator and slowly silted it up, greatly decreasing it’s efficiency. Alongside this, the inherent electrolytic reaction between iron and aluminum at the heads also became a problem if the coolant didn’t contain inhibitors that prevent it.
If the radiator and coolant was regularly flushed / cleaned / replaced, then these V8s ran fine, and of course sounded georgeous with that off-beat firing order.
Anyway, it was time to refurbish mine. I removed the radiator and flushed it clean inside, then gave it a coat of paint to tidy it up along with the air intake duct above it. Whilst the radiator and pipes were out of the way, I also painted the inner side of the front valance and the headlamp panels.
Another issue with the Stag engine (not mentioned above) is the positioning of the waterpump. If the cooling system is kept in good order then this feature of the design doesn’t present itself. However as the car ages and the pipe joints get a little worn and tired, then air can leak into the cooling system. The water pump happens to be the highest point in the circulation system, so this is where the air ends up. Spinning a dry pump never ends well.
To help prevent the above, I have purchased a complete set of new hoses and a StagWeber Header tank, alongside the fresh anti-corrosion anti-freeze. Re-plumbing took a few hours, not because it was complex but mainly to position the header tank correctly and the make sure the lower radiator pipe was positioned so it didn’t snag the alternator or power steering – tricky.
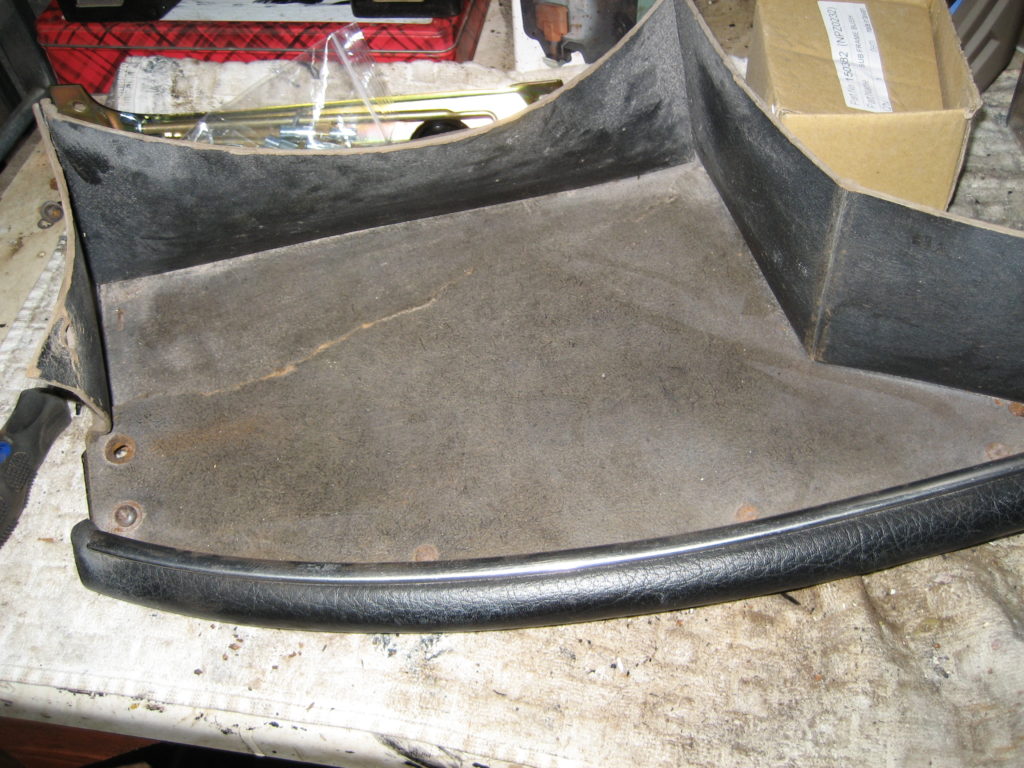
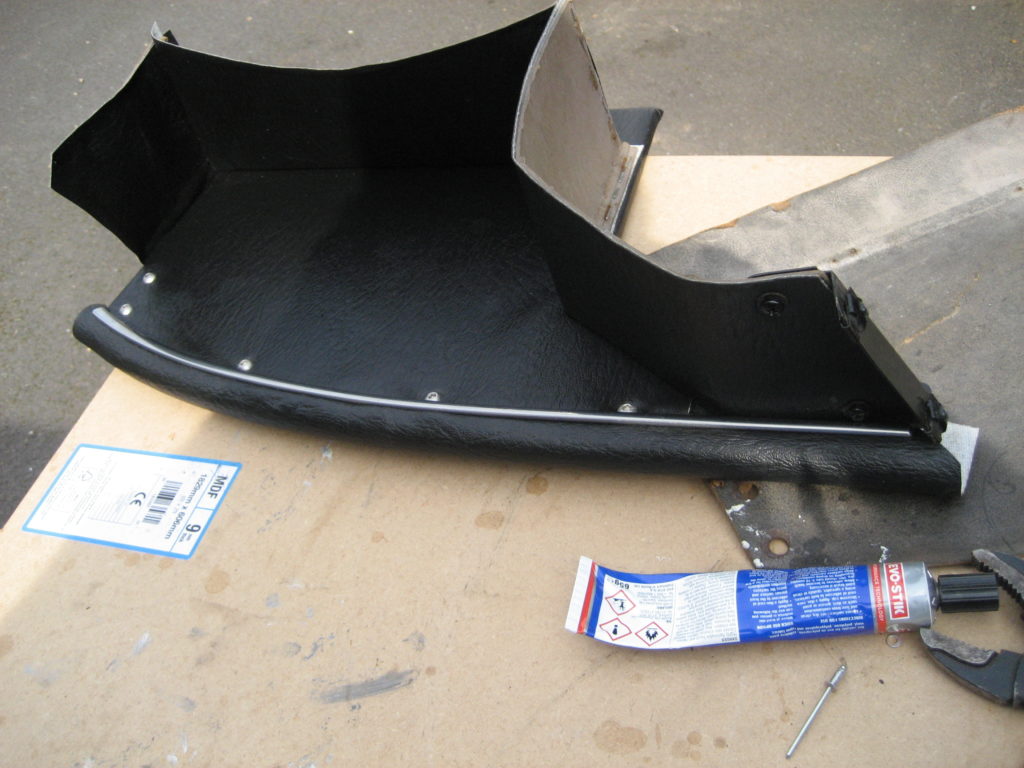
The parcel shelf under the glove box on a Stag is another weak point. It is made of little more than cardboard, and 47 years on it is looking decidedly worse for wear.
Instead of replacing like-for-likefrom Rimmer’s Catalogue, I thought I would upgrade, by making a new one from MDF and some spare vinyl. A little time, some evostick and an industrial stapler later, and I think it looks better than the original (and is definately more robust).
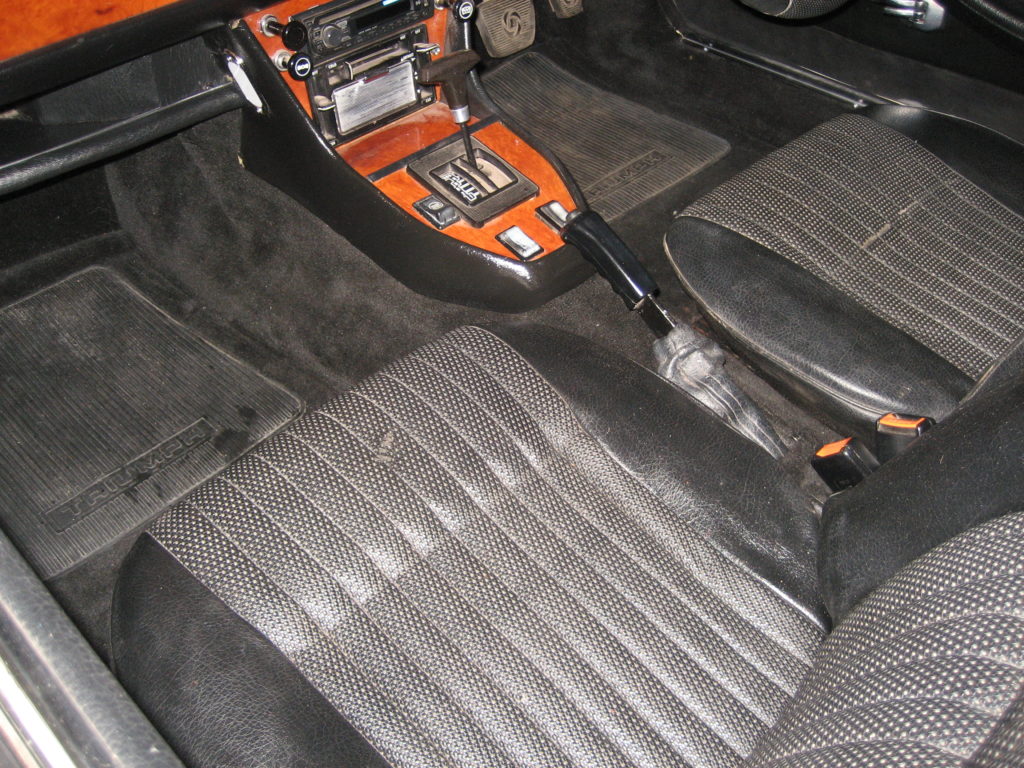
I wanted to get the parcel shelf back in before I finished the carpets and put the front seats back in. It’s much easier to install when you can lay in the car, rather than leaning over the passenger seat.
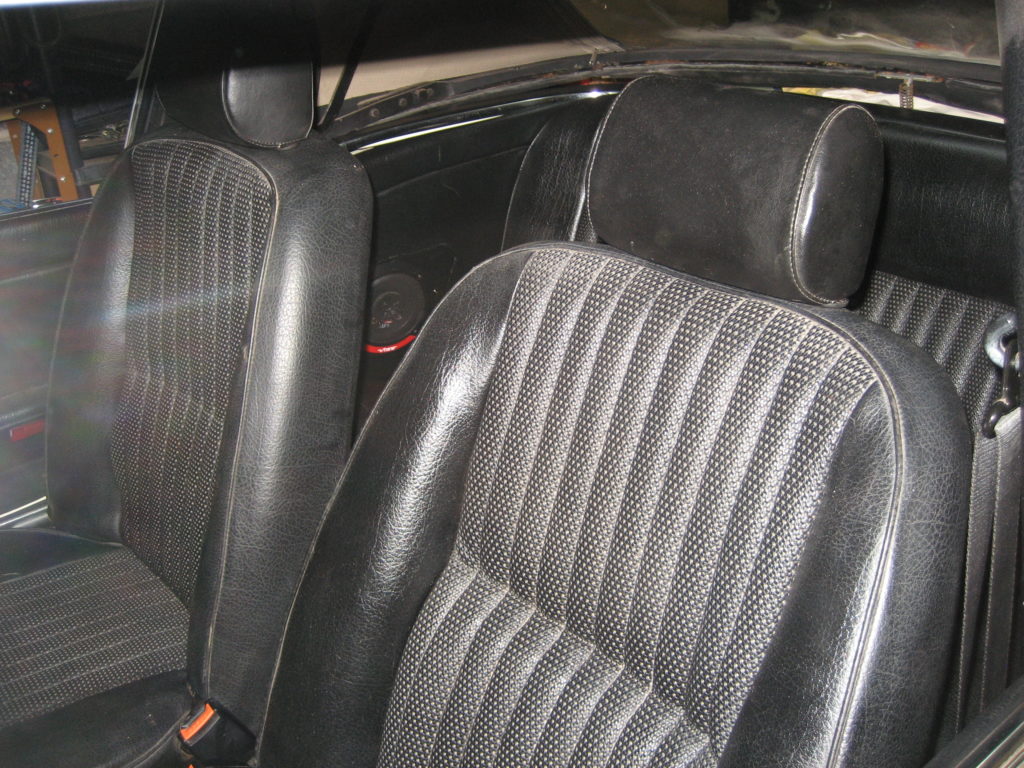
Re-trimming the cabin didn’t take too long once it was in. I had already done most of the hard work in the reburb and cleaning. With everything back in and sparkling, my eye is drawn to the small rips in the drivers seat covering. When I refurbished them, and in the context of the car as it was, I thought I could live with it. Now everything around it is clean and tidy once more, it stands out.
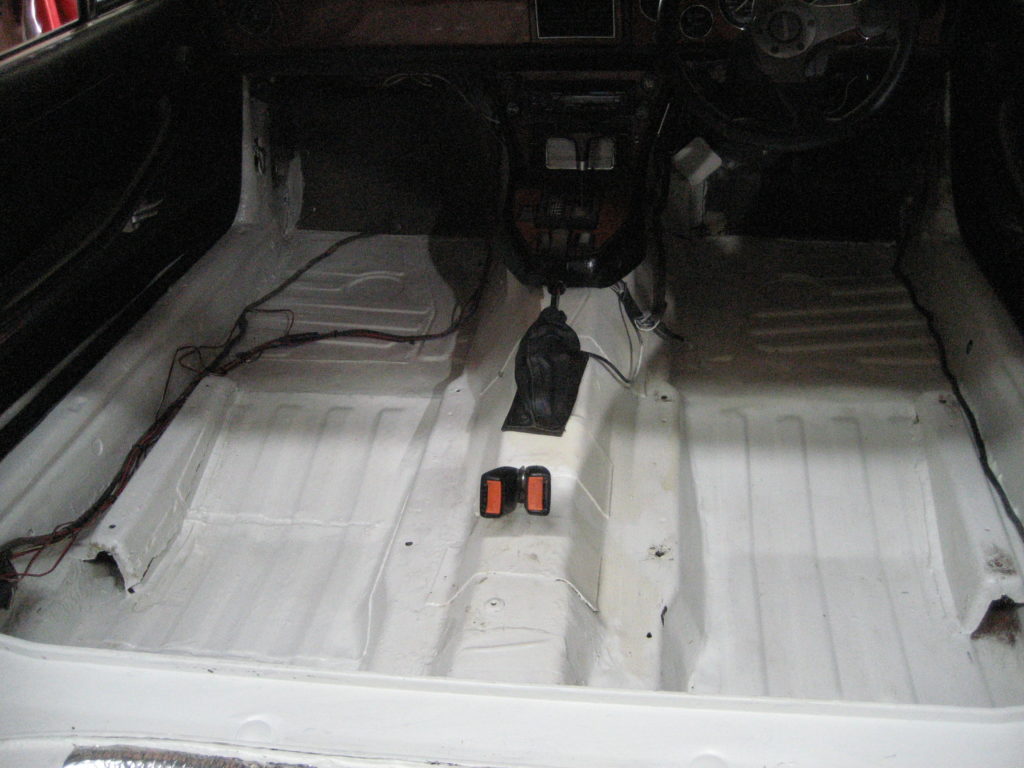
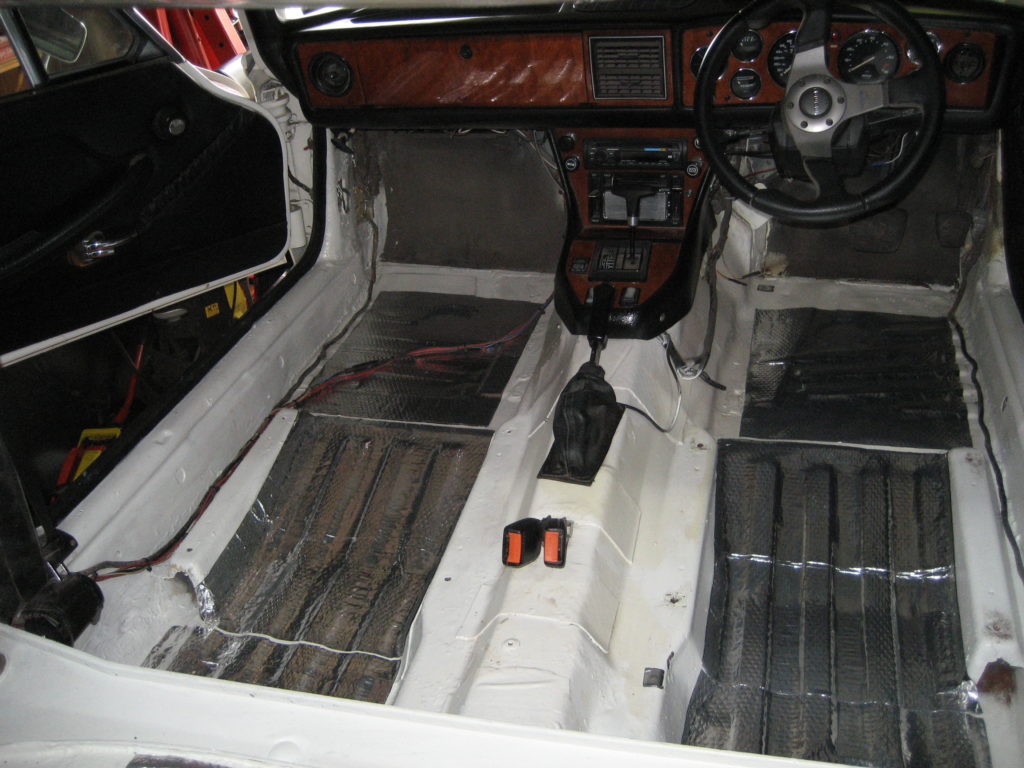
I am amazed how much dust and crud is generated by an angle grinder. The inside of the Stag was a real mess. So out it all came – well what was left anyway. Then the vacuum cleaner, detergent and a coat of epoxy paint. Looks better already.
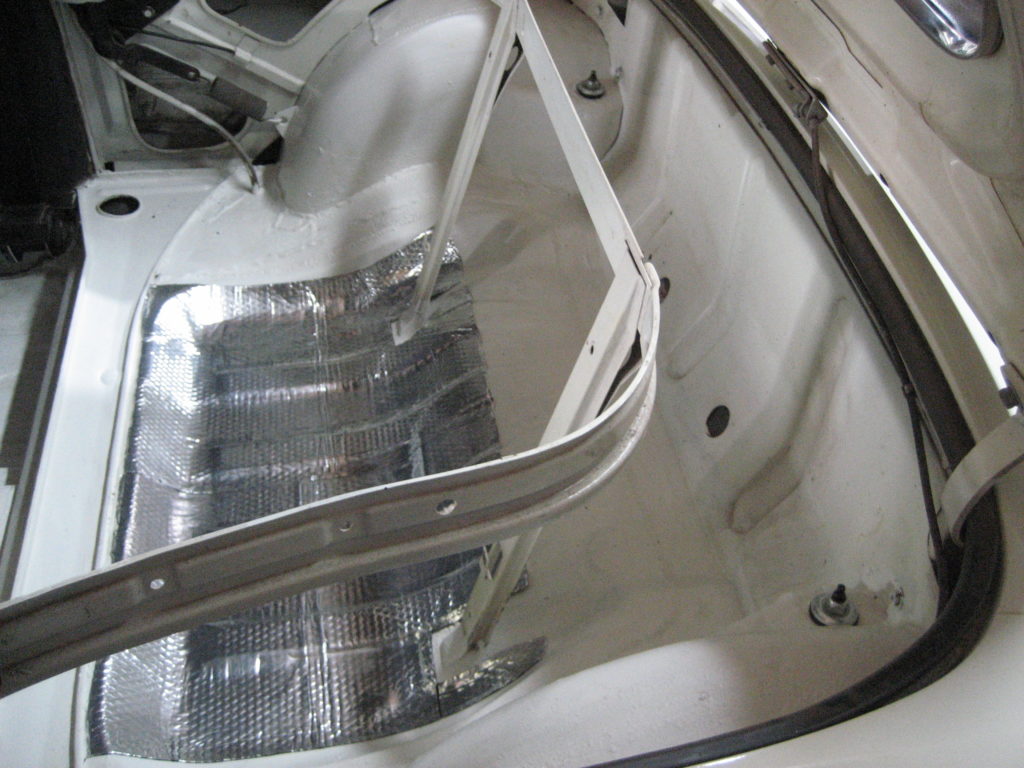
With all of the welding and panel replacement, the sound deadening pads were removed along with the rust. Rimmers are rather expensive so I sourced some via Ebay. Much bigger sheets, so I’ve covered both passenger and driver floors and under the rear seat.
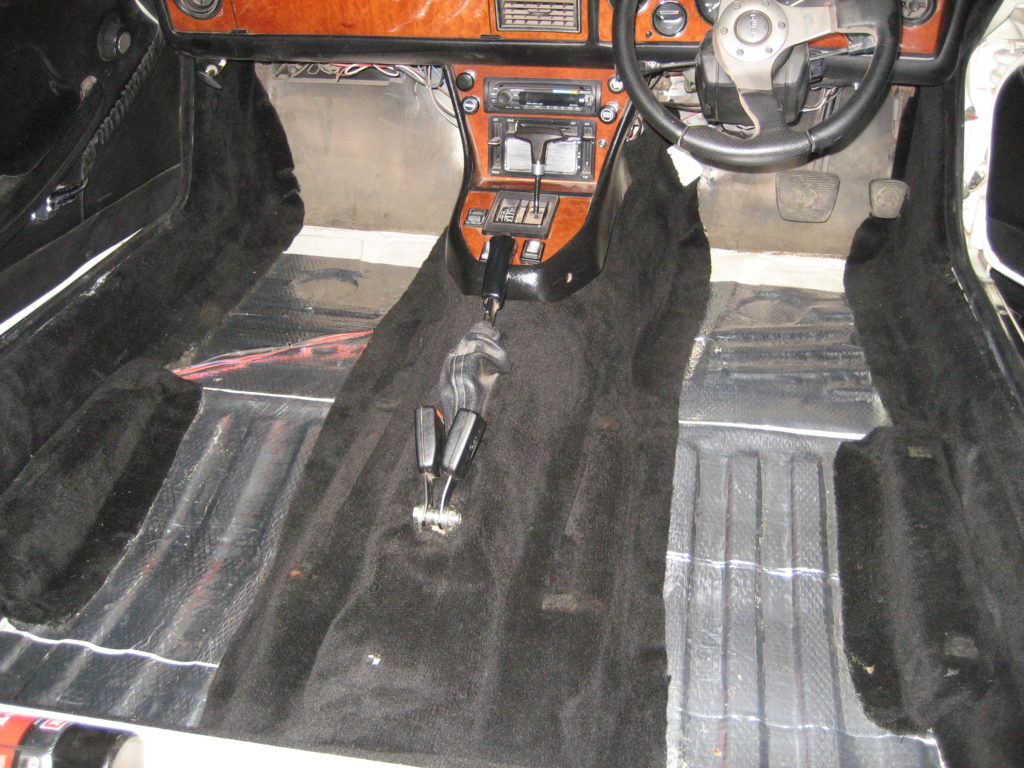
Next the carpets. My wife was horrified when she found me. In the kitchen, sitting on the floor, with all of the Stag carpets around me, and her precious carpet cleaner. They came up a treat. A few bare patches but nothing so bad as I need to spend £500 on new. I used some spray-on Evostick to place the edging peices.
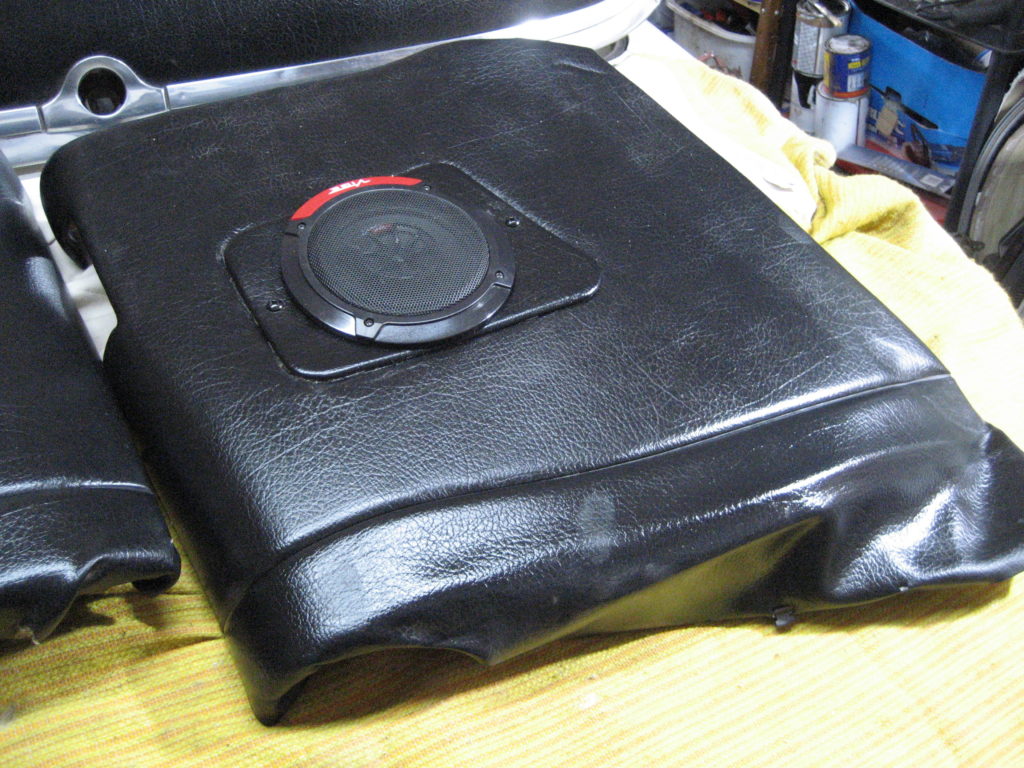
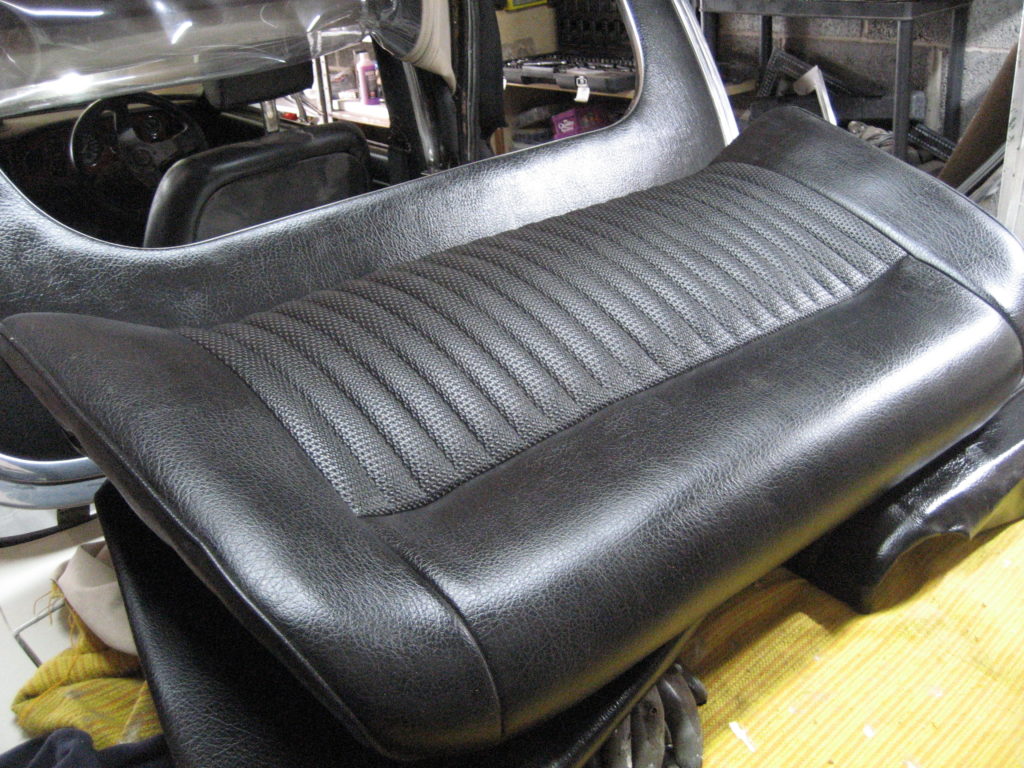
While the glue was drying, I turned to the seats. I have already refurbed them, but they got covered in crud over the last few months work. A good clean later here they are along with the rear side panels where I also installed a couple of speakers.