|
My plan today was to build a new set of gates for my Mom in Wales. Her’s had rotted and blown apart during th recent gales, so I thought I would pop over, take her for a nice Mother’s Day lunch and start building the new gates. Covid 19 has put paid to that as my Mom is 78 and therefore in a vulnerable group. Next on my list was a game of golf as the weather was forecast to be clear and dry. Although the Golf Club was open, it is not essential travel so, in line with the current guidence, I haven’t travelled. So, it was back to the garage – what a pity 🙂
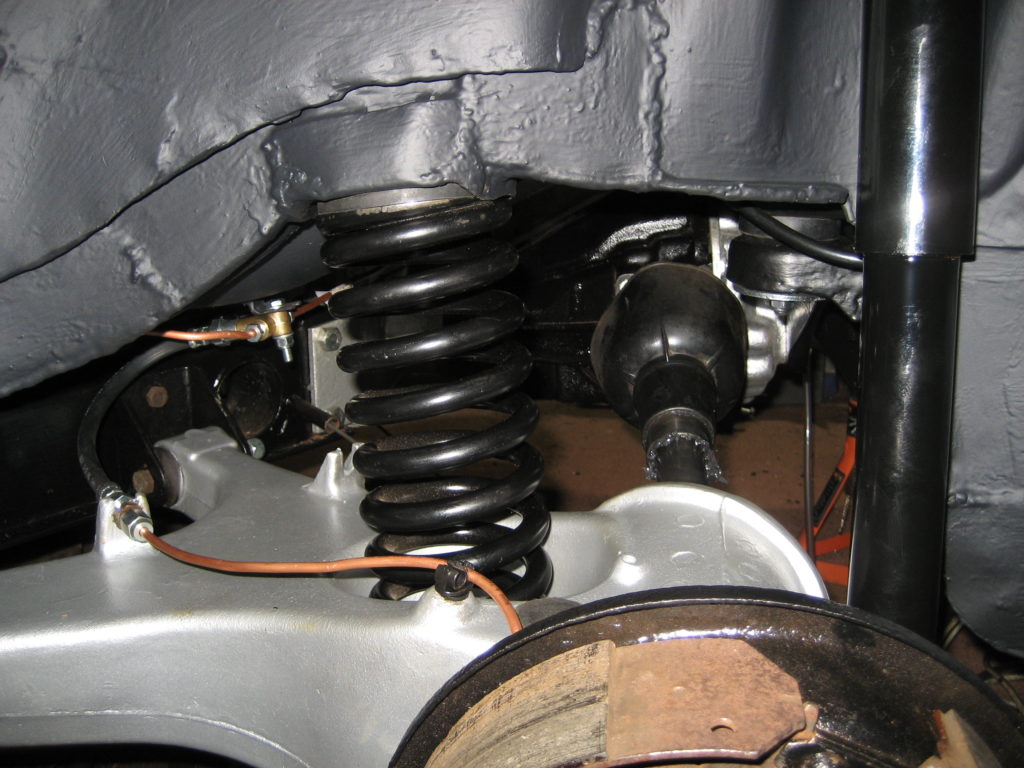
Todays job was to start the re-assembly of the rear suspension. Starting on the passenger side, my aim was to build up the suspension gradually on the vehicle, rather than assemble it off the vehicle and then fit it as one peice. My reasoning was simple. I am doing this by myself with my limited equipment in a domestic garage. A complete rear suspension is just too heavy and cumbersome to move around when you are solo.
Anyway, the first task was to re-couple the trailing arms to the rear sub-frame arms. I had already replaced the bushes so this only involved a little silicone spray and easing the bushes into the steel brackets on the already assembled and painted sub-frame arms.
Then I fitted the trailings arms and sub frame to the quill shaft sub-assembly with the aid of my small trolley jack. Next I connected the inner drive flange to the diff and torqued the 4 bolts up tight. The sequence of re-assembly I chose was because I thought that it would be easier to torque up thes bolts whilst I still had reasonable access. It was, but aligning the inner and outrive shafts was not easy later on.
The main sub-frame bush was connected next through the car body and the ant-vibration strap. Follwed by the outer drive shaft, gaiter and dust cover. As I mentioned above, the precision nature of the inner and outer drive shafts makes it difficult to mate them together whilst also supporting the weight of the hub and brake assembly. I may try assembling the full drive shaft / brake assembly and the trailing arm before I attach to the diff on the driver side – it may be easier.
Finally I installed the new spring, mounting rubbers and shock absorber. I didn’t have time to torque all of the bolts or close the gaiter with tie wraps, but I was very happy with the progress today.