
 |
It feels like I’ve turned the corner. All the welding is done: chassis and floor panels. The under-side has 2 coats of Rustbuster epoxy mastic paint and 2 coats of stone chip. Its now time to start putting the rear end back together.
First was a replacement brake pipe between the PDWA and the 3-way connector under the boot floor. Whilst the propshaft was missing, this was quite a straight forward job, especially since I had purchased some new brake pipe / fuel pipe clips and simply replaced the existing ones along the transmission tunnel.
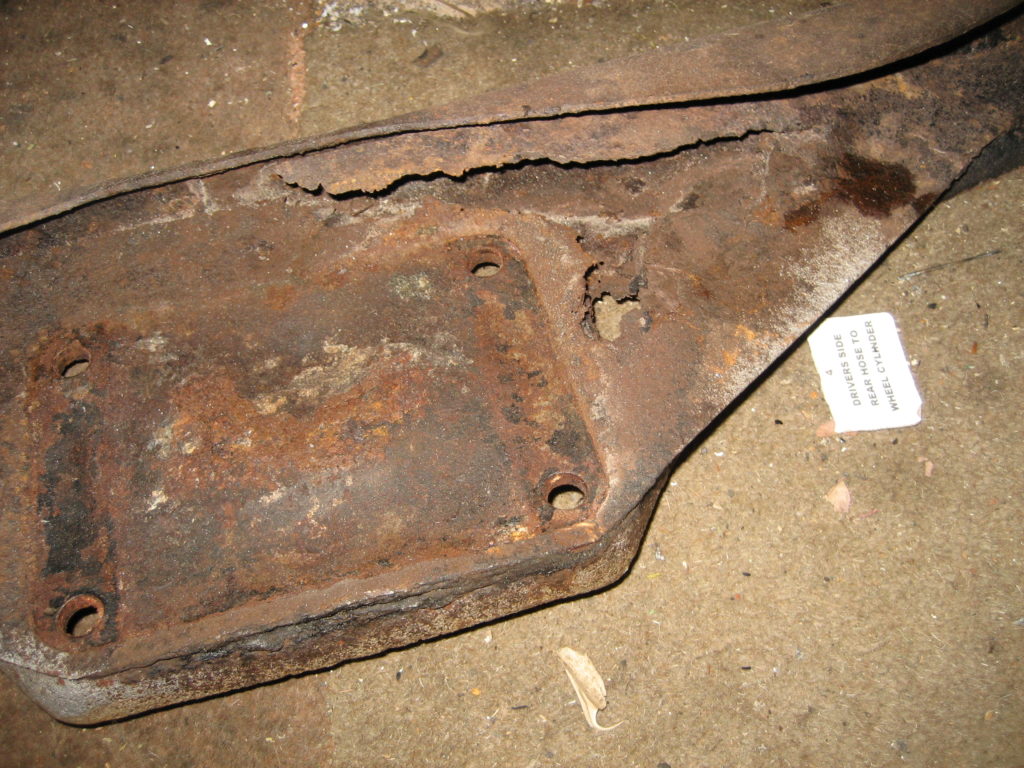
Now to the differential and prop shaft. The photo below is the old diff mounting panel. It was scrap along with the backplate of the diff itself. I found a second hand mounting panel, cleaned it up an painted it. Then swapped the diff for a reconditioned one. As you can see, it looks as good as new now.
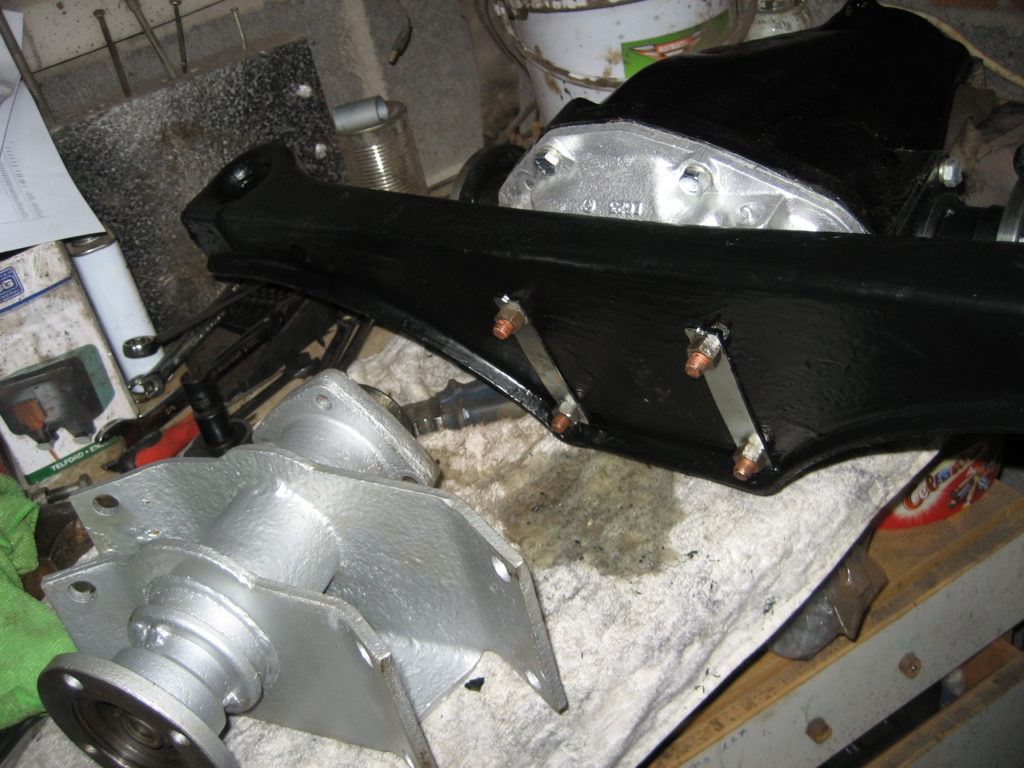
As I mentioned in a pevious post, I had already refurbished the quill shaft assembly, so once I had mated the diff to the mounting panel, I attached the quill shaft to the other end. I then torqued up the bolts to the settings in the service manual – see the Torque setting page.
With the aid of my trolley jack, I manouevered the assembly into position under the mounting pins and sandwiched the mounting panel at both ends with new rubber top and bottom mounts and a shiney new lower washer. With the jack taking the weight it was simple to add the 1/2″ nylocs and torque them up. I left the jack taking the weight and re-connected the prop shaft.
I torqued up the 4 connecting bolts to the right settings and managed to damage my left shoulder in the process. The problem was that the torque wrench has a much longer handle than my 1/2″ spanner, and since the prop shaft was able to rotate, my left arm had to mitigate the torgue produced by the longer torque wrench whilst lying under the car. Ouch. That’s enough for today.