
As I have mentioned in several previous blogs, I have never been happy with the operation of the IACV. I believe the car only starts and idles because of two opposing problems: the first is that the IACV was wired back to front so even though it is turned off in the ECU it still remains circa 70% open when the ignition is on; the second is the diameter of the pipes leading into and out of it physically constrain the air flow. Together, these issues allow just sufficient air to the plenum to allow the car to start and idle (albeit very fast 1250 RPM warm idle). If I am right, then there is a third unseen problem. The airflow via the IACV is constant and un-metered, which means that the engine will be running lean. The proper answer is to install the IACV correctly along with a Lamda sensor and run closed loop, but I haven’t the time or inclination to do that at the moment since I have registered for the GBS Track Day at the Nurburgring in 2 weeks time. My priority is the get the car operating in the most reliable and predictable fashion ready for the trip to Germany. So I have decided to remove the IACV and revert the idle control to a simple throttle stop on the butterfly.
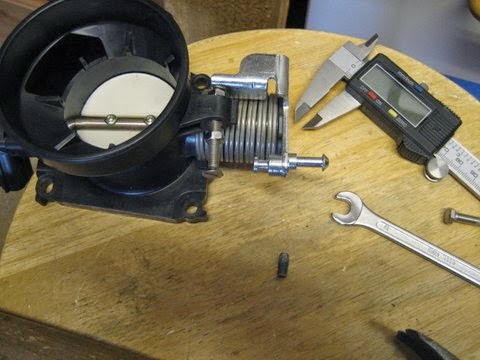
As you can see from the photo, it is quite a straight forward process to remove the threaded lug and replace with a standard bolt and a couple of nuts to lock it into position. The throttle can then be re-installed on the end of the plenum.
The real work in this job isn’t mechanical but it is in the trimming of the idle set-up in the ECU for warm idle and cold start. I found some instructions on the Emerald web site for trimming the warm idle:
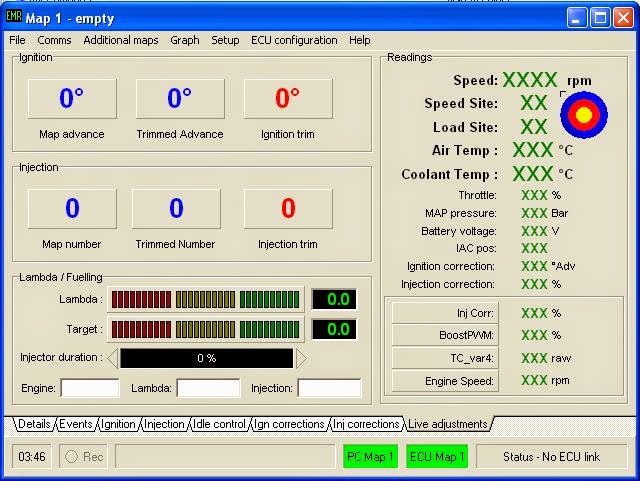
If you disable the idle stabilisation function (as found in the “Idle control” page) and the overrun fuel cut off function (as found in the “Events” page) it will prevent these functions from hindering rather than helping while you initially get the engine fired up, throttles balanced and the idle set.
Assuming that the ECU is locking onto the crank sensor signal ok, then the main task is to get the engine fired up and up to temperature. This may (will probably) involve holding the throttle open slightly while you adjust the idle screw to hold the engine at a sensible rpm.
The next bit is a bit of a juggling act – you want to make sure that the fuelling is somewhere right, so just use the fuel trim keys (2 & 3) in the “Live adjustments” screen to add or take away fuel so the engine runs as smoothly as possible.
Once you’re happy that the engine is running smoothly, the engine rpm is ok for a hot idle speed and the throttles are fairly well balanced, you can shut the engine off and re-align the throttle position sensor via the PC software. Switch the ignition off/on (if you haven’t already) just to ensure that everything (e.g. fuel trims) are cleared, and re-start.
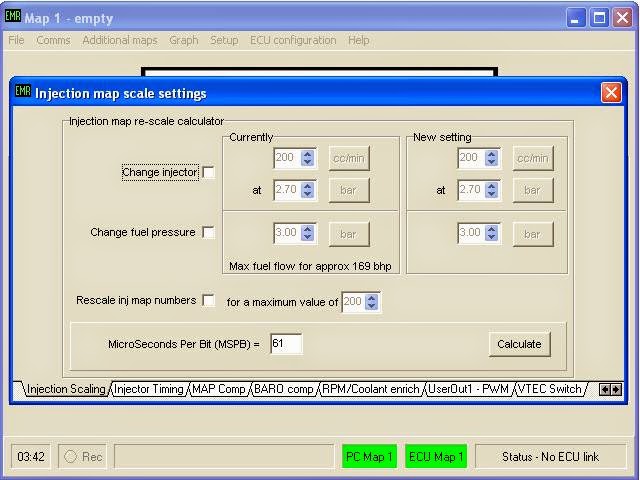
If you make changes to the MSPB number, keep the changes fairly small each time, (say steps of 4 or less) and remember to program the map to the ECU for the MSPB value change to take effect – you can do this with the engine running. The base map should get you most of the way there but the idle fuelling and very light throttle settings are most sensitive to injector/fuel pressure/engine differences so often require a little more attention and fine tuning.
Here is the link to the technical article on Cold Start Calibration.
Emerald_Cold_start_crib_sheet.pdf
Even though I am not an automotive engineer, following the process resulted in an engine that idles smoothly and starts without a problem from cold – albeit cold equating to 10 degrees at the moment. This may need some more work in the Winter.