Front Suspension Refurb

Dismantling:

The underside of the car is now clean and ready for repair and painting. To improve access I might as well remove some of the obstacles, for example the front suspension.
I need to do this anyway as the bushes look perished on the track control arm and anti-roll bar mountings. As they all look a similar age, then it’s probably worth replacing the lot. I’ll dismantle first and then decide.

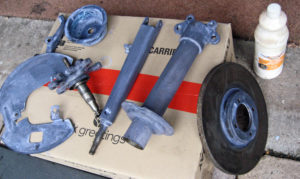
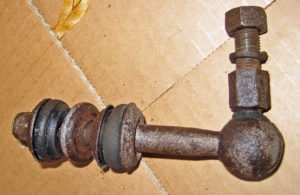
The first step was to disconnect and drain the brake calliper. Followed by compressing the road spring (carefully and safely) with a set of spring compressors. With the tension released from the suspension, I could then break the taper joints on the track control arm ball joint and anti-roll bar ball joint. Releasing the anti-roll bar ball joint was quite straight forward. A couple of sharp blows with a hammer and it dropped apart. The track control arm ball joint put up considerably more resistance. In the end the joint gave up and disintegrated into it’s component pieces. One way to get it off I suppose.
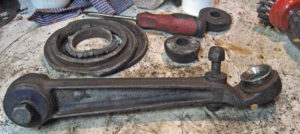
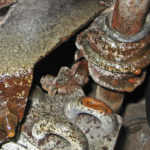
I then disconnected and removed the drag strut, suspension leg and hub. That left the wheel arch free and open to complete the repairs apart from the anti-roll bar itself. With the engine and alternator in place the mounting bolts for the anti-roll bar bracket on the drivers side are a bit tricky to get to. Made more so by the fact they were initially seized. Patience, penetrating oil and brute force eventually proved over-whelming although the car did exert some revenge , by snapping a Halfords 1/2inch socket and removing the skin from my knuckles.
Disk Brake & Calliper

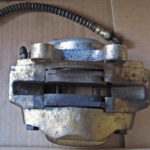
With the major front suspension components off the car, I could work on each of them on the bench. After removing the brake calliper it looked fairly new and the pads were hardly worn. I think this just needs degreasing and an new coat of paint.
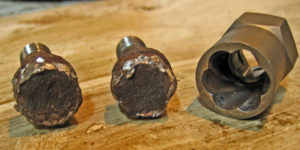
Removing the disk from the hub should have been straight forward – after all this is a regular maintenance job. But no. Even after soaking in penetrating oil,  2 of the retaining bolts wouldn’t budge. To compound the problem my 9/16″ socket has side walls too thick to fit properly around the bolt head. So I used a metric 13 which eventually rounded the heads of both seized bolts.

What to do?

Well if in doubt Google it. Sure enough there is a readily available tool called a grip nut remover tool. After reading some reviews the best one seemed to be the Irwin brand which arrived next day courtesy of Amazon Prime. It worked a treat – plenty of penetrating oil, some heat on the hub and a pri-bar behind the Irwin socket and the seized bolts both started to move again.
Suspension Leg

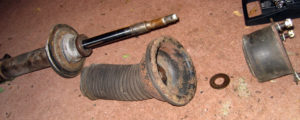
I was hoping not to have to replace the dampers, but on extracting the damper from the strut, there was a pool of damper oil in the strut.  This type of damper was the original fit.   So a new set of dampers along with bushes, gaiters and insulator pads are all needed for peace of mind. Thankfully the hub bearings and stub axle looked and felt OK.
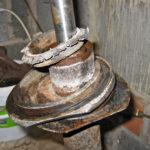
With the drivers side front suspension now stopped back to it’s main components, I could assess the extent of the new parts needed. Pretty much all of the bushes, bearings, ball joints, gaiters, nuts and bolts along with dampers and some new springs just for good measure (may as well).
 

De-rusting the ironwork

After placing the order with Mr J Paddock, I set about reburbishing the components I am not replacing. These are mainly composed of the heavy iron work and dust shields.

All need to be:

  • Wire brushed to remove surface rust;
  • The remaining rust treated (I use Rust Buster Fe-123);
  • Then finally a clean coat of new paint. I tend to either use Hammerite or Rust Buster epoxy mastic 121.

Both give far more protection that the new part ever had, and both also give a reasonable finish. Not as good as powder coating, but then far less expensive.
Grit Blasting

As mentioned in earlier posts, I realised that the car was not a rot free example early on. How many 1970’s Britsh Leyland cars are? But because of the thick coatings of underseal applied to the underside, the extent of the rot underneath was unknown. I could see the passenger floor panels (front and back) were holed from inside the car and to a small extent the panel under the rear seat was similar. What I didn’t know was what was lurking under the underseal.

So, once the good weather had come to an end (and there was such a lot of it this year 2018), I had the underside grit blasted at a local stripper.

I drove the car around to his yard and left it there for a few days awaiting a phone call to say that it had been grit blasted and I could come and collect it. When the call came it was a little more complex than “pick it up tomorrow”.  It went along the lines ….. “the grit blasting had ruptured the fuel tank, so the fuel had to be removed”. Oh well that’s life I’ll take a fresh can of fuel. “Oh and the brake lines are also leaking so the car is not safe to drive“.

So it came back eventually on the back of a low loader with the whole car covered in grit. Inside and out – with every crevice filled. I’m not sure what I expected but this certaunly wasn’t it.

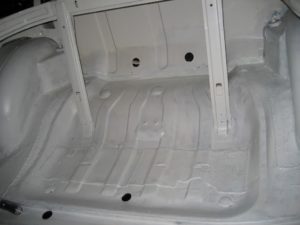
That said, the grit blasting did what it should. All the under seal had been removed so I could see the rot holes in the underside panels.

I can see there is quite a considerable amount of welding needed. As well as replacement floor panels, and boot floor there is also some minor repair patching to be done.
Welding isn’t cheap, especially good mobile welders who can come to my garage to work on an immobile vehicle. Then there’s the issue of needing to have someone there to open up and supervise which isn’t straight forward in my household.
Anyway, I have decided to learn to weld at the local college – evening classes on a wednesday evening. Coupled with a cheap MIG welder from eBay I think I should be able to do it myself. I know it will take longer and I may regret the decision. But I am going to give it a go. How hard can it be?


Cockpit Refurb – Part 2

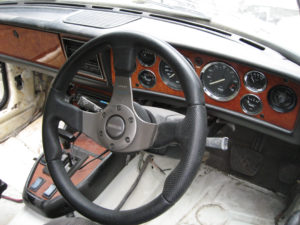
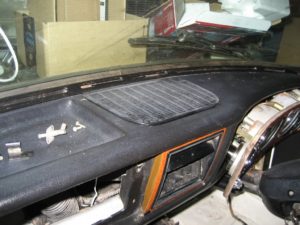
This was only expected to be a short exercise to clean up the dash and fit the Sony head unit that came with the car – albeit in a box in the boot. A previous poor re-installation of the electrics and a new enhancements of my own design have lengthen the task somewhat. I have now (eventually) put the dash back together.
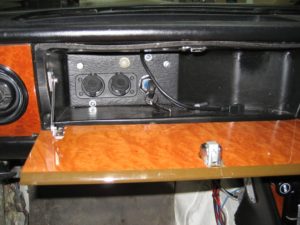
I picked up a second hand voltage gauge and warning light cluster from the Triumph show and Stoneleigh a few weeks ago. So these are now in place and working nicely. My glove box USB charging points are also in place along with a secondary ignition key. This will act as a simple deterrent against casual theft, as it switches off the ignition if the key is switched off or removed, and is hidden in the locked glovebox. 


Rear Tub Refurb

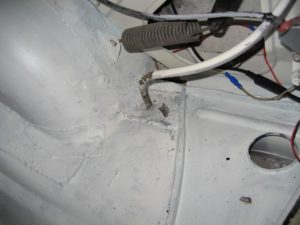
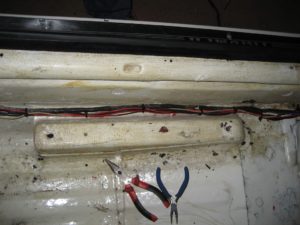
With all of the seats removed for refurbishment its a good time to put a generous coat of epoxy mastic 121 paint on the inside of the tub. Having given the tub a good rub down / wire brush to clean off the flaky stuff I noticed something not right. Both of the tonneau drainage tubes have been directed into the cavity between the inner and outer wings. That means that any rain-water ending up in the tonneau drainage tray would be directed to fill up this cavity. Not only would the car fill with water but it would simply rust from the inside out. 
I can see what has happened, and it seems to be a common problem. Replacement panels don’t come with the hole pre-drilled and it’s not an intuitive place to put a water drainage pipe – inside the car (although the MX-5 does something very similar). I have seen mention on the Stag forum that there is a steel tube that should fit through the boot floor that these drain pipes connect to. I can’t find these tubes in any parts supplier’s catalogue, so I have simply drilled through the 2 layers of steel and pushed the drainage pipe through the hole. It emerges just in front of the rear wheel arch. I have then applied a generous helping of seam sealant where the pipe meets the steel both above and below to keep any water from the rear wheel arch out.

LED Bulb Replacement

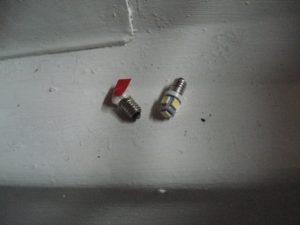
Whilst the dash is in bits I might as well replace the old filament bulbs with some modern alternatives. A few reasons: a) they are brighter than the originals, b) they last longer before needing replacement and c) they far consume less power. The later point being a minor factor in the decision to upgrade the old radio (See later).
Having looked around the internet, the site I chose was “Classic Car LEDs” (here is the Link). They offer a complete set of LEDs for the Stag and their website had some good feedback regarding customer service.
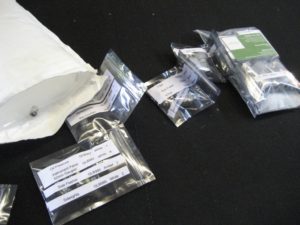
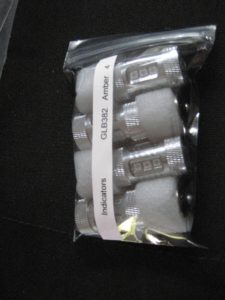
A parcel arrived a couple of days later. Carefully wrapped and labeled with each of the bulbs identified – even down to using a coloured marker pen to identify which LED was to be used for each of the console warning lights. Excellent service.
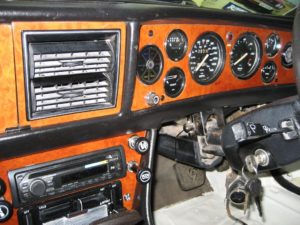
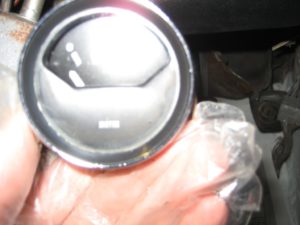
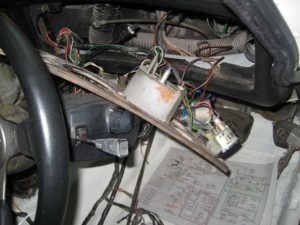
As I needed to clean the dial rims and the walnut dash behind the dials, to get rid of what looked like 40 years of grime. I decided to replace the bulbs systematically dial by dial as I removed and cleaned them. The grime turned out to be more serious than surface dirt. The car has obviously been stored for many years in a damp environment. This has slowly seeped into the gauges, damaged the cards and dis-coloured the inside of the glass.This need professional refurb or simply new dials. The Voltage indicator was the worst. I will look around the internet for a replacement.
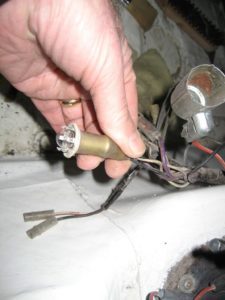
Anyway, the new LEDs for the console dials all dropped in nicely. There was one challenge. The screw fit bulb holders where only the top of the glass bulb was accessible. Twisting the old bulb out and the new one in was difficult without twisting the glass bulb apart from the bulb base. My solution was to stick tape to the glass and turn the tape. Seemed to work without breaking the glass. Then I came to the Brake Warning lamp. Depending on the model Stag you have, this place on the dash board can be taken by different lamps e.g. seat belt warning light. In my case on my Mk2 it’s a warning lamp for the dual break circuits. This should be ON when the ignition is switched on and then goes out when the engine is running / brake pressure is established. This particular LED replacement wasn’t in the pack,  but a quick email to Duncan at Classic Car LEDs and a new one was in the post – great service again.
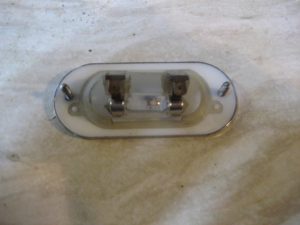
Next were the console lights and foot well lights. The footwell light fittings were already dismantled and ready to fix back in the centre console which is being re-furbished in parallel. The bulb base diameter in the replacement LEDs is about 1mm greater than the original filament lamps so the fit isn’t perfect – but works.
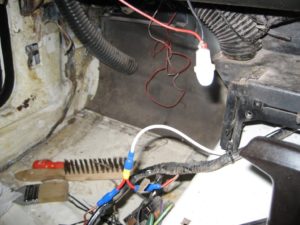
The console lights were almost direct replacement, however the wiring to the console internal light switch was incorrect. Wires to 2 of the terminals had been reversed which meant the lamp didn’t illuminate if the door was open or the switch down was – easy fix. I am having to validate the wiring at every junction due to the poor quality of the previous refurb. 
The next item to fix was the wiring to the gear selector lamp and the glovebox lamp. Both should have been fed from the same red/white feed used for the dial illumination (although via a red/blue wire in one section). This connection simply didn’t work and needed bypassing. Both now work with the nice bright LEDs.
So there ends another Sunday – where does the time go – a little more done and a little closer to completion, but a lot colder (only 4 degrees in the garage today).
The next lamps I am going to tackle are the cluster of dashboard warning lights for main beam, ignition, fuel, indicators etc. Back in the day, a filament lamp would glow regardless of which way current flowed through it. LEDs on the other hand don’t. Current can only flow one way through a diode. Therein lies the first problem with this light cluster. Some of the lamps are wired 12v to ground and others ground to 12v, so to replace with LEDs you need positive and negative polarity LEDs. Classic Car LEDs already understand this and supply the correct LEDs for each of the status lamps – all labelled and idiot proof. 
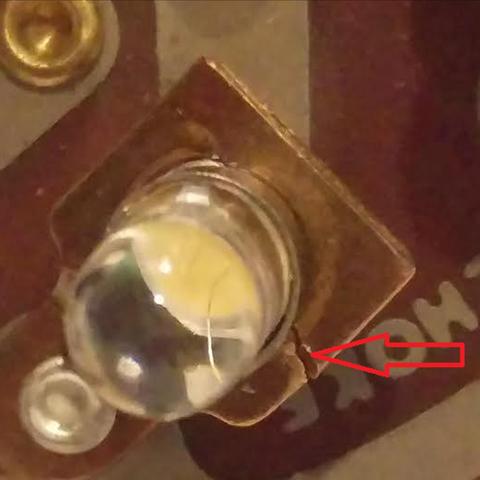
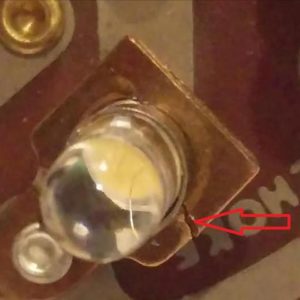
They also supply fitting instructions because not only is there the an electrical polarity complication, there is also a mechanical one too. The new LEDs are a fraction of a millimeter larger diameter thread than the originals. If you try and twist an LED into the existing lamp holder you will end up holding the LED glass lens only. It will break from the base before  you overcome the resistance from the bulb thread. There are two methods for overcoming this. After breaking the first lamp I tried them both. The first is to ream out the bulb holder. In theory easy enough, but in practice less so because the bulb holder is simply a flimsy piece of copper which flexes and twists whilst you are trying to ream it. If the reamer catches, then you either twist the bulb holder out of shape and/or position, or you rip it off the base. The other method, which I used successfully, was to cut the bulb holder with a pair of sharp wire cutters. The bulb holder is then able to follow the thread of the bulb. Replacing on an old filament bulb back into the adjusted bulb holder (because you broke one) also works with this method.
Once the new warning cluster lamps were in and tested, it was back to debugging the electrics again. My next problem to track down was the main beam which worked only intermittently. By removing the fuses (11-12, 13-14, 15-16 & 17-18) and apply 12v directly to the fuse holder I found that the main beam units all worked fine and the new LED dashboard indicator also operated. On tracking the loom back to the steering wheel switch, I found a connector under the steering column that had been forced together, and in doing so the pins for the main beam and indicator (RH) had been pushed out of the back of the connector. Sometimes it would make contact and sometimes it wouldn’t. Another mystery solved.

The next thing on my list was the indicators. The LH indicator has never worked fully. There must be a bad earth or a mis-wired connection. The symptom was the lack of flash from the relay, meaning that the lamps were not lighting and drawing sufficient current to warm the relay coil. 
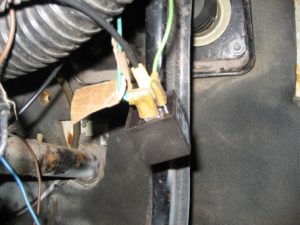
First job was to change the relay coil for one that would work with LEDs. Since LEDs draw very little current they don’t work with conventional flasher relays and exhibit the same symptom as my poorly wiring i.e. no flashing. The packaged set from Classic Car LEDs comes with an LED type relay, that even has a simulated “click”. This does need an earth connection, but that’s about it. Then I set about changing the bulbs in all indicators. With the new LEDs and relay in place, I quickly found the non-flashing culprit – LH rear. The problem turned out to be the bulb holder not gripping the shank of the bulb tight enough – easy fix. Another problem solved.
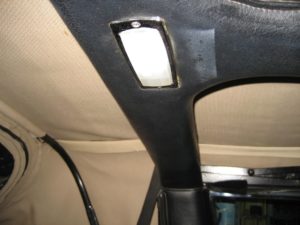
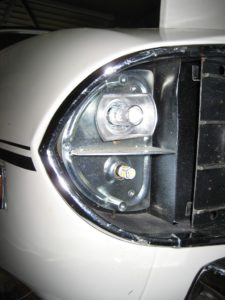
Whilst I was in the boot, I also replaced the number plate lights and also the boot interior light – although this needed a little fettling as the switch was too low to be impacted by the boot hinges. For good measure I also replaced the fog lights, rear side lights and stop lights, before re-wiring the electrical / power aerial and running the cables back through the car ready for re-connection behind the glove box where I will mount a new relay.

Cockpit Refurb

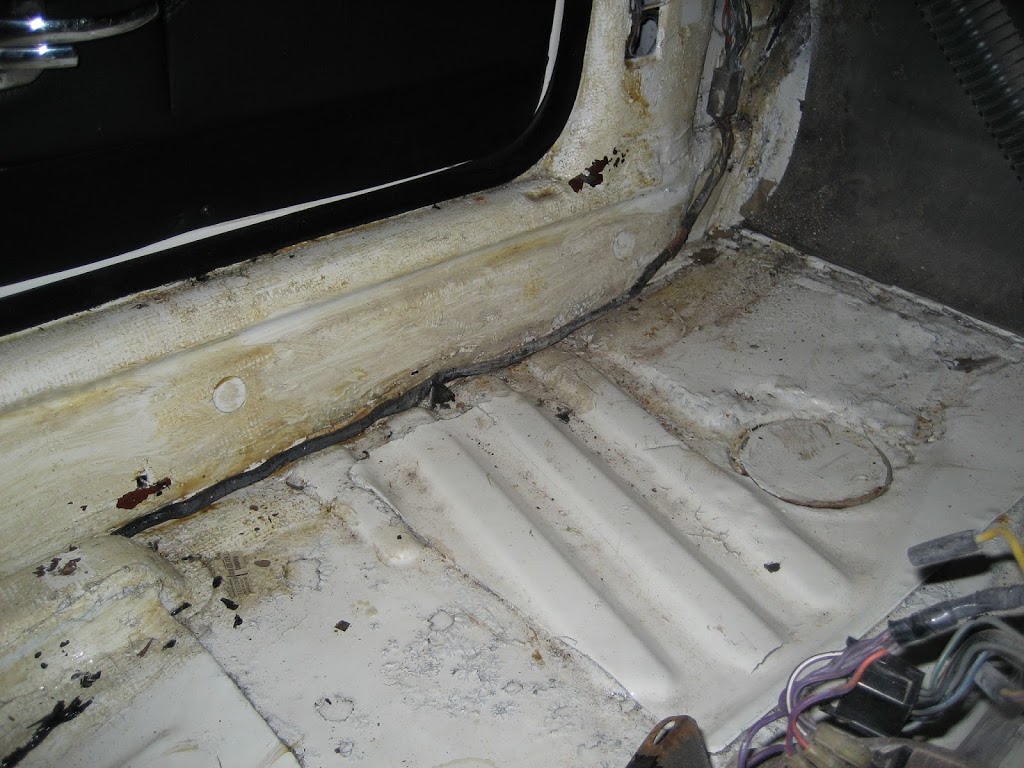
Having removed the carpets and the seats I can now fully see the state of the floor panels. Drivers side looks fine and I suspect has been replaced before although it’s difficult to tell since the inner and outer sills also look like they have been replaced (lots of welding scars). 

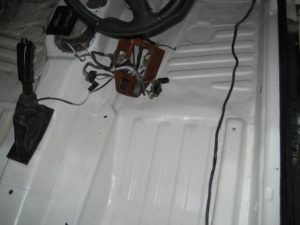
In order to add a few more years of life to the drivers side floor panels I have cleaned  them down, covered them in rust proofing agent (Rustbuster Fe-123), and then a coat of white Rustbuster Epoxy Mastic EM121. Looks much better and should give better protection. In time I will do the underside in a similar way.
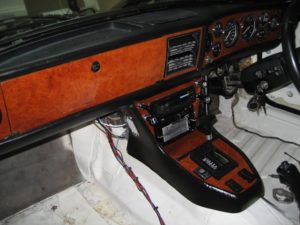
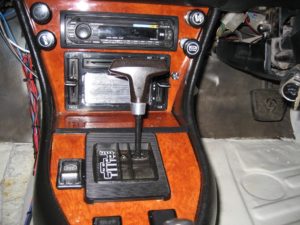
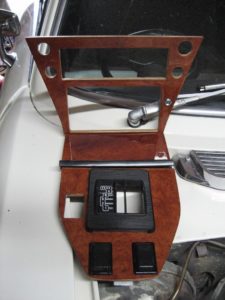
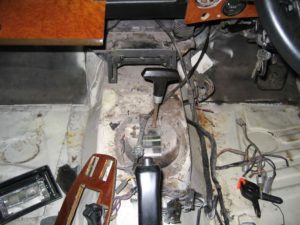
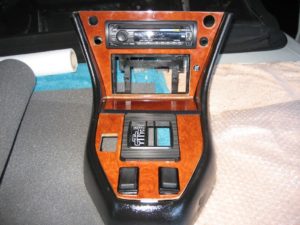
The passenger side floor is another story. It has a number of molded sound deadening sheets which are keeping it structurally intact and I suspect forming a base for large amounts of underseal underneath to disguise the rot. Rather than rubbing down, sealing and painting this side of the floor I have decided to get it replaced. I have found a local welder and sourced the front and rear panels from Robsport (cheaper than Mr Rimmer). The seat rail mount looks fine. I hope it can be re-used. But before I can drive the car the the welders, I need to put it back together. I am taking the opportunity to remove the what seems like 40 years of muck from the components before I put them back in. Here’s the centre console after degreasing and polishing. I even managed to re-blacken the window switches.
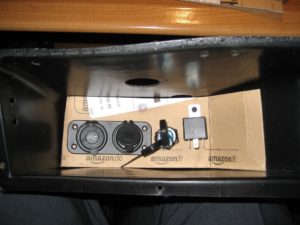
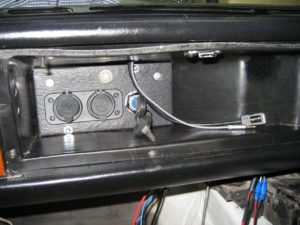
We all know that the Stag is one of the most stolen (and easy to steal) classics. To help protect mine I have decided to install a second ignition key and switch. This one concealed in the glovebox. Whilst I am at it, I will also install a couple of modern USB charging points, and a relay to drive the power aerial. When I bought the car the power aerial was already installed but the wires were part connected with twisted cables and electrical masking tape. There was also a Sony head unit still in the box. So I am going to install all of these properly with some new speakers for good measure.
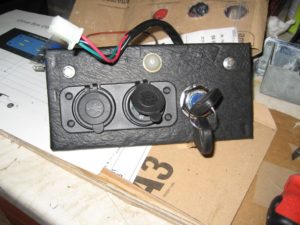
Firstly the glovebox amendments. Here’s a mock up of the new panel in cardboard: a double USB charging point, motorcycle ignition switch and a standard HEF555 relay. Once I had the size and layout I wanted I repeated the layout in MDF and covered it in vinyl. I also re-positioned the glovebox light so it will illuminate the new switch and power sockets when the glovebox is opened.
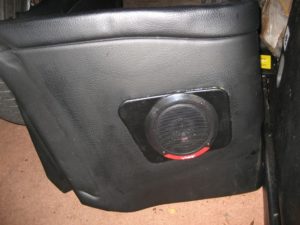
I used a similar technique for the speakers in the rear. Templates in MDF, covered in vinyl. These I have simply glued over the rear cubby areas. The head unit was brand new from 2009. When I turned it on it went straight into demo mode. Here it is mounted in the console. 
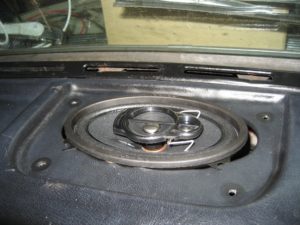
When I opened the dashboard grill where the radio speaker should have been, it was empty. After some research, I concluded that the best option was a dual voice coil speaker. It would handle stereo input and fit in the opening. Some other Stag owners have done this. When it arrived I found the only way of installing it was via removal of the glovebox, but even then I couldn’t get it into place without using force or modifying the dash in some way. Further research found that the other Stag owners had installed it whilst their dash was out of the vehicle. I am not taking the dash out so it went back for a refund.
The next best option I found was a single voice coil speaker (mono) from Pioneer (TS-A4633i). This drops in from the top. Can be bolted down without much fuss and the speaker cover fits over it – job done – well almost. This is just a single speaker – do I connect it to the left or the right channel? With the left an right separated in the rear this would annoy me. So I built a speaker mounting board for the other speaker and mounted it under the dash between the steering column and the door on the drivers side. You wouldn’t know it was there but I am sure it will help to provide more depth to the sound. I realise that mono is more befitting the age of the car, but why when good quality stereo is available for very little cash.

Now to start to put everything back together – here’s the glove box part way through re-construction. I’ve looped in a phono extension lead and a USB extension lead. These will pop out of the ash tray so music players or phones can be left charging in the glove box and still play through the head unit 


More Electrical Gremlins

As you may have read from my previous posts, a historical rebuild / refurb of this car has introduced some electrical gremlins.

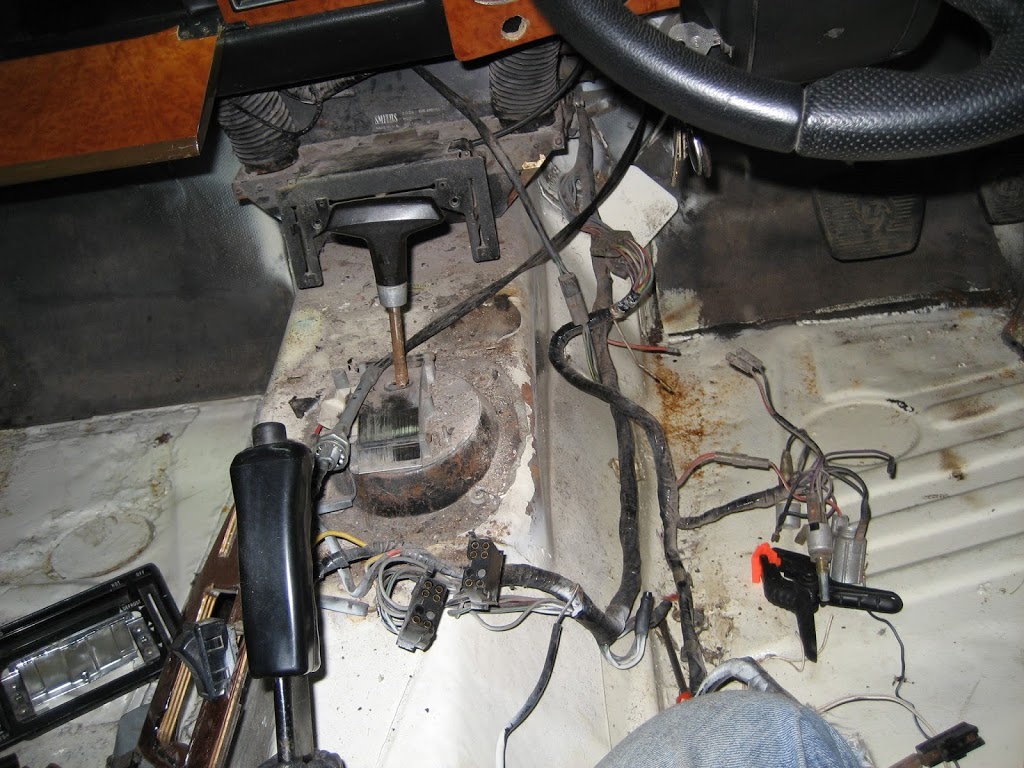
Whilst investigating why the battery totally discharged every few days I noticed that there was considerable spurious wiring hanging out of the dash for a) a radio which wasn’t fitted b) a rocker switch fixed to the centre console for something or other – unknown. There was also missing bulbs in the dash and issues with non functioning interior lighting, not to mention a random indicator that seems to make it’s own mind up whether it works or not.
So whilst I was waiting for some paint to dry I decided to investigate and remove the spurious wiring. 
Got a little carried away.
Now it’s all in bits I will put it back together with a little more care than the last time, check and test all of the wiring and replace with LED in the dash and interior – might even do the the indicators as well.
The more I look into the electricals the more I need to get down into the detail in order to figure it out. I am now doubting whether the basic wiring loom has been re-installed properly as there are so may wires that have simply been cut rather than the problem investigated and fixed
After some research on line and of course the expert knowledge of the Stag Owners Club I have come up with the following sources of information that should help me.

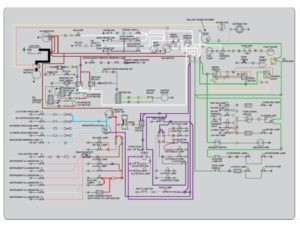
These are the starting points. As I work my way around the car and notice anomalies or modify/add new elements, I will make changes to these pictures and post on the Wiring and Electrical Diagrams page (here).

Wiring Diagram


One strange phenomenon was the left hand indicator. It has always been, lets say weak, in that it sometimes worked and sometimes not. But recently the problem has worstened to the point where engaging the left hand indicator flashes the reversing lights. Looking at the circuit diagram above this seems impossible and I feared a new loom was called for. But, after talking to some helpful SOC members I eventually diagnosed the problem as the indicator earthing through the reversing lamps. Turns out that the earth for the indicator ignored a layer of paint between it and the chassis. Probably not there when the car was disassembled before it’s respray, but definitely present afterwards and not removed to provide a good clean earth.

Front Seat Refurbishment

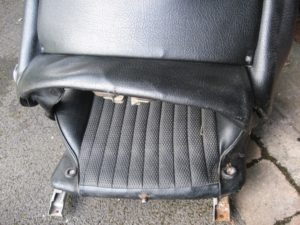
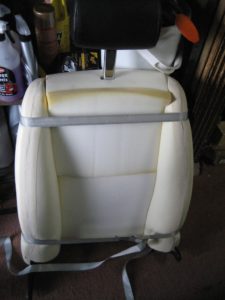
43 years have taken their toll on the padding of the front seats. Whilst the structure/frame was sturdy and robust, the bolsters were non-existent and had collapsed. There was also evidence of rust to the rails and the seat frame. So, new fillers were purchased from Mr Rimmer and I started to open up the first seat to see what was inside……
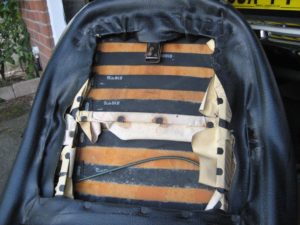
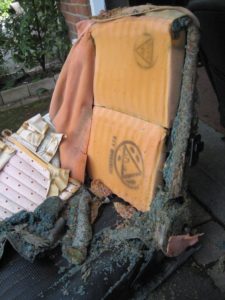
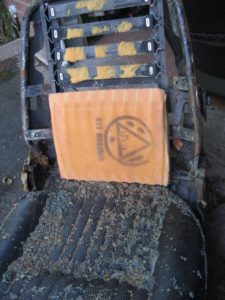
As there are no issues (other than dirt) with the vinyl covering, I carefully removed each of the many retaining clips that hold the fabric to the frame. What I found in there was disgusting. The foam had completely disintegrated in the bolsters and stank!!
With the aid of rubber gloves and a razor blade, I parted the vinyl from the padding. Not easy, as the padding had been glued to the vinyl and was still firmly attached even after all of this time. It was also complicated by the need to disassemble the seat frames in order to remove the vinyl in a way that it could be re-used. 
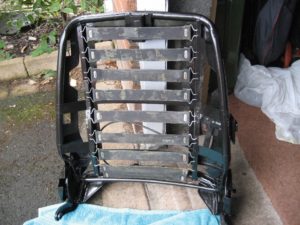
I ended up with 3 pieces of frame: the runners, the seat base and the seat back. Each needed extensive cleaning and removal of surface rust before prepping and painting with black Hammerite.
Here is the seat back after painting and with the rubber strapping cleaned and replaced. Looks better already. 
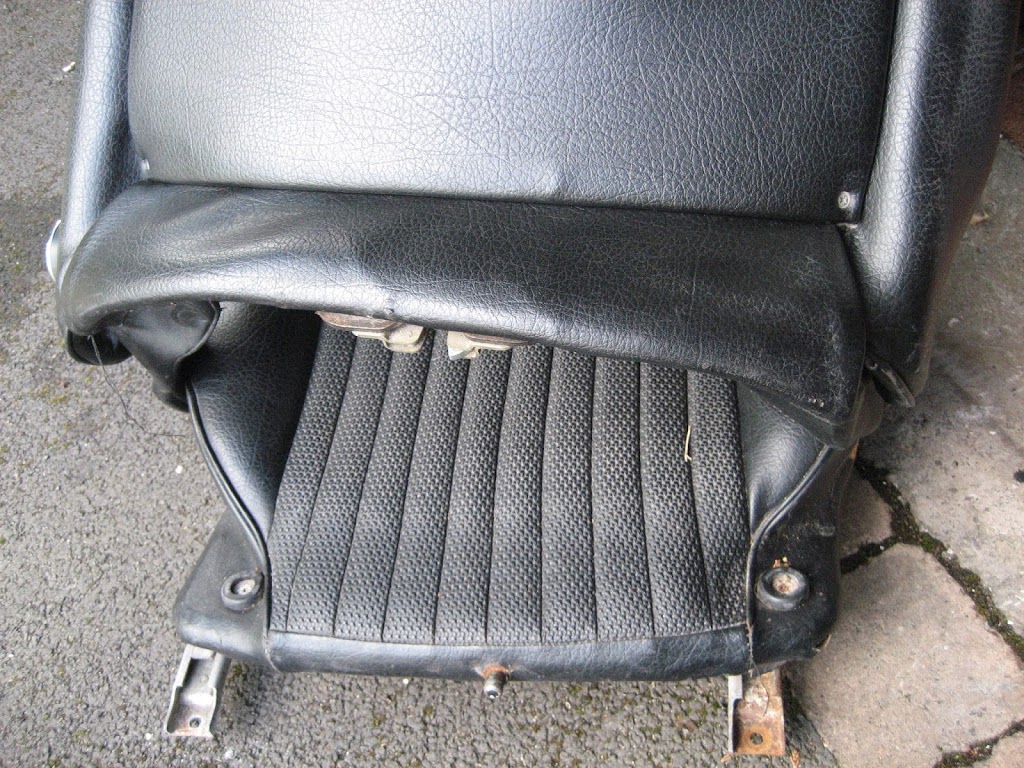
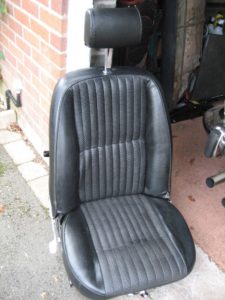
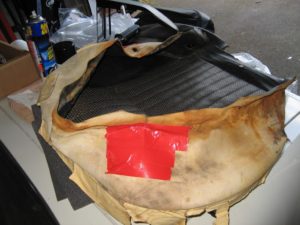
Putting the new cushions back in place took longer than I had thought. It’s not a difficult process if you reverse the dismantling process, but it’s fiddly and made far more difficult for re-using the seat vinyl. The reason is that the seat vinyl is secured to the frame by beige strips of much less heavy duty vinyl – see photos.This can rip, especially when you start to tension the vinyl over the new cushions.I was quite pleased with the result though.The seat base is a single cushion so should be more straight forward, but oops I don’t have them. After checking my order from Rimmers I found I didn’t order properly. I only ordered the kit for the seat backs rather than the complete seat. So I received the 2 side bolsters, 2 seat back cushions and a cushion connecting the 2 bolsters that sits under the head rest – but no set base. Another order from Rimmers required.
The drivers seat was much like the passenger one: the cushions had collapsed with age and usage, the frame and runners had rusted, and the whole thing was just tired. Unlike the passenger seat the seat base on the drivers seat did have a couple of nicks /splits in the vinyl. I didn’t think they were sufficient to warrant the expense of a new vinyl (I’ve spent enough with Mr Rimmer lately) so I have patched it from the back with strong tape. 
Here’s the end result – much improved.


Alternator Problems

It’s been a few weeks since I have had any time to work on the Stag. It’s been a very busy time at work – the culmination of 2 years work successfully delivered at the end of June 17. So now it’s time to take a breath and get back into the garage.
The last few weeks have benefited from some very warm, dry weather – perfect for the old Stag. I have had the Stag on the road a few times with the hood down listening to that intoxicating burble. But, every time I get into the car after it has stood for a few days, the battery is flat. As there is now radio or clock at the moment, then this is a little puzzling. Once started the, voltage reading climbs up to 16.5v (as I would expect if the battery was very low) but it stays there and doesn’t drop back as I would expect after 20-30 miles. Dropped a quick query on the SOC Forum and the consensus is that the alternator needs replacing. The built in regulator is probably not functioning. 
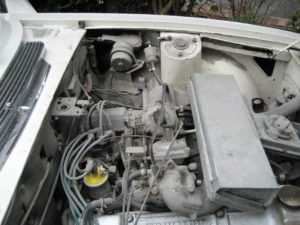
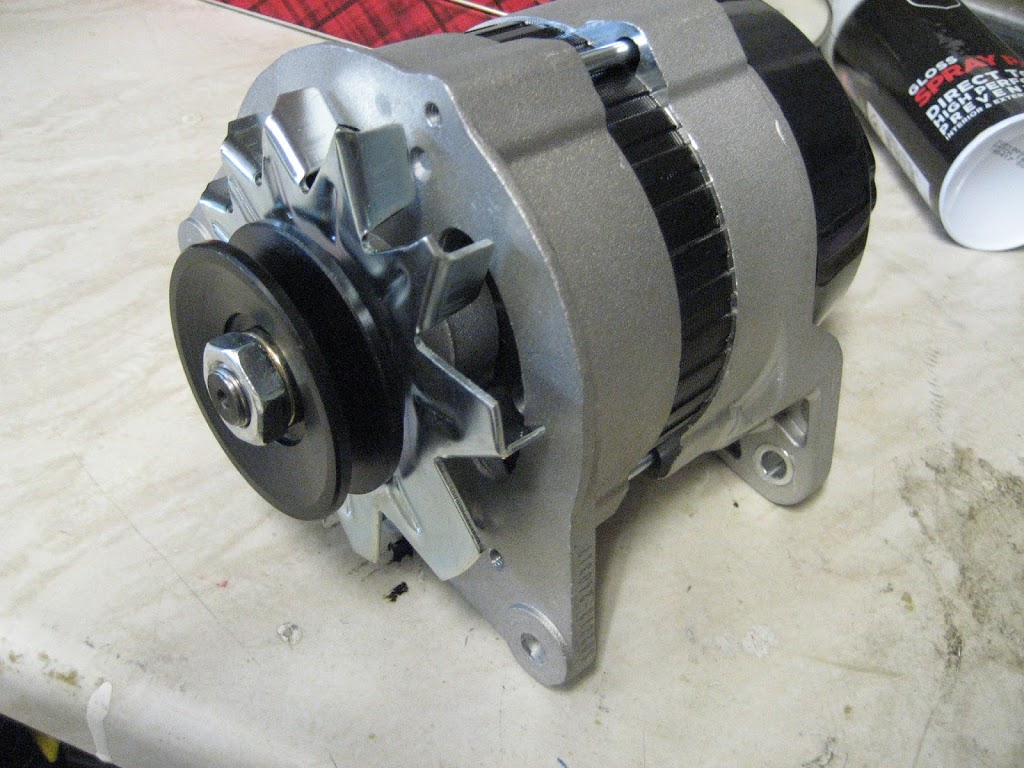
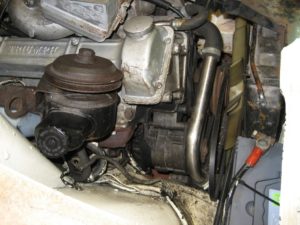
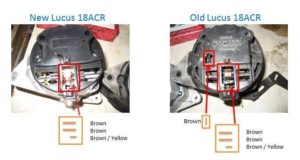
The direct replacement is the 18 ACR. Some upgrade to higher ampage, but I intend to replace the lamps all round with LED so I don’t feel the need for more amps at the moment, as LED will reduce the overall load. So, courtesy of the interweb and RimmerBros a new 18 ACR arrived. Fitting from above was fairly straight forward. Moved the screen wash bottle out of the way. Disconnected the power steering pump brackets and swung the pump around to where the screen wash bottle once sat. Then slackened the 3 bolts that hold the alternator in place. Then the problem – and there always is one. The old alternator has 4 terminals and the new one only 3.

Looking at the Stag wiring diagram, the extra thin brown terminal doesn’t seem to be needed. It looks like it connects to the same general, pre-ignition switch live as the other 2 larger Browns. Checked with the SOC Forum just to be sure. The advice is to isolate it and just use the single large connector. So, put it all back together and hay-presto the alternator now responds to the level of charge in the battery – success.


A week later – battery flat again. Perhaps the over-charging old alternator had destroyed the battery? I’ve no idea how old the battery is. I’ve probably fried it. So, down to Halfords to pick up a HCB072 calcium battery. Maybe this would fix it. Well it did for a week or so. Then the same problem – flat battery after a few days.

Putting an ammeter in series with the battery positive lead showed 2.5A without the key even in the ignition!! Something seriously wrong here.

So back to the wiring diagram. By following each of the paths from the battery positive, I found that the current was leaking through the Ignition Warning lamp via the alternator to ground. The internal resistance of the alternator circuitry was luckily preventing a dead-short and the flames that usually go with this. So why was this happening? Another painstaking but systematic tracing of wires followed. As always, when I found the problem it was easily explainable. The 2 thin wires from the alternator (one brown and one brown/yellow) exited the alternator, into the loom, then popped out of the loom further along the engine component into 2 bullet terminals and a double connector. The wires had been reversed into the connector: brown to brown/yellow and vice versa.
I’ve replaced the connector with new individual bullet connections which I have heat shrunk. An easy mistake to make. The brown and brown/yellow look very similar especially when covered in the gunk from the engine bay, but the problems it has probably caused go further than the ones I have found so far. There is evidence of fiddling with the console warning cluster and internal lighting. But those are problems for another day.

Major Service – Part 1

As I really have no clue as to when this car was last treated to a service, then I thought that I should do it now. At least I will have a baseline to work with.
I’ll start with the basics:

  • Air filter
  • Oil Filter
  • Oil
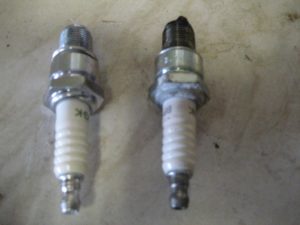
  • Plugs
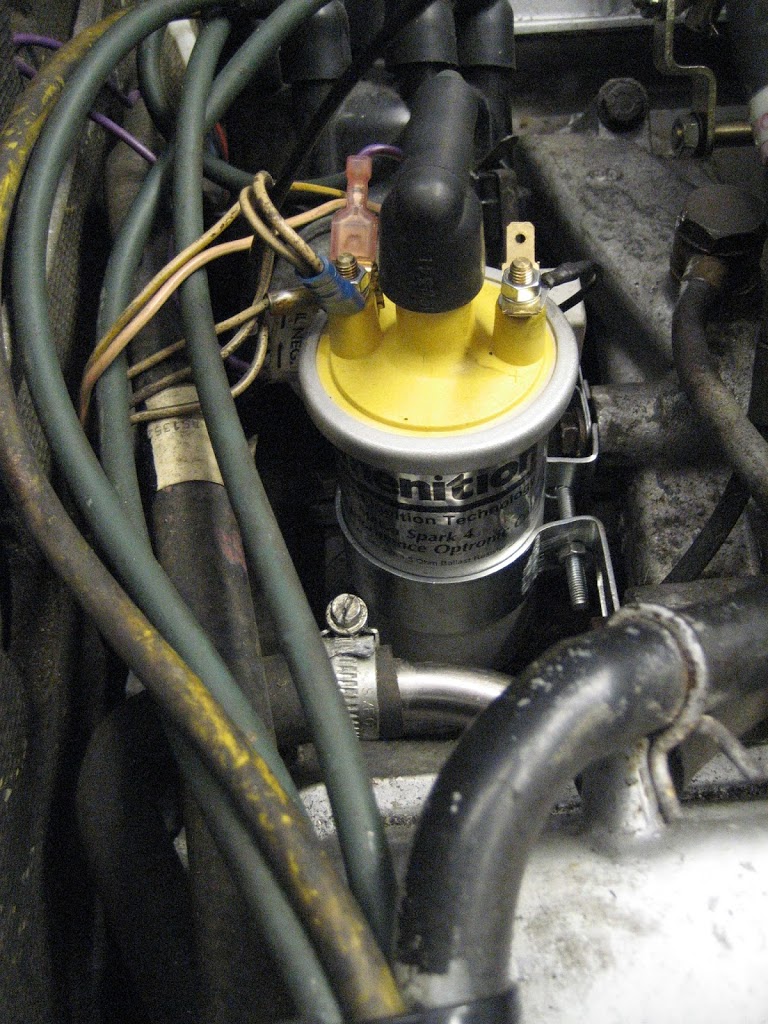
  • Coil
  • Leads
  • Distributor cap
  • Distributor arm
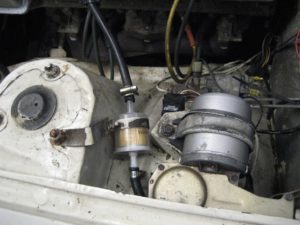
  • Fuel Filter

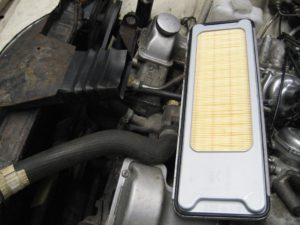
Had to remove the rubber strip from around the outside of the air filter before it would fit in the air box. Also the air box needed a good rub-down to remove surface rust. I need some aluminium colour paint to finish it off now. The temp compensation value also seemed defunct.


The coil and plugs were both OK. Although the plugs looked like they had been in there for some time, when removed they were fine. A little blackened from runing on choke recently but no signs of wear and tear. Good for spares.
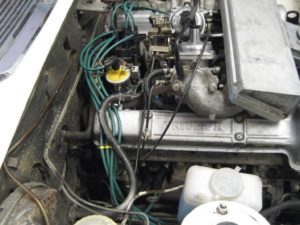
The distributor cap looked fine, although like all of these parts it looked like it had been in-situ for 10 years plus. I replaced it anyway and likewise the rotor arm. The fuel filter in the front was also replaced. The one in the boot will be done when I get that far. Finally a new set of leads and lead guides ti neaten the engine bay a little.


Alternator belt snapped

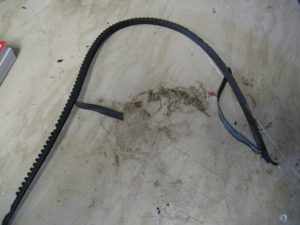
On inspection I noticed that the belt between the fan and the alternator was shredded and hanging loose. That would explain the other feature of the drive home. The sudden drop in charging of the battery. I was lucky the car had been recently fitted with a new battery as there was no chance it was creating and electricity with the perished belt in such a state.


Ordered new belts (alternator and power steering) from Rimmer Brothers. Should be here is a few days along with a small fortune of other bits to cover the other areas that need attention.


Rimmer Brothers delivered as they promised a couple of weeks ago. A minor plumbing emergency in the downstairs cloakroom has prevented me doing anything on the Stag for the last couple of weekends whilst the radiator was fixed, floor dried and relayed and basin replaced – just the tiling to do but that can wait.

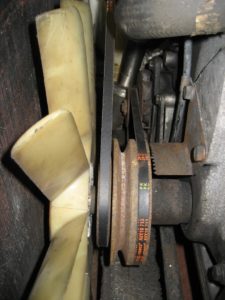
Slackened off the bolts holding the alternator and power steering pump. Difficult to get at as there isn’t a lot of clearance between them and the radiator / fan. Replacing the belts is simply a matter of threading them back around the pulleys, but tensioning the alternator belt took a little more time. Trying to lever the alternator whilst also tightening the mounting bots is ideally done with more than one pair of hands, but with perseverance (and a little swearing) it all came together.

Now charging again.

Fuel pipe into DS carb not connected

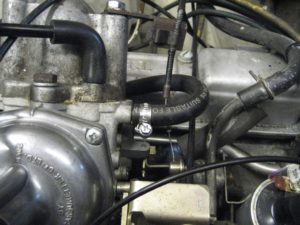
On inspection I noticed that the fuel pipe to the drivers side carb has sprung off the carb and was hanging free. The car must have been running on a single carb for the last few miles home. That would explain the loss of power when driving back.


Replaced the pipe and re-connected – tighter this time.


Auto gearbox – slow to engage, clutch slip

The car was manufactured with a Borg Warner 35 auto gearbox. I think the same unit is still in the car. With the car running, reverse selects OK, but drive (especially first) may not engage initially in D or 1. Applying some revs has either no effect or drive is suddenly acquired with a jolt that can spin the rear wheels – not pleasant.


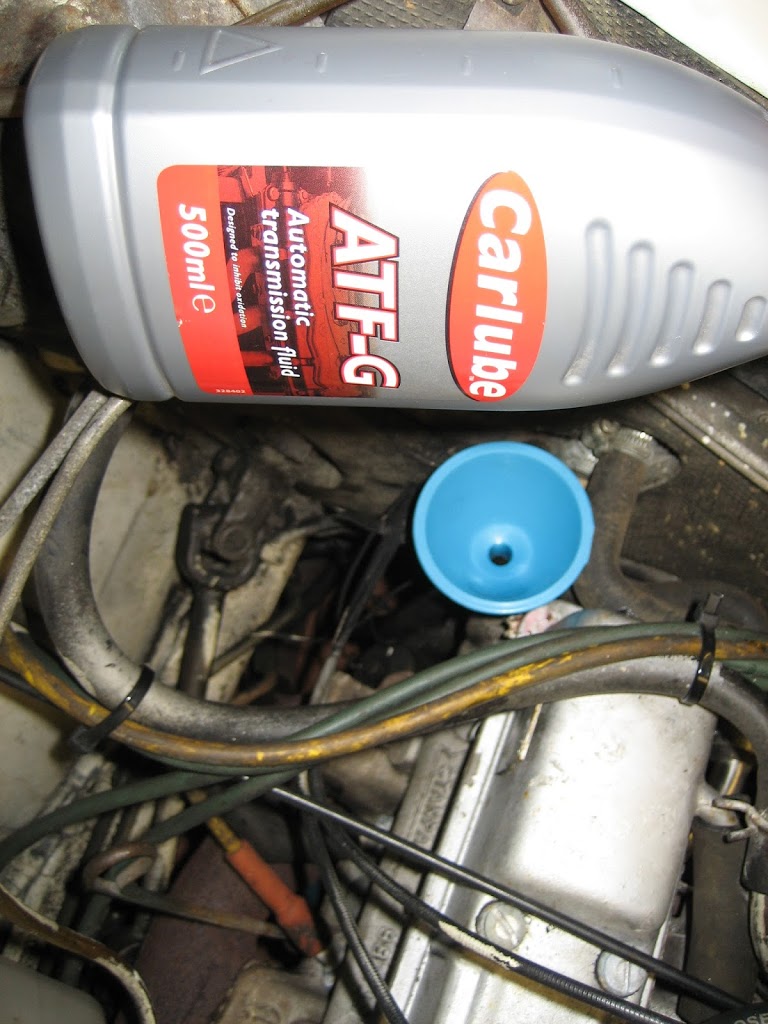
After some superficial forum research it sounded like a simple lack of fluid. On checking the dip stick – nothing – not a trace on the stick. Off to the local motor factors, but no one locally stocks ATF without Dexron. So back to the interweb and wait for delivery.

There seems to be two ways of checking the fluid level before topping up:
a) Start the engine and run the selector through all drive settings, then quickly dip and fill to the lower/cold mark
b) Start the engine and drive the vehicle until warm making sure that all drive settings have been used. Park up on a level surface and quickly dip and fill.

As mine was being a little temperamental I went with (a) to start with. It drank about 300ml before it was seen on the  bottom of the dip stick. I will do (b) the next time I go for a run.

Things to do

Following my initial inspection (1st May 2017)

  1. Auto gearbox – slow to engage, clutch slip – Fixed – (See Auto gearbox Slow to Engage)
  2. Rear exhaust silencer needs adjusting – brackets missing – will need welding
  3. Drivers seat belt installed upside down – Fixed
  4. Fan switch Bezel missing – Replaced
  5. Dashboard back lights need replacing (including rheostat) – Replaced with LEDs
  6. Passenger door lock doesn’t work
  7. Ill-fitting door cards
  8. Seat padding collapsed on front seats – Fixed (See Front Seat Refurbishment)
  9. Front seat rails rusty – Fixed (See Front Seat Refurbishment)
  10. Dashboard chrome pitted – Polished and replaced Volt meter
  11. Radio missing – Replaced and new speakers (front and rear) installed
  12. Soft-top frame rusty (superficial) – also needs second spring clip (passenger side)
  13. Rear light covers missing in the boot
  14. Boot floor cards need fettling to fit
  15. Front wheels judder at 45-55mph
  16. Braking Ok but could be improved
  17. Body panels unprotected from rusting
  18. Water header tank below top of cylinder head
  19. Bonnet position needs adjusting
  20. Fuel pipe into RH carb not connected – Fixed (See Fuel Pipe Not Connected)
  21. ATF fluid cooler bent and clogged
  22. Alternator belt snapped – Fixed (See Alternator Belt Snapped)
  23. Battery strap missing
  24. Interior lights – Other than T-Bar don’t work – Fixed and replaced with LEDs including door puddle lights
  25. Major Service required – Fixed (See Major Service Part-1)
  26. Heater value stuck ON
  27. Trim coming off front chrome finisher (upper)
  28. Rear bumper badge back to front
  29. Centre rear bumper – chrome pitted
  30. Stainless steel sill finishers missing
  31. Bonnet insulation pad and fixing missing
  32. Instrument dimmer missing – bypassed and replaced with dummy switch
  33. Corrosion / rust in 3 areas that are visible: Passenger footwell, boot floor and inner sill around gearbox cross member passenger side
  34. Ignition warning light not working – Fixed (See Alternator Problems)
  35. Main Beam warning light not working – Fixed – new warning cluster
  36. Choke warning light not working – Fixed – new switch and warning cluster

First Drive – Home

On 18th March 2017 I took an early train up to Chesterfield to pick up the Stag and drive it back home. It had a full MOT with no advisories, so I know it was road worthy, however when I arrived it wouldn’t start. It turned over but no trace of firing up. Swapped the coil. Checked there was fuel. Inspected everything that was visible for things that may have broken or fallen off – especially wires – nothing. Then after about an hour it fired up as if the key had just been turned for the first time. Relived but slightly anxious, I concluded the purchase paperwork, jumped in and pointed the car south.

 
I was very wary whilst driving it the 60 plus miles back home. Firstly because I didn’t know the car or its history, secondly because it was 44 years old and not built to fantastic quality standards when it was new, and thirdly (most importantly) the car had not been driven that far in almost 30 years!!
 
Old cars make noises. Things cluck and creak. Having owned old cars in the past I knew this and ignored anything I thought was superficial, however I did notice 3 things that were beyond normal background chatter:
  1. – an intermittent cut-out of the electrics and engine: needles dropped back to zero, engine stopped firing but only momentarily, then everything burst into life again as if nothing happened. Just like when I first tried to start the car earlier that morning This occurred a few times, but each time less severely – it’s not happen since. Suspect a dirty contact on the inhibitor switch.
  2. – the alternator was charging quite nicely (15v ish) for a few miles as I expected it too since the car has stood for so long. Then there was a judder and the needle on the Voltage gauge dropped back to 12v and stayed there. I remember thinking this was odd, as the battery charging will be gradual and not on-off since we are not talking about complex electronics managing the charging process. See Inspection post item 22.
  3.  – on the motorway, I tested the kick-down to overtake. It worked fine the first few times, but then there was a loss of power as the gearbox changed up. Not knowing the car well enough, and the power reduction not being that sever, I thought it was simply a characteristic of low revs and carried on a little more gingerly, wondering whether the stress I was putting on key components for the first time in 3 decades would lead to any catastrophic failures resulting in a call to the AA. See Inspection post item 20.


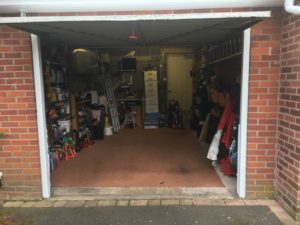
Arrived home safely without further incident and introduced the Stag to it’s new home.My empty garage.
 
In the excitement of finding and buying this car in what had been quite a short space of time, I had assumed that it would fit into a modern garage. I assumed correctly, but only just. 
 
I could only just close the garage door due to the accumulate detritus from my last project. The Stag has a backseat and boot, where the Seven had neither. Whilst it fitted, there was nowhere to work. After my initial interactions with the Stag I doubted this arrangement would be a workable one – there is a lot of work to be done!!
 
The solution – empty some of the contents of the garage into a) the tip and b) the sheds at the top of the garden. This is when I started to realise that anything to do with this car will not be straightforward. I’ve been putting off any repair work on the two old sheds I inherited when I bought the house over 12 years ago. If I was to clear enough stuff out of the garage to make it usable, then the sheds needed a refurb. 
On closer inspection, the back walls and rear floor of both sheds were rotten beyond simple repair. So, Easter weekend was spent, not working on the Stag, but demolishing two old sheds and replacing them with one new bigger one. Since then, the “stuff” has been slowly moved from garage to the new shed, and numerous trips to the local trip have been made.


The Stag now sits in the center of the garage with walking space all around it. Time to start the new project in earnest.  

A Stroke of Luck

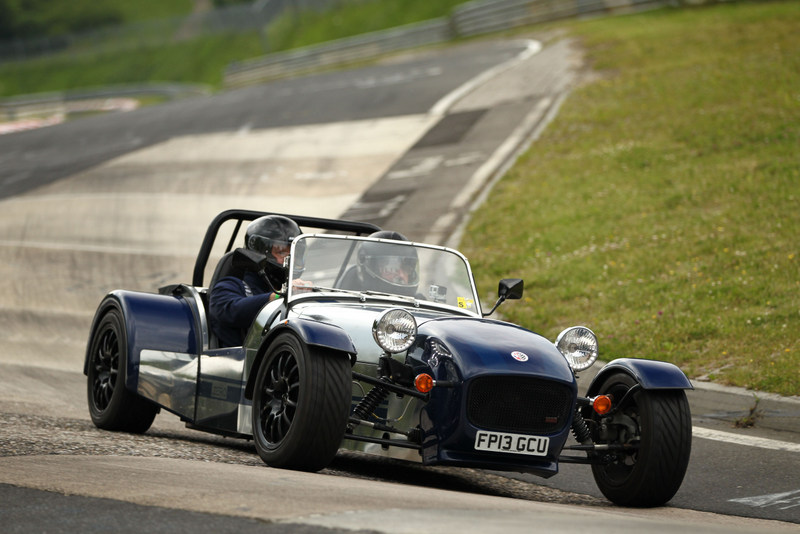
I have been thinking about a new project for some time now. I have been driving the Seven for over three years since finishing the build. Whilst driving a car like that is hugely exhilarating, and the other owners and club members are a great bunch to spend time with, I miss the building and engineering aspect, and the ability to get lost in my garage on a damp Sunday afternoon.
 
In the back of my mind I had a restoration project in mind. An old Triumph, perhaps a Vitesse or GT6. Definitely something with more than 4 cylinders and preferably something with an open top. With nothing more than that as a background thought, I decided to do a little research at the International MG & Triumph Spares Day at Stoneleigh on 19thFebruary 2017. I have normally only been to Stoneleigh for Kit Car events – classics certainly pull in more people. The place was packed.
 
Whilst wondering around the stands looking for Vitesse / GT6 interest, I came across a few Stags.  That V8 burble was intoxicating. So I visited the Triumph Stag Owners Club (SOC) as I wanted some advice about the possibility of buying a Stag: pricing and what to look for / avoid. There I met Andrew Bradbury who is a Stag Owners Club member who was manning the SOC stand with some other Stag enthusiasts. A pure coincidence he had been approached recently to sell a Stag, by the family of a late Stag owner and because of his links with SOC. As these things often go, all of the pieces started to fall into place for me: A Stag with some documented history; sold via the SOC; and at a price I could consider.
 
A few weeks after, when diaries aligned, I drove up the Chesterfield to take a look. No surprises. Just as Andrew had explained and the photos illustrated. Not a concours model by any means but a honest 43 year car, where time had taken it’s course. The previous owner had obviously cared for the car and spent a great deal of money to get the Stag back on the road, but as I’m coming to find, the effort required to keep it there is huge and relentless.
I agreed the full asking price with the owner.